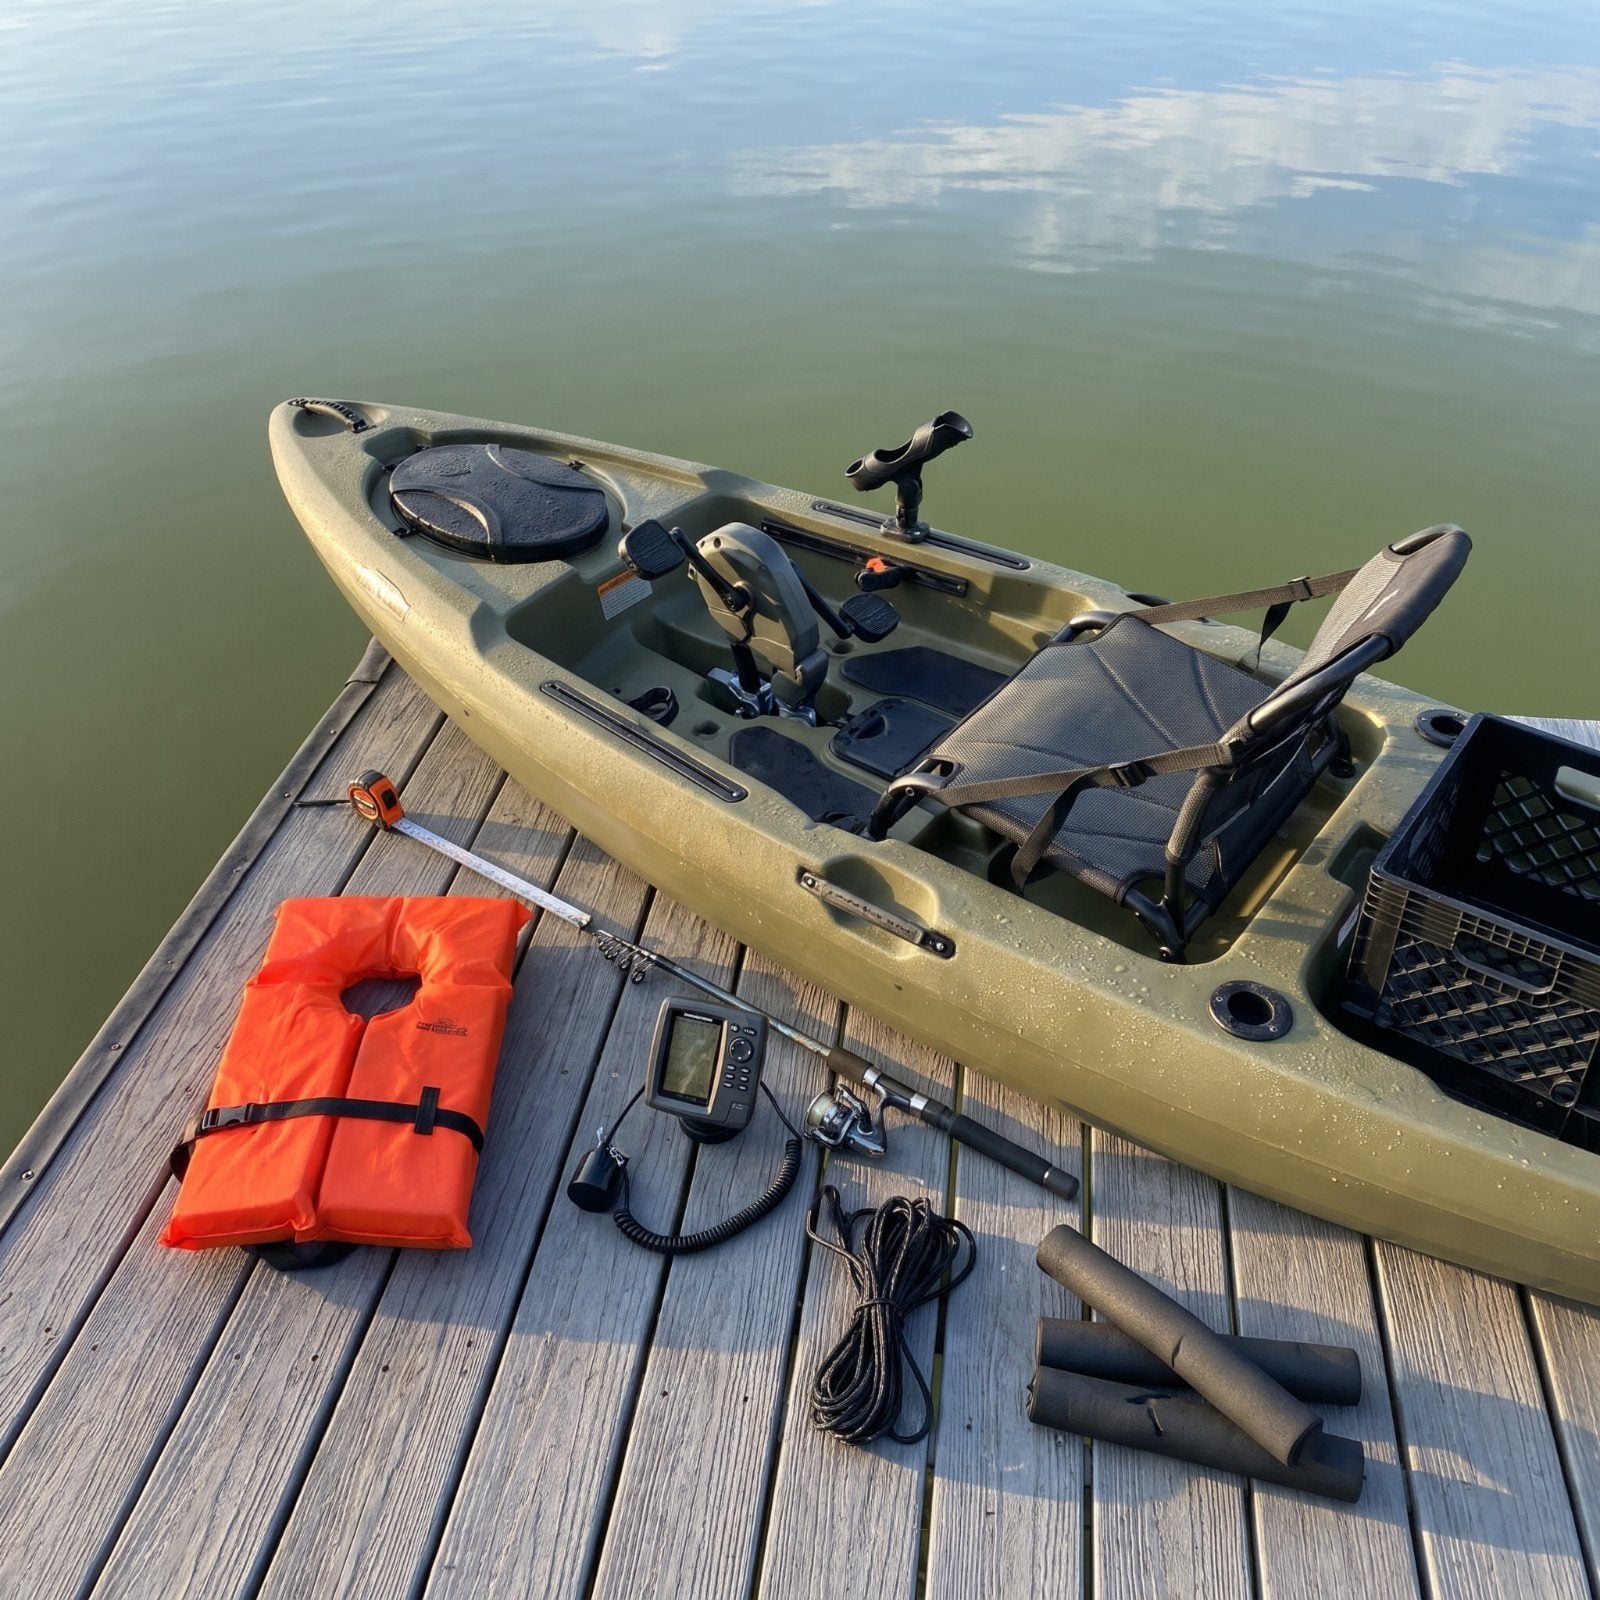
The salesman will tell you a kayak weighs 72 pounds. What he won’t tell you is the real number — after you bolt on two rod holders, a fish finder, a battery, a milk crate stuffed with tackle, and an anchor. That gap is where buyer’s remorse lives. Most people fall for the specs on the hangtag and skip the questions that actually decide whether you fish happy or sell it in two seasons. Work through these before you hand over a card.
Please note that some of the images in this article were created with the assistance of AI.
46. Calculate Fully Loaded Weight Capacity
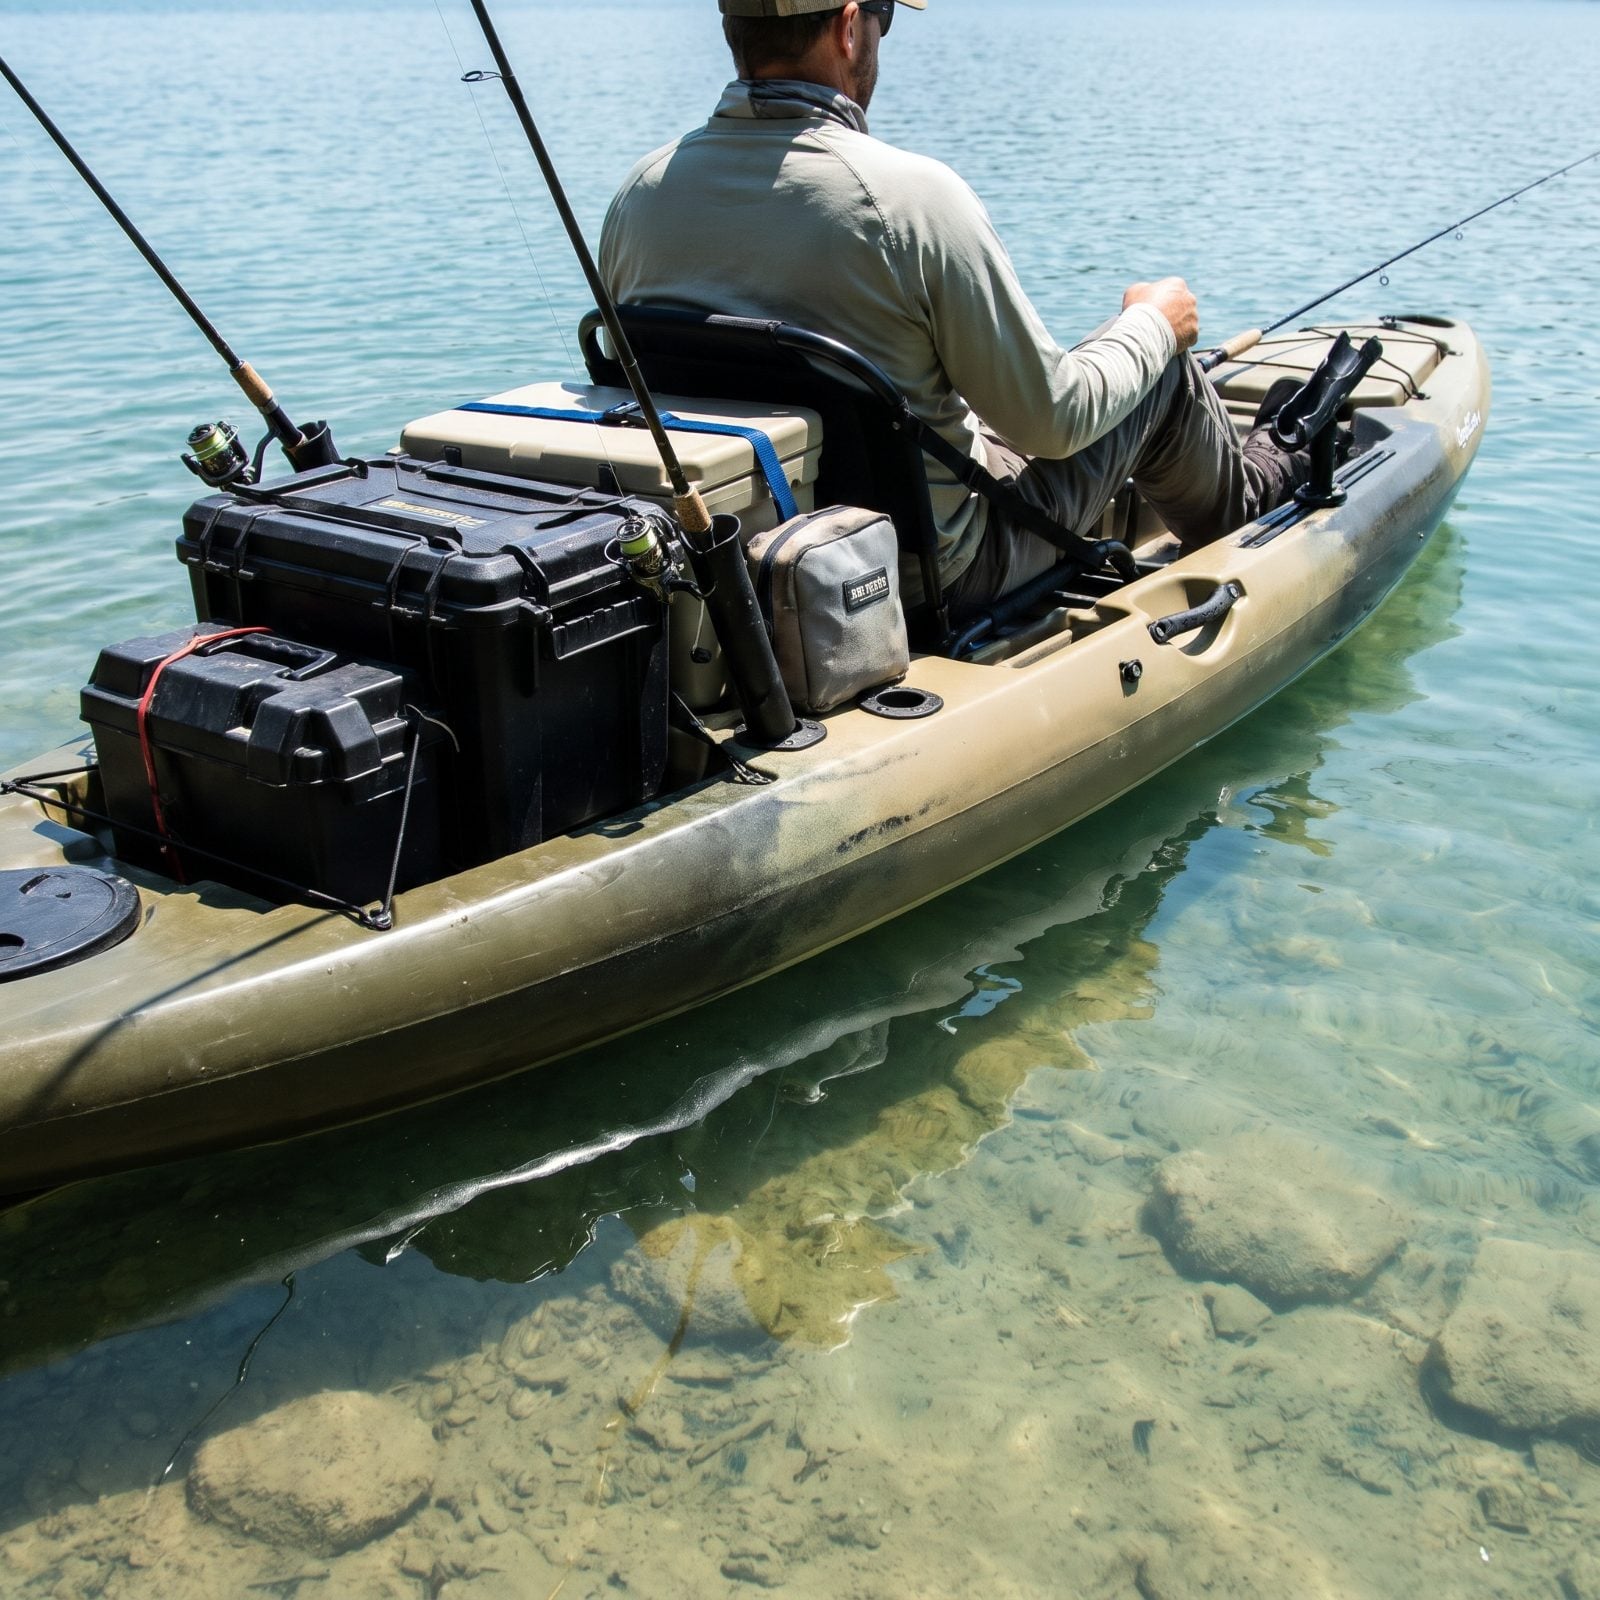
The number on the sticker is a lie of omission. A 400-pound capacity does not mean you can load 400 pounds and still fish. The honest working figure is closer to two-thirds of the rated max, because once a hull sinks past its design waterline it gets tippy, slow, and wet — the scupper holes start taking on water instead of draining it.
Add it up before you buy: your body weight, clothes, PFD, cooler, tackle, battery, anchor, and the fish you plan to catch. Weigh 230 and want a day’s worth of gear aboard? That 400-pound boat is already marginal.
45. Test Primary and Secondary Stability
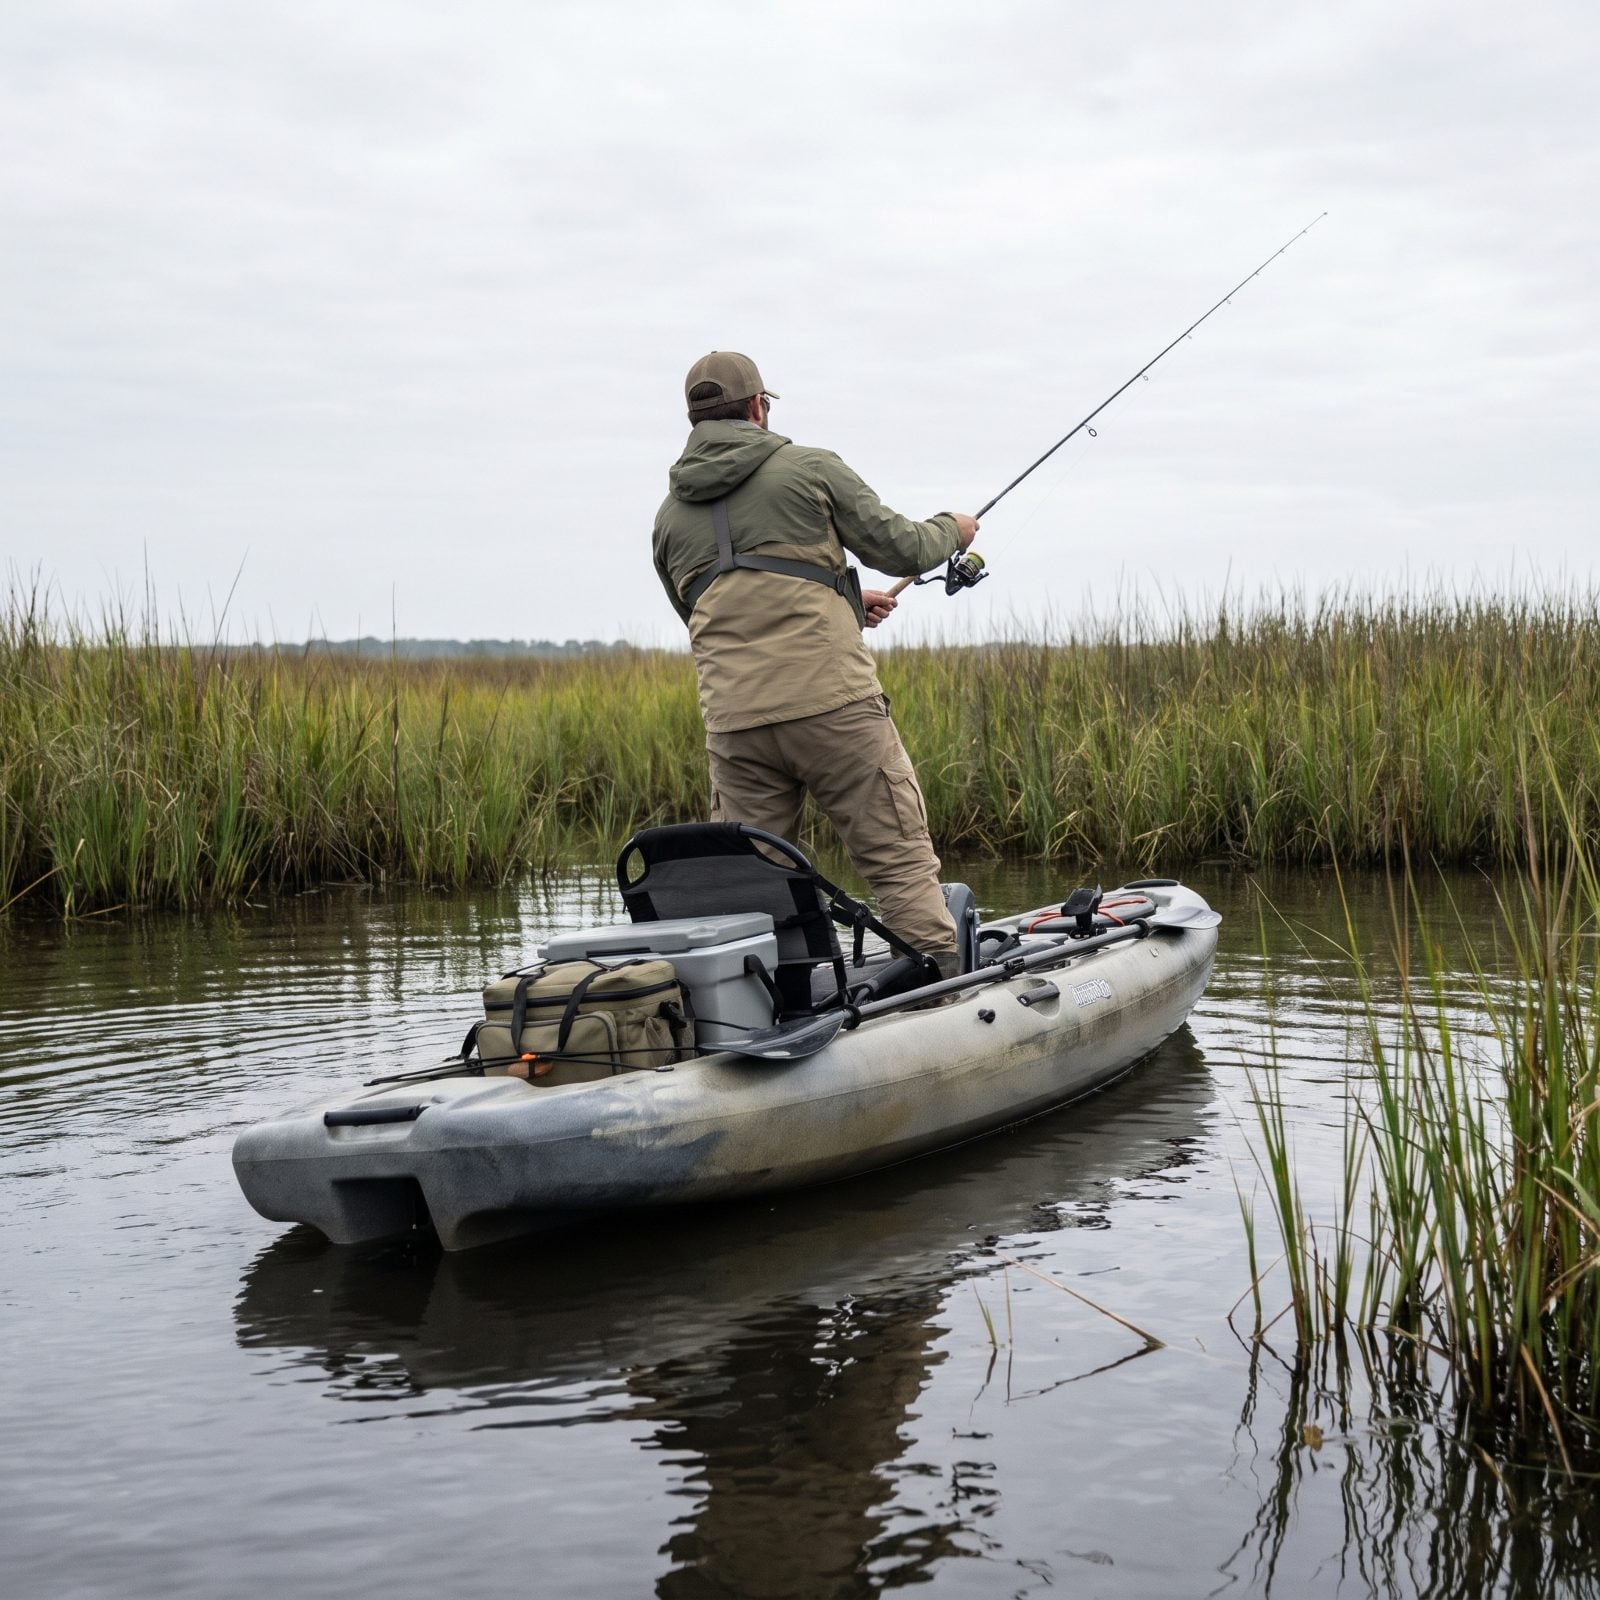
Two different things, and showrooms test neither. Primary stability is how steady the boat feels sitting flat. Secondary is how it behaves when you lean it on edge — which is exactly what happens when you reach for a fish, twist to net one, or stand up to sight-cast. A boat with great primary and lousy secondary feels rock-solid right up until it dumps you.
If the dealer has a demo pond, use it. Sit, then shift your weight hard to one side. A good hull firms up as it leans, like it’s catching you; a bad one just keeps going. Standing is the real exam. Can you stand and cast without white knuckles? Then the secondary stability is there.
44. Match Hull Length to Your Water
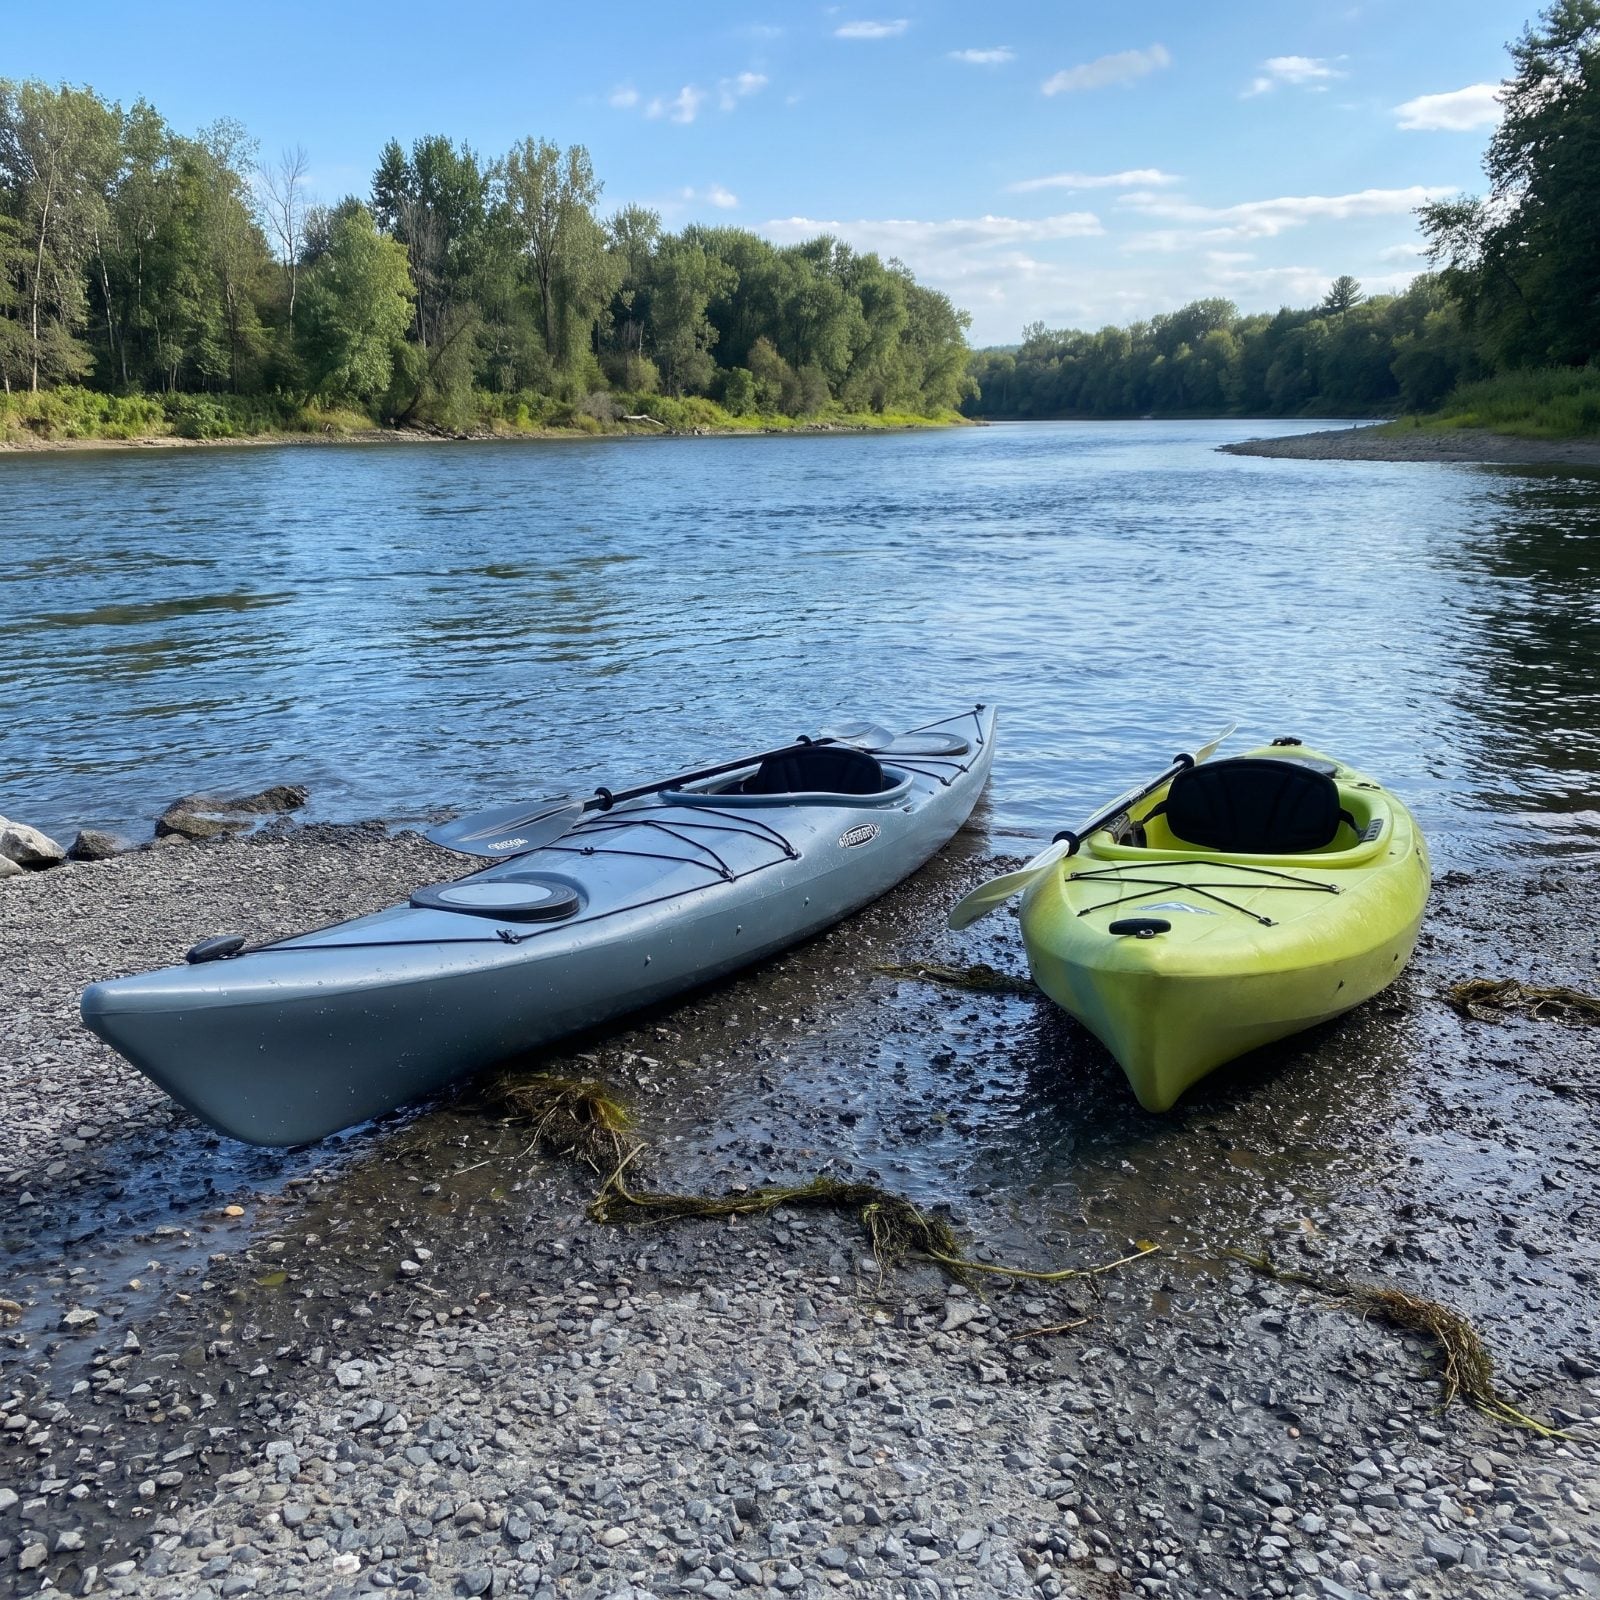
Length is the tradeoff nobody explains at the counter. Long hulls — say 12 to 14 feet — hold a line and cover water fast, so they shine on big lakes, bays, and open rivers where you’re paddling a distance to the fish. Short hulls under 11 feet turn on a dime and sneak into pockets, which is everything on a tight creek or a timber-choked pond.
Buy for the water you actually fish most, not the trip you take once a year. I owned a 14-footer for years and spent most weekends cursing it on a small lake full of laydowns. Be honest about your home water and you’ll get the right boat.
43. Inspect Hull Rocker for Your Conditions
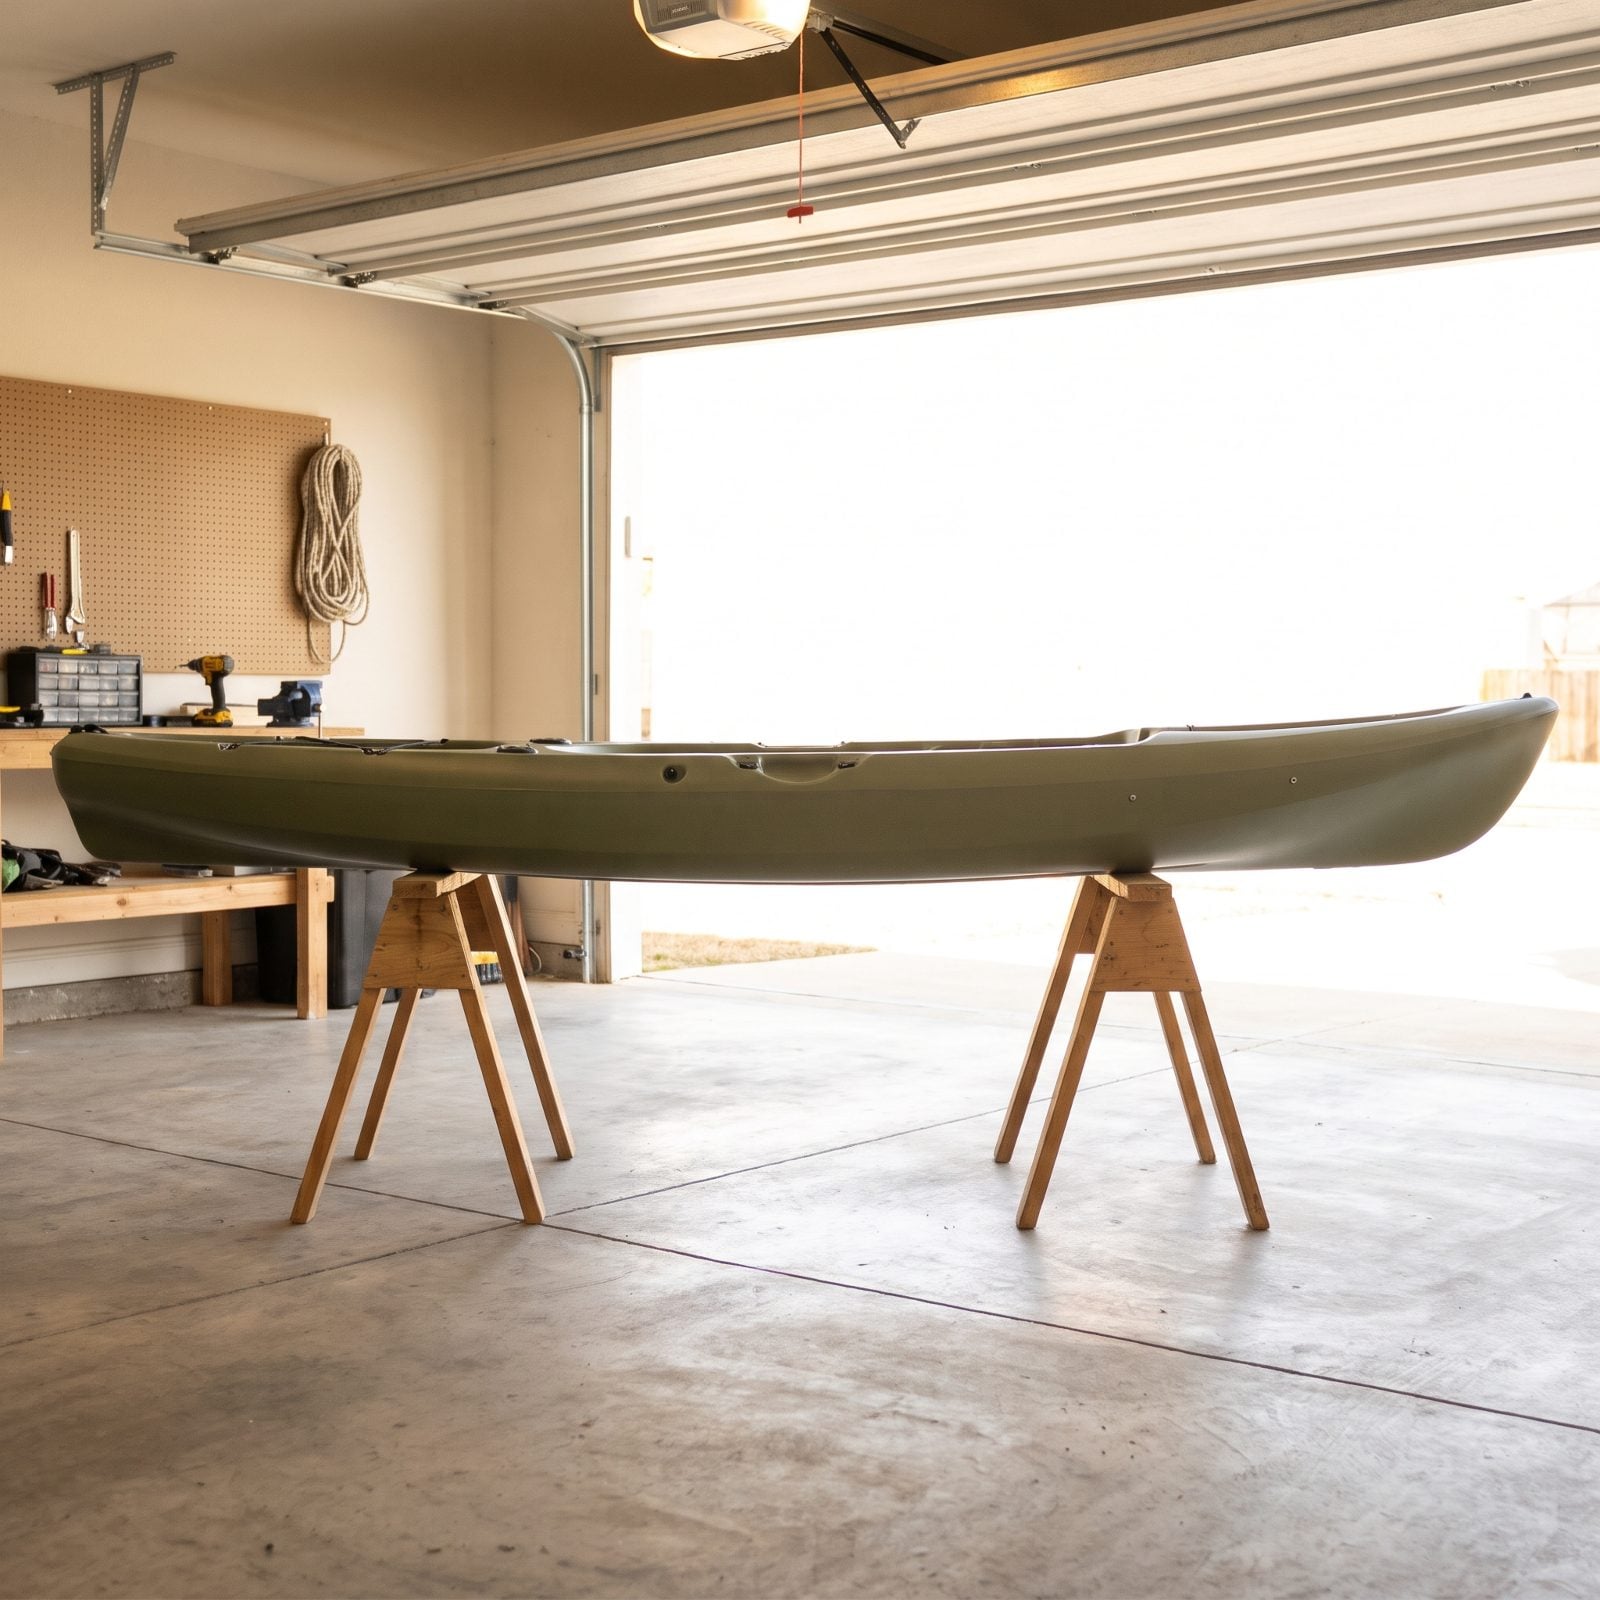
Rocker is the banana curve of the hull from bow to stern, and it decides how your boat handles chop versus flat water. More rocker lifts the ends over waves and turns quicker, which you want in surf, rivers, and open bays. Less rocker — a flatter keel line — tracks straighter and glides farther on calm ponds and lakes.
Eyeball it from the side. Set the kayak on a level surface and look at how much the bow and stern lift off the ground. A lot of lift means a playful, turny boat. A nearly flat keel means a straight-line cruiser.
42. Compare Sit-On-Top and Sit-Inside Designs
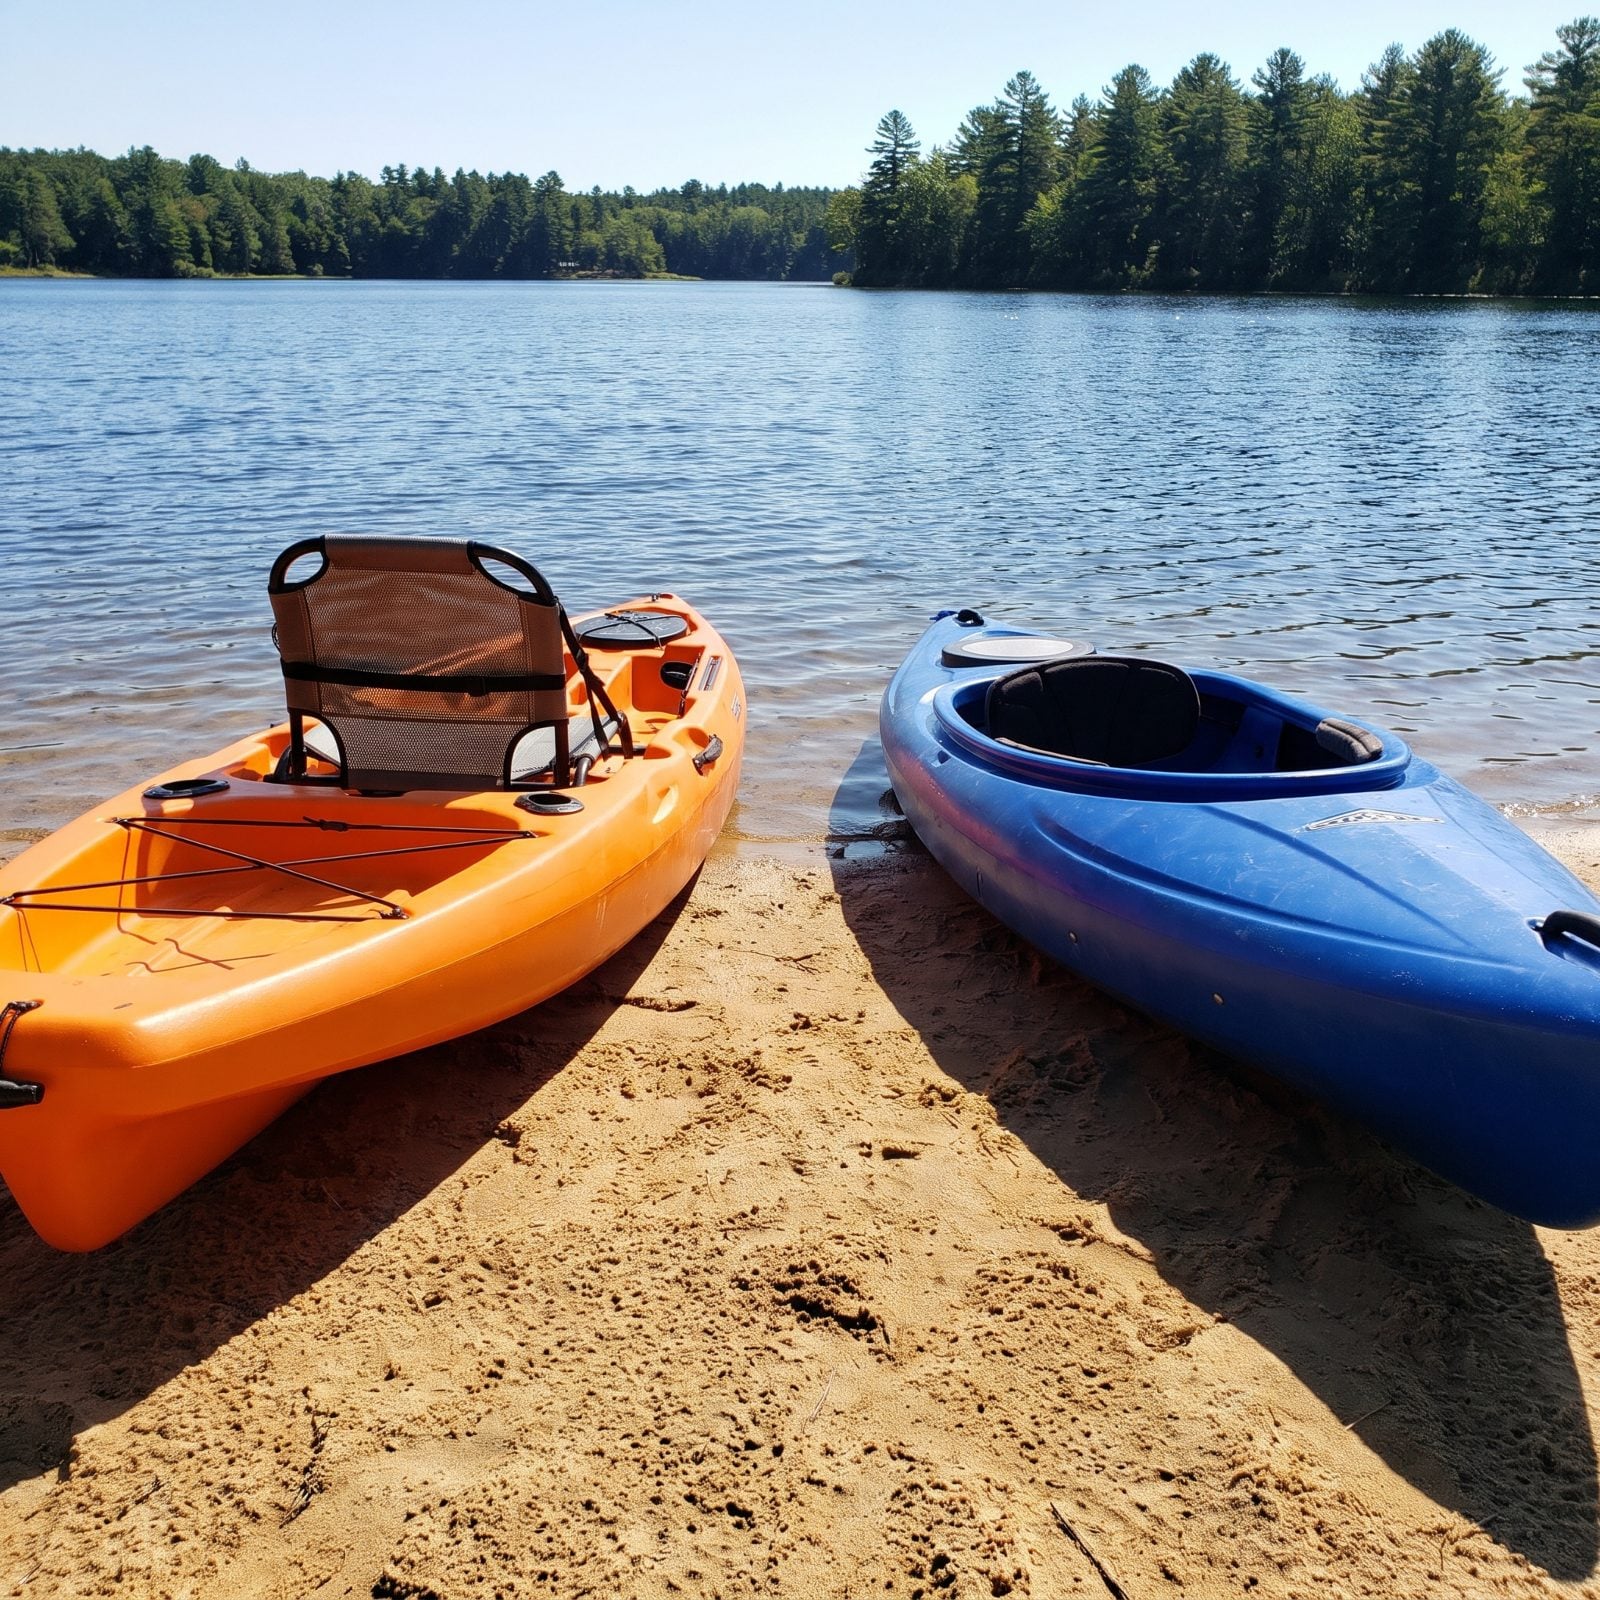
This is the first fork in the road, and most anglers should take the sit-on-top. You can stand on it, move around, drain water through the scuppers, and climb back aboard after a capsize without a bilge pump and a prayer. It’s warm-weather, big-deck, gear-everywhere fishing.
Sit-inside kayaks keep you drier and warmer, sit lower so the wind pushes you around less, and feel faster. The catch? A flooded cockpit is a serious problem to clear out on the water. For most of the country and most of the year, sit-on-top wins for fishing. Paddle cold water, cold weather, or chase speed, and the sit-inside earns a look.
41. Check Tracking in Open Water

Tracking is whether the boat goes where you point it or wanders off like a shopping cart with a bad wheel. Poor tracking means you paddle twice as hard and spend half your energy correcting. On a big open lake with a mile to the first spot, that’s the difference between fishing fresh and fishing tired.
Demo it on flat water with no wind if you can. Take three or four strong strokes, then stop and let it glide. A boat that tracks holds its line and coasts straight. One that veers needs constant correction — or a rudder.
40. Test Maneuverability in Tight Cover
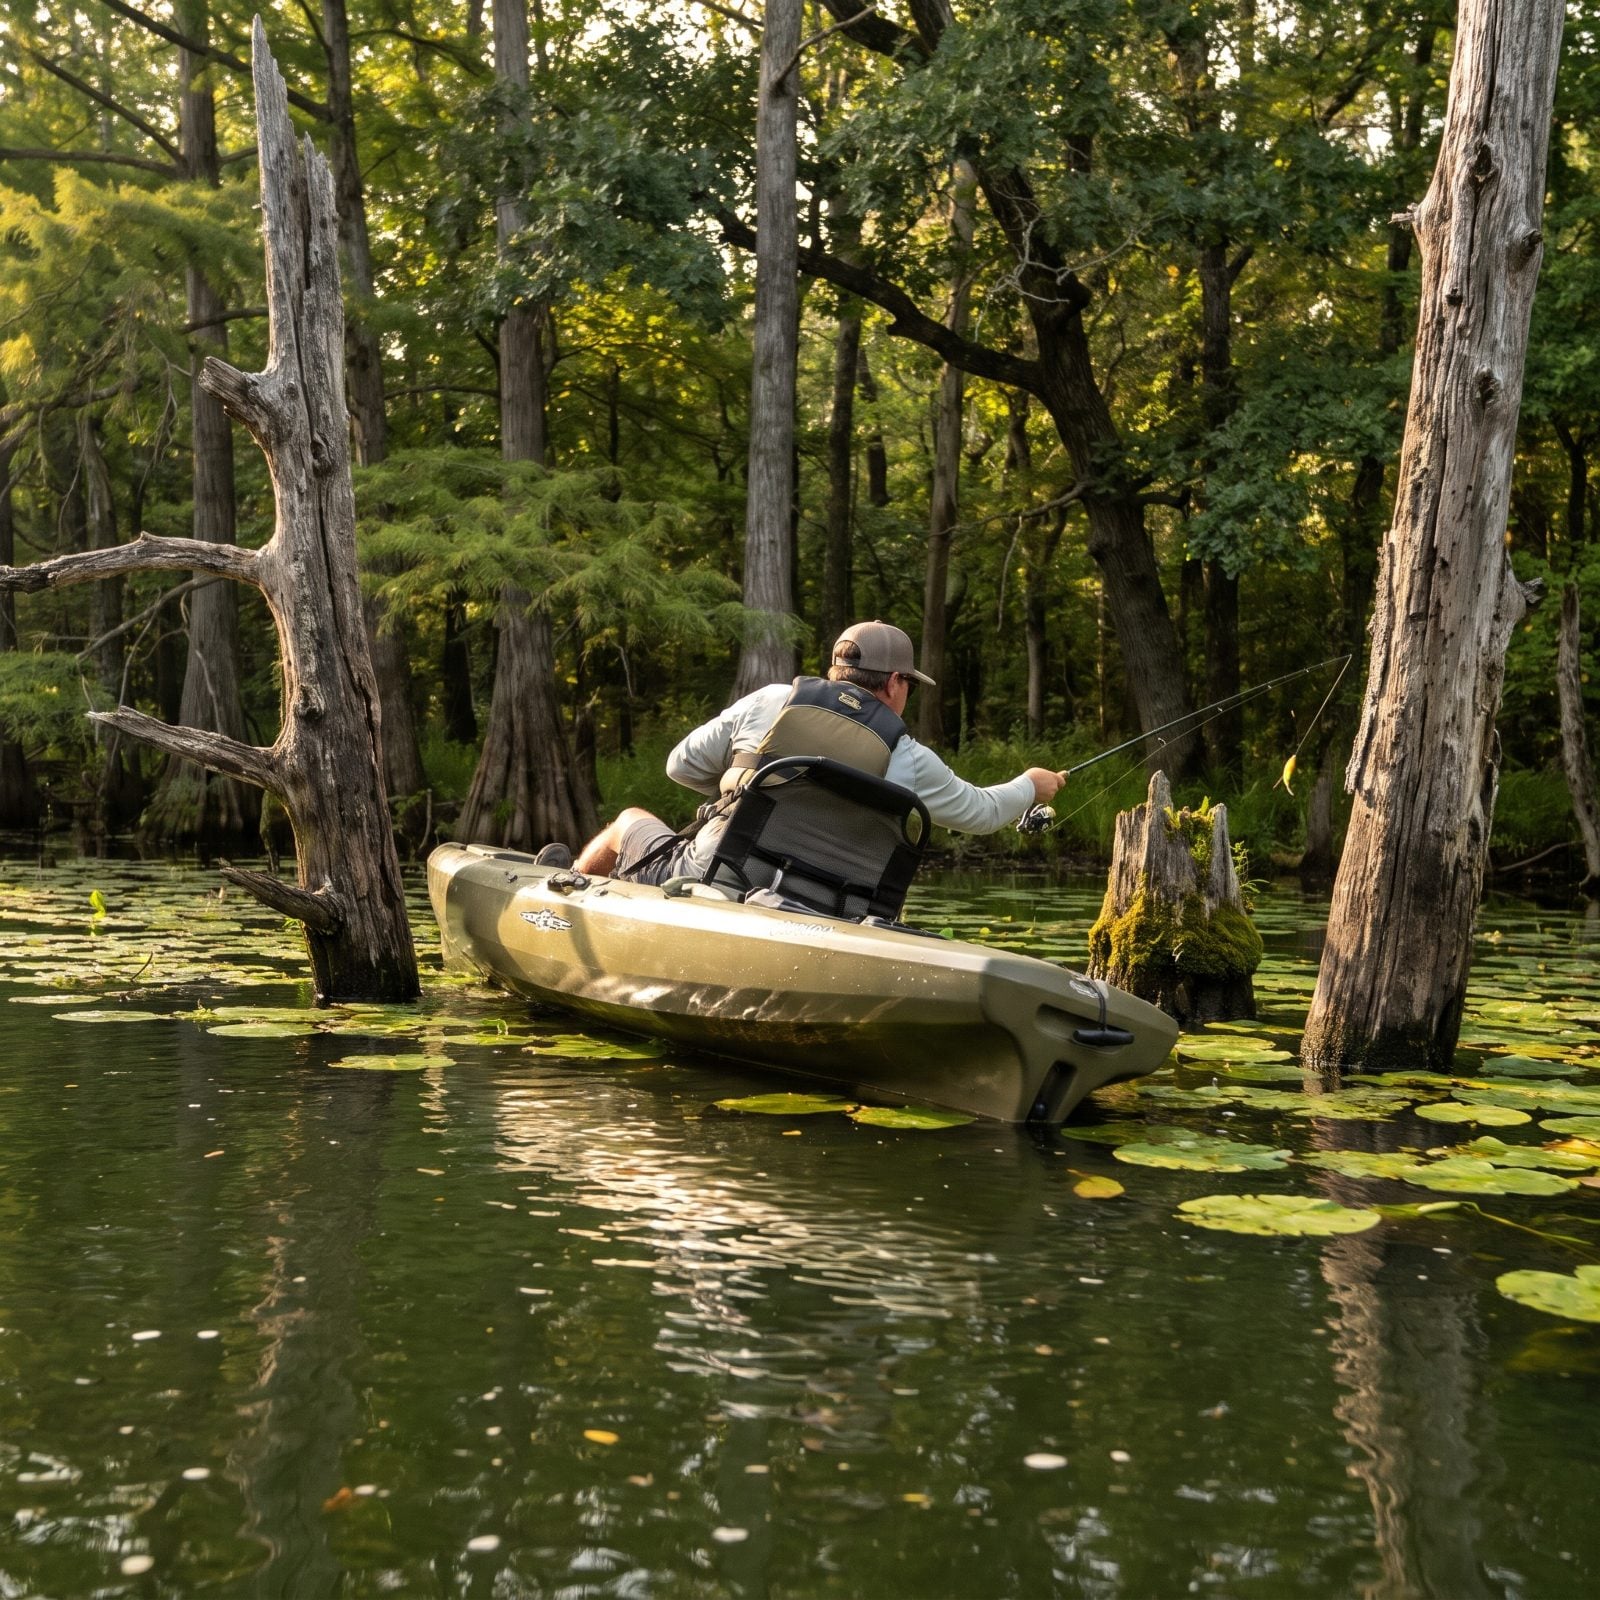
The opposite exam from tracking, and the two fight each other. A boat that pivots on command in flooded timber, lily pads, and dock corners is the one that puts you on fish other people can’t reach. The shorter and more rockered the hull, the quicker it spins.
Test it with a single sweep stroke. Plant the paddle wide and pull. A nimble boat swings well off one stroke; a barge takes three. If you fish creeks, sloughs, and tight cover, prioritize this over top-end speed. You’ll be making a thousand little course changes a day, and a sluggish boat makes every one of them a chore.
39. Account for Windage Above the Waterline
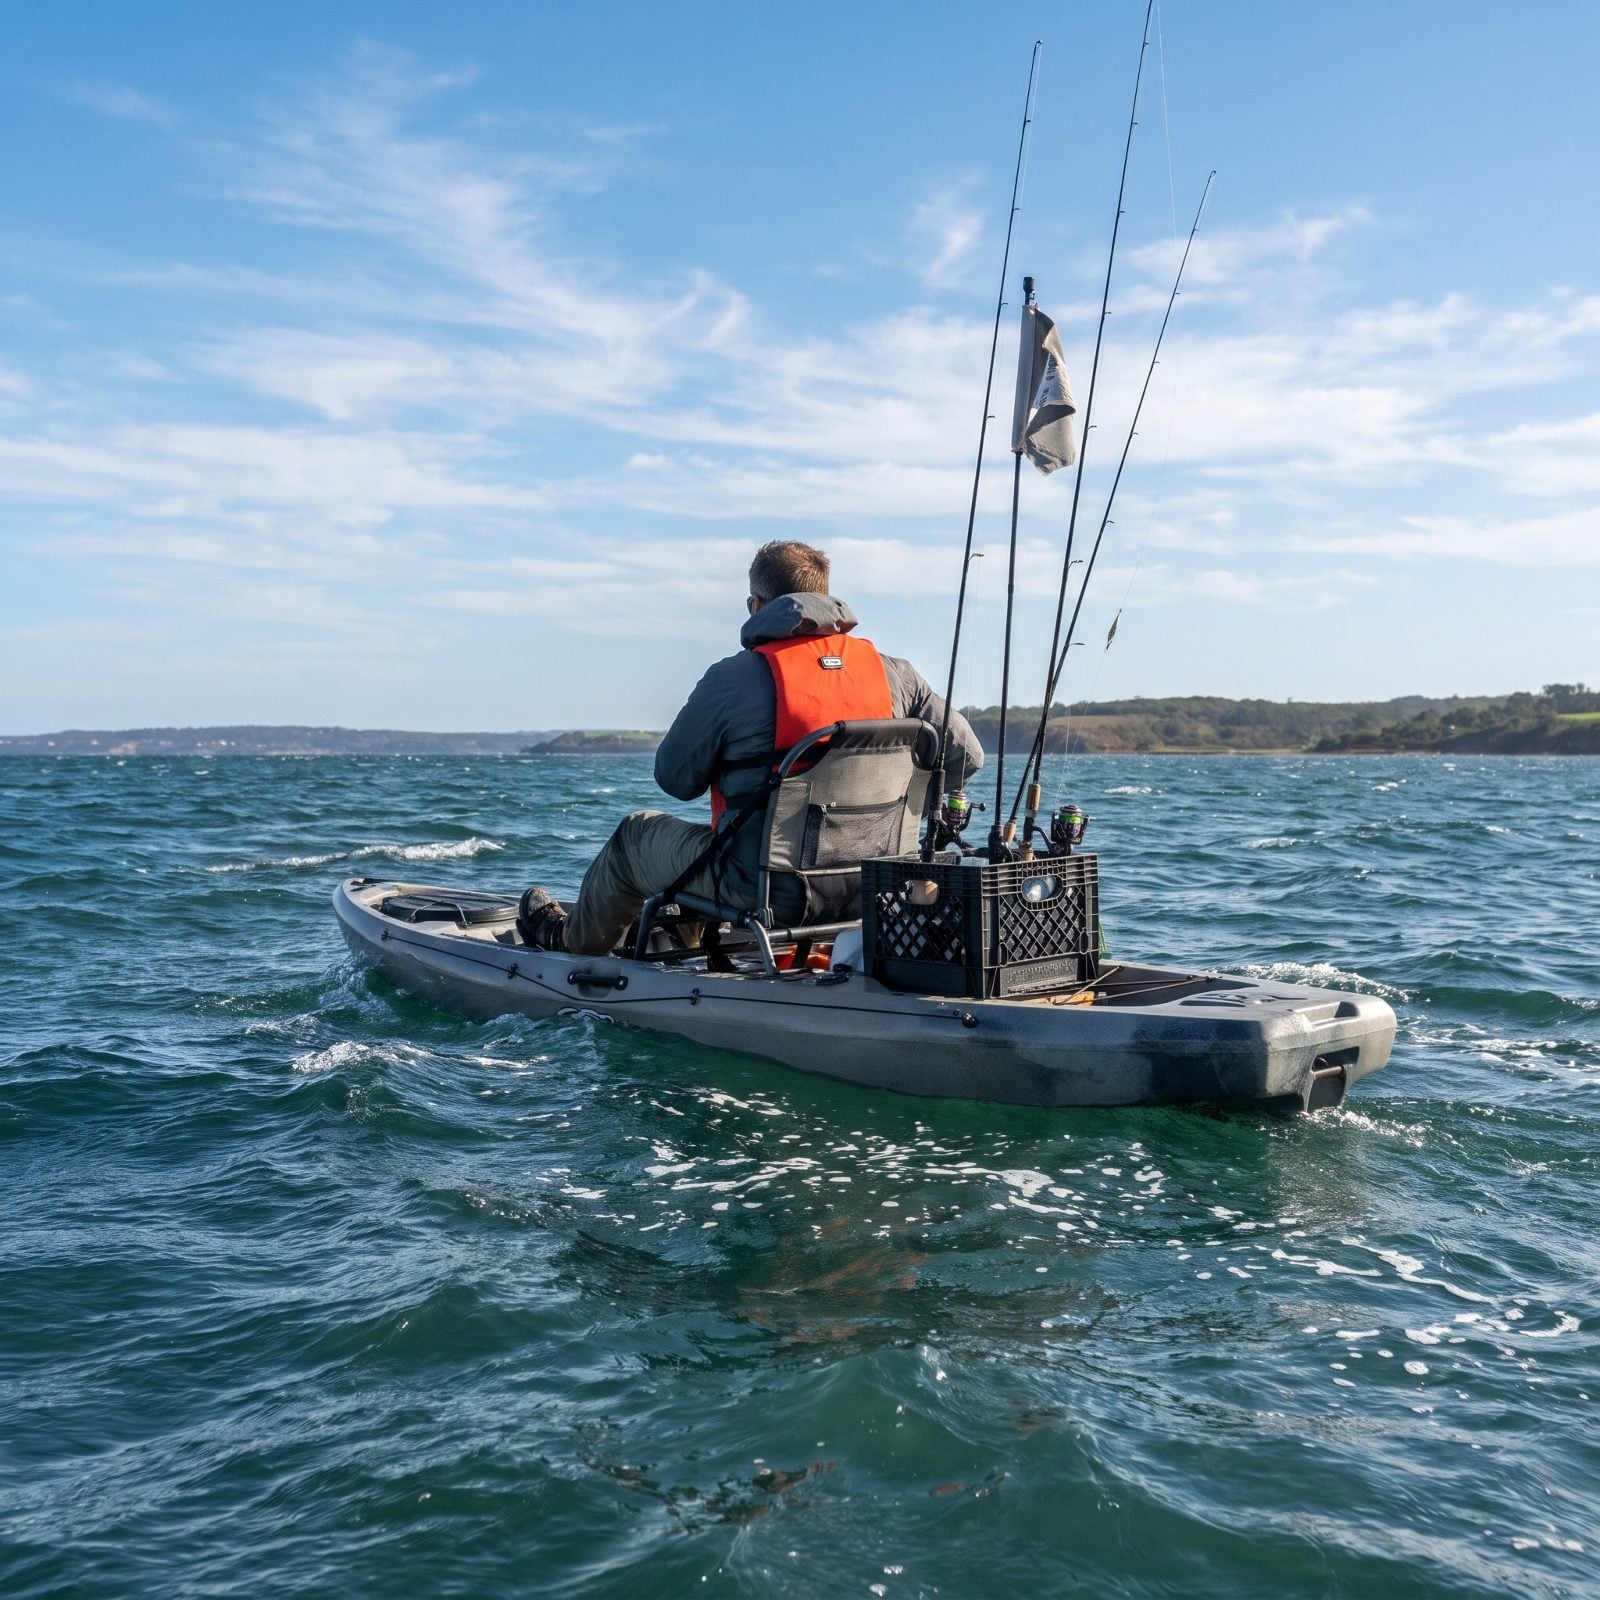
Everything that sticks up above the water is a sail you didn’t ask for — a high seat, a tall rod crate, a stacked load of gear, even your own torso. On a windy bay or a big lake, the wind grabs all of it and shoves you off your spot faster than you’d believe.
Look at the boat’s profile from the side with the seat in the high position. The taller it rides, the more it’ll fight you in a blow. A low-slung sit-inside barely notices wind. A pedal kayak with a jacked-up throne seat and a rod tower is a different animal when it’s gusting 15.
38. Check the Actual Rigged Weight
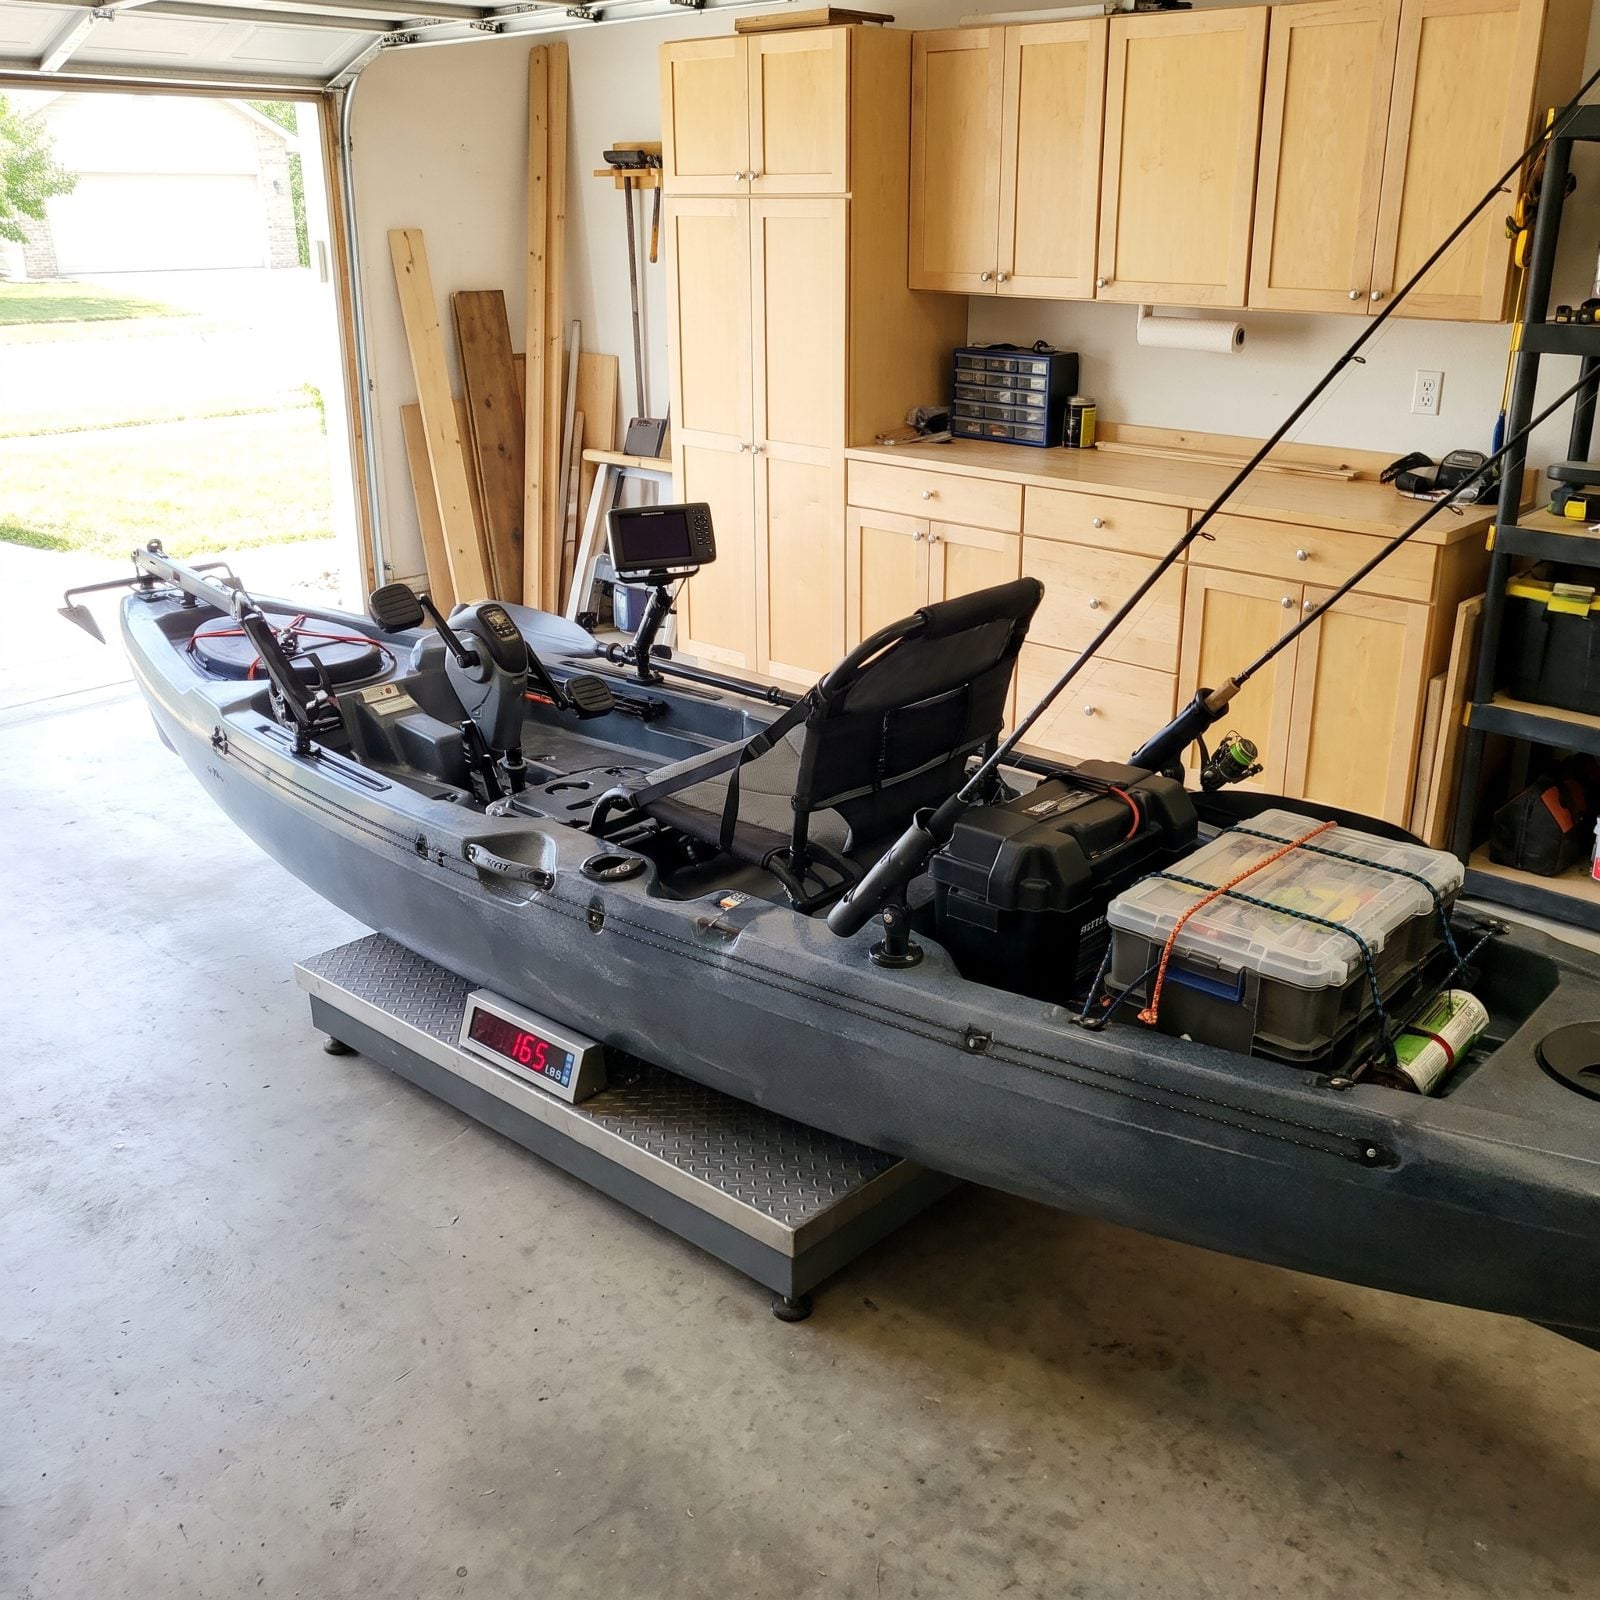
The hangtag weight is the naked hull. By the time you’ve rigged it for fishing, you’ve added real pounds nobody warns you about. A pedal drive is heavy on its own. Stack on a battery, a fish finder, an anchor trolley, rod holders, a crate, and a seat, and you’ve bolted dozens of pounds of gear onto a boat that was supposed to be light.
So a 72-pound base boat can hit well over 100 rigged. That’s the number that matters, because that’s what you’ll be dragging to the water and heaving onto your truck every single trip. Ask what the common rigged weight runs for the way most people set the model up.
37. Confirm You Can Lift It Alone
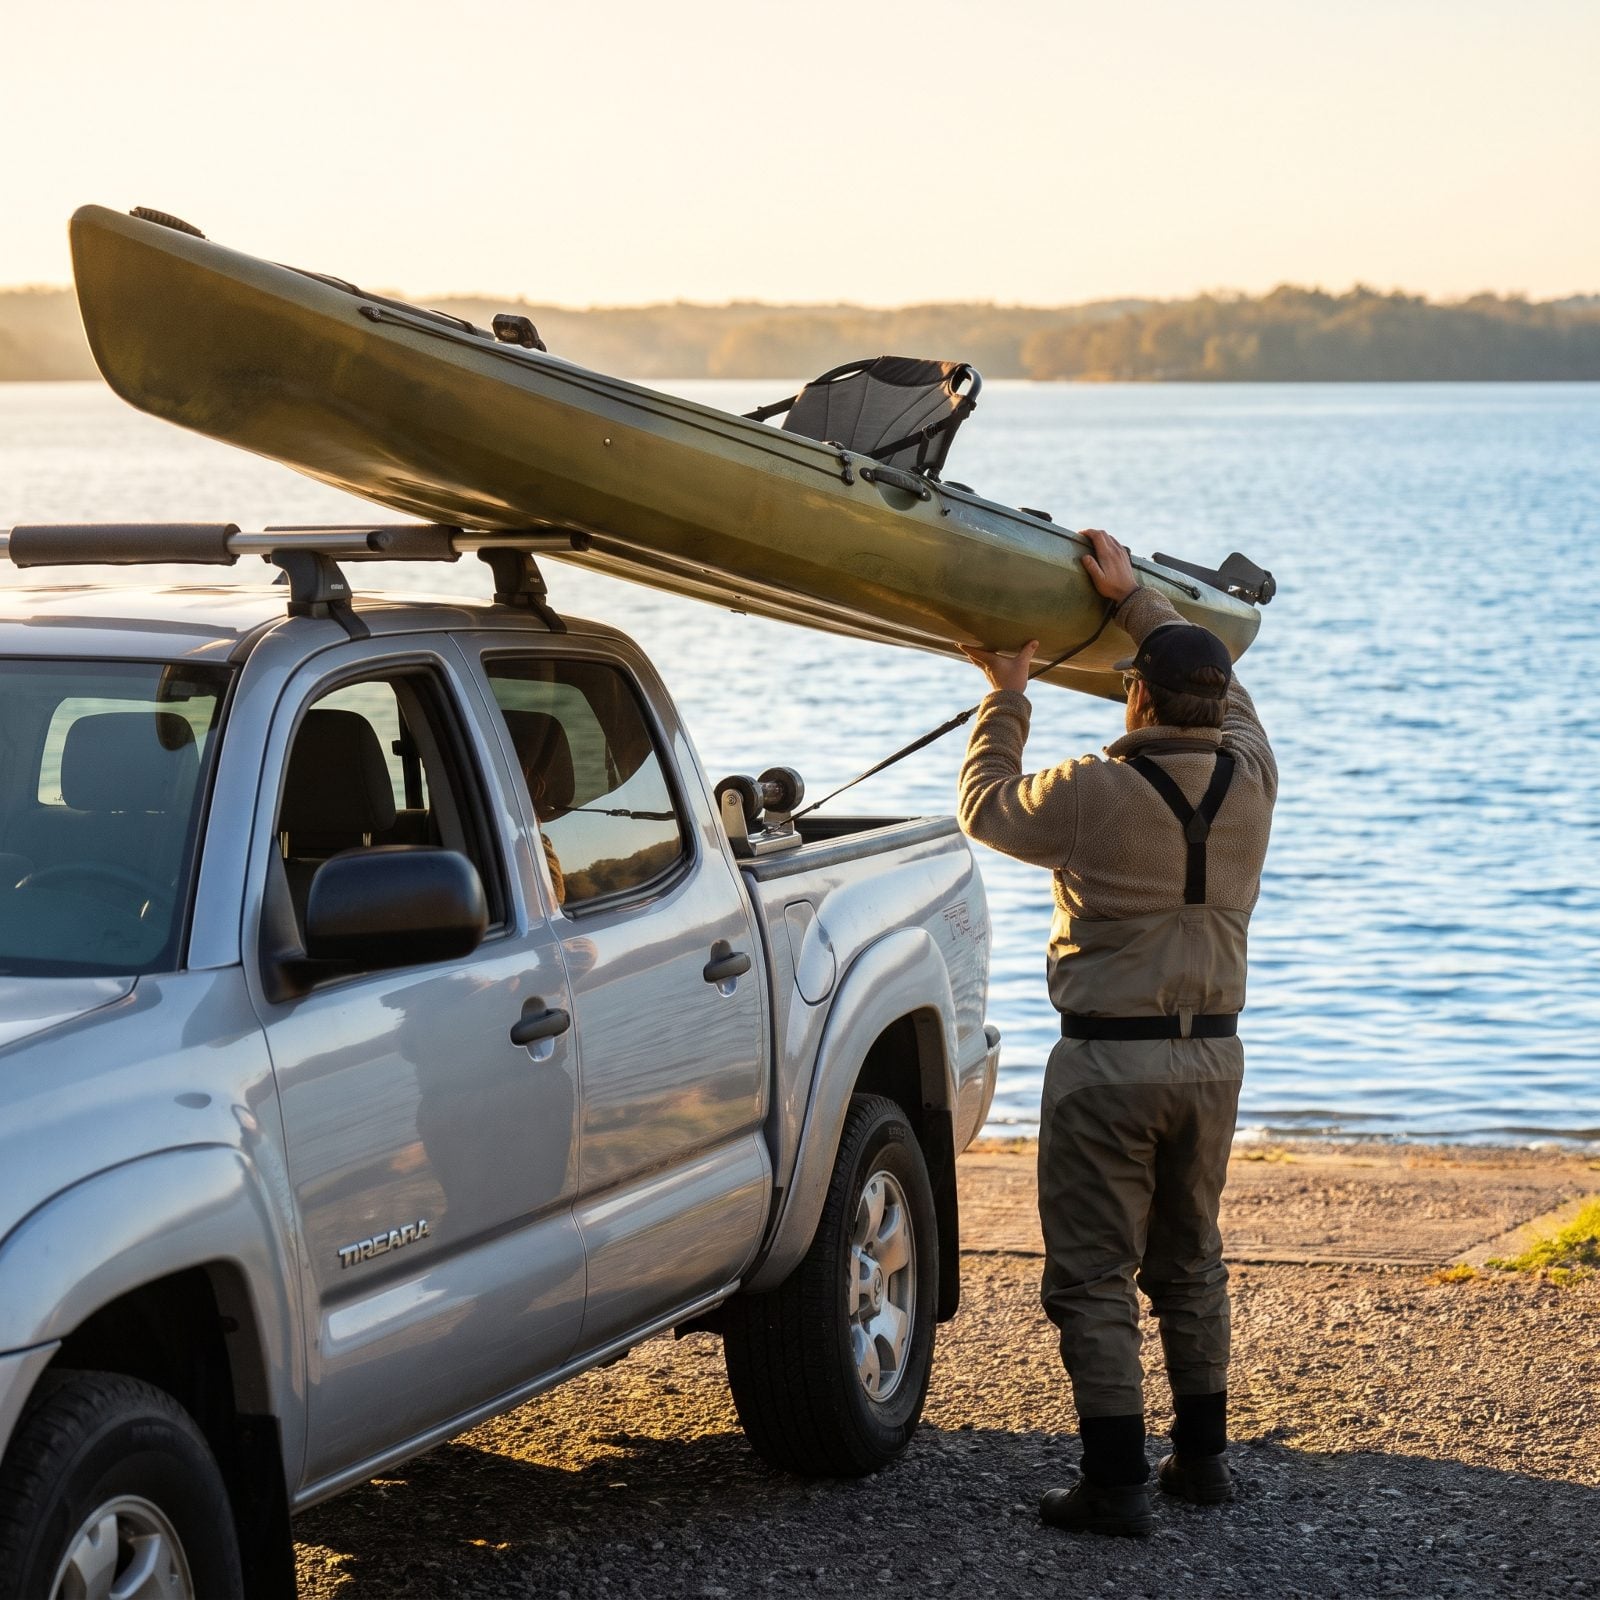
The best boat in the world is useless if you dread loading it. This is the check people skip and regret, because a kayak that’s a two-person lift means you only fish when someone’s free to help — and that’s most of your season gone.
Before you buy, actually lift the rigged boat the way you’ll load it: onto the truck bed, onto roof bars, into the garage rack. If it’s a grunt now, it’ll be worse at dawn after a 4 a.m. alarm, and a nightmare at dusk when you’re beat.
Be honest with yourself here. A kayak parked in the garage because it’s a pain to move catches nothing.
36. Verify Your Vehicle’s Roof Capacity
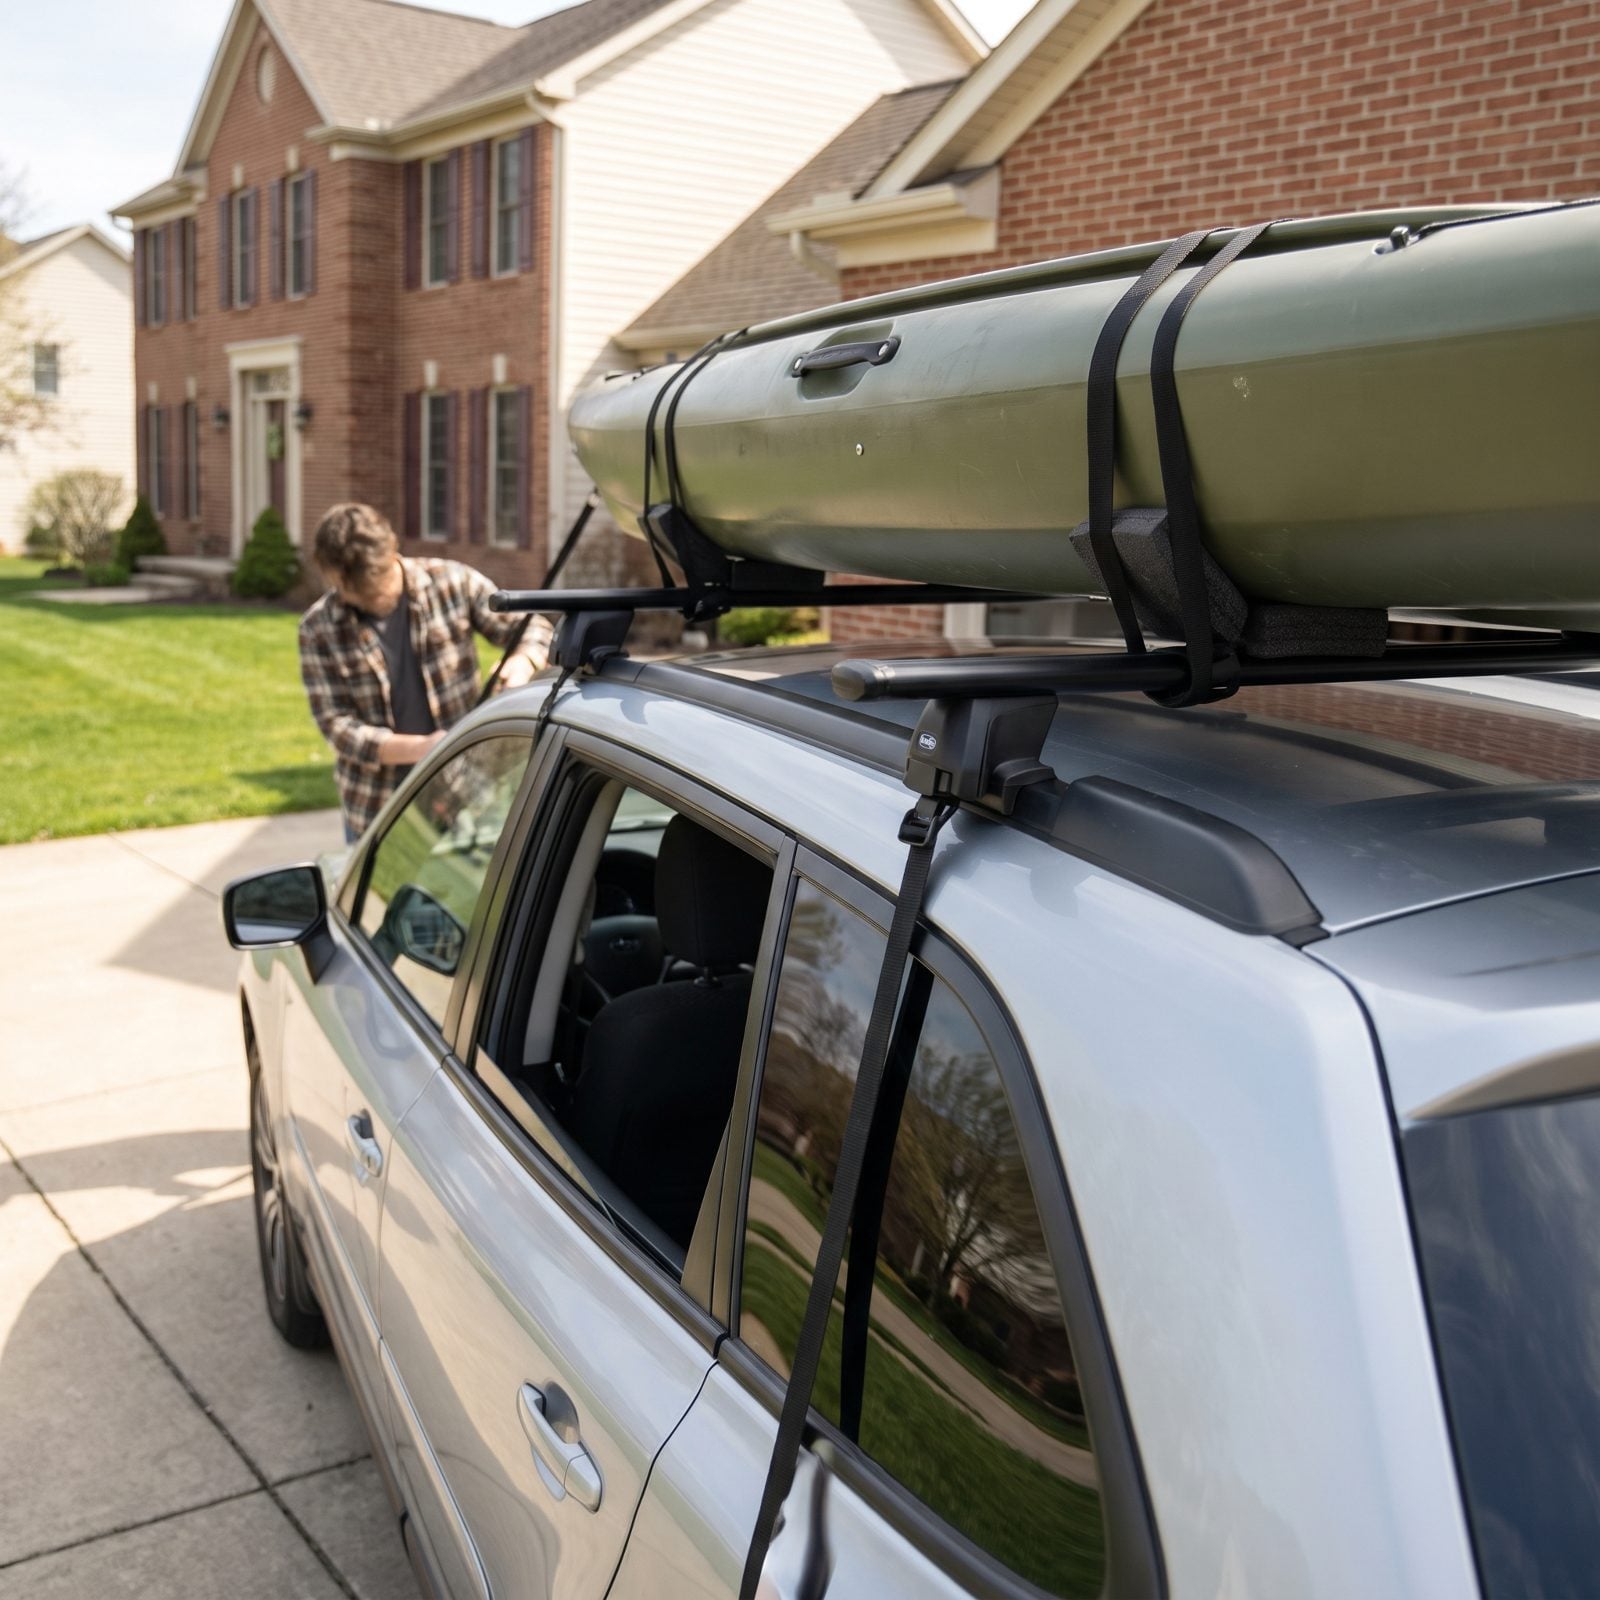
That sticker inside your door jamb lies to you, or at least it hands you the wrong number. Dynamic roof load — what the roof holds while you drive — is often a third of the static load, and a loaded fishing kayak can run 80 to 120 pounds on its own. Your crossbars eat into the budget before the boat ever touches them.
Pull the owner’s manual and find the dynamic rating. Subtract your rack. What’s left is your real ceiling. I ignored this once and watched my crossbars bow on the highway like a longbow at 65. Not a feeling I’d recommend.
35. Price the Complete Transport System
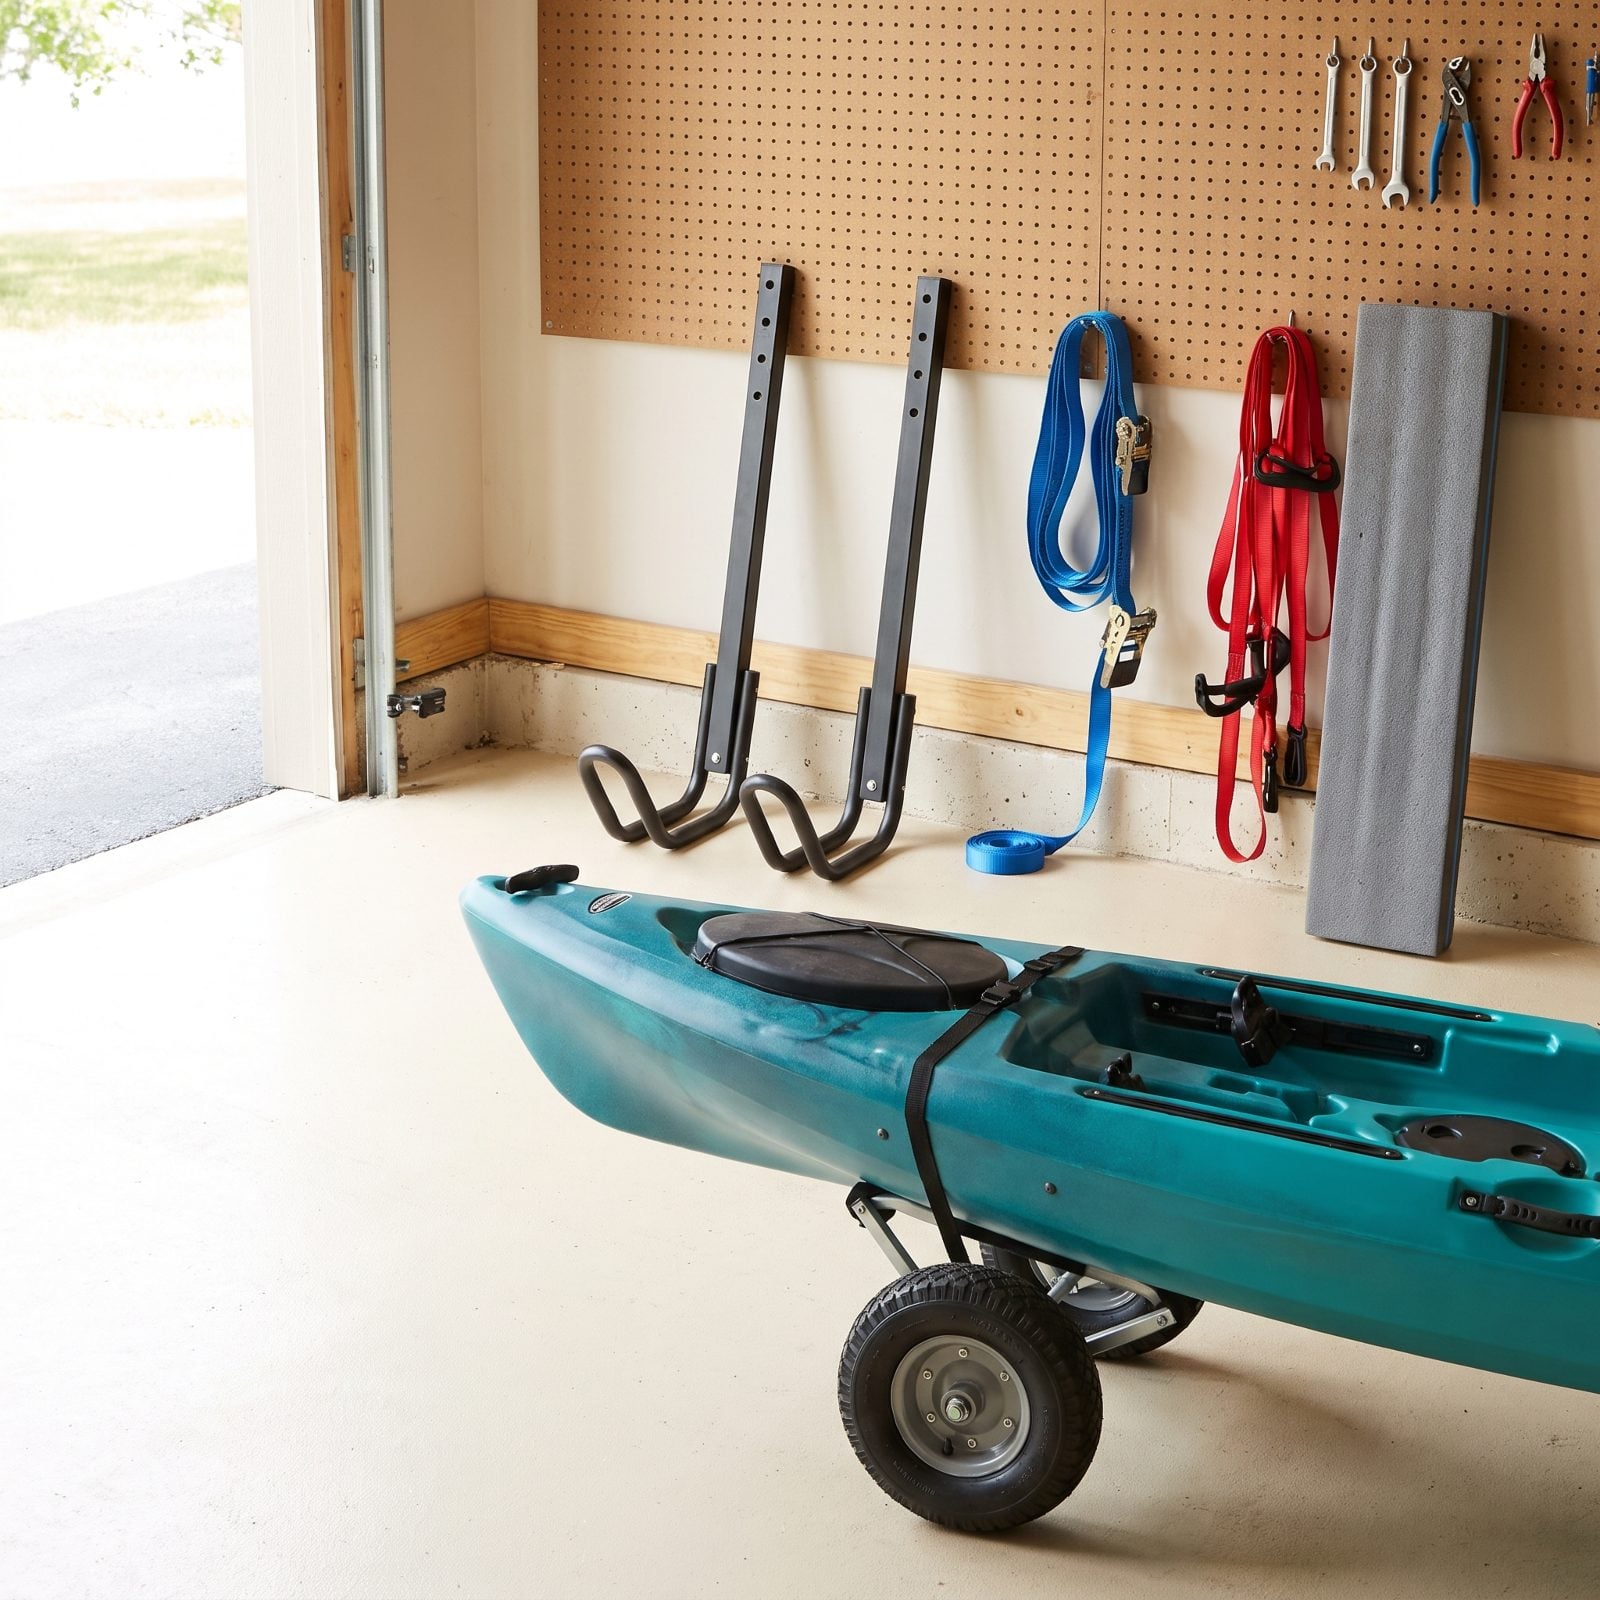
The boat price is the headline. Everything else is fine print, and it stacks up faster than people expect.
Budget for crossbars, a set of J-cradles or saddles, ratchet straps, bow and stern tie-downs, and almost certainly a kayak cart with real wheels — because dragging a fully rigged fishing kayak across a gravel lot by hand is a punishment nobody signs up for twice. I’ve watched folks drop fifteen hundred on a boat, skip the two-hundred-dollar cart, and wrench their back on the walk from the parking spot to the ramp. Penny wise, spine foolish.
Add it all up before you commit. The honest cost of getting the thing to the water is part of the cost of the thing.
34. Measure Your Home Storage Space
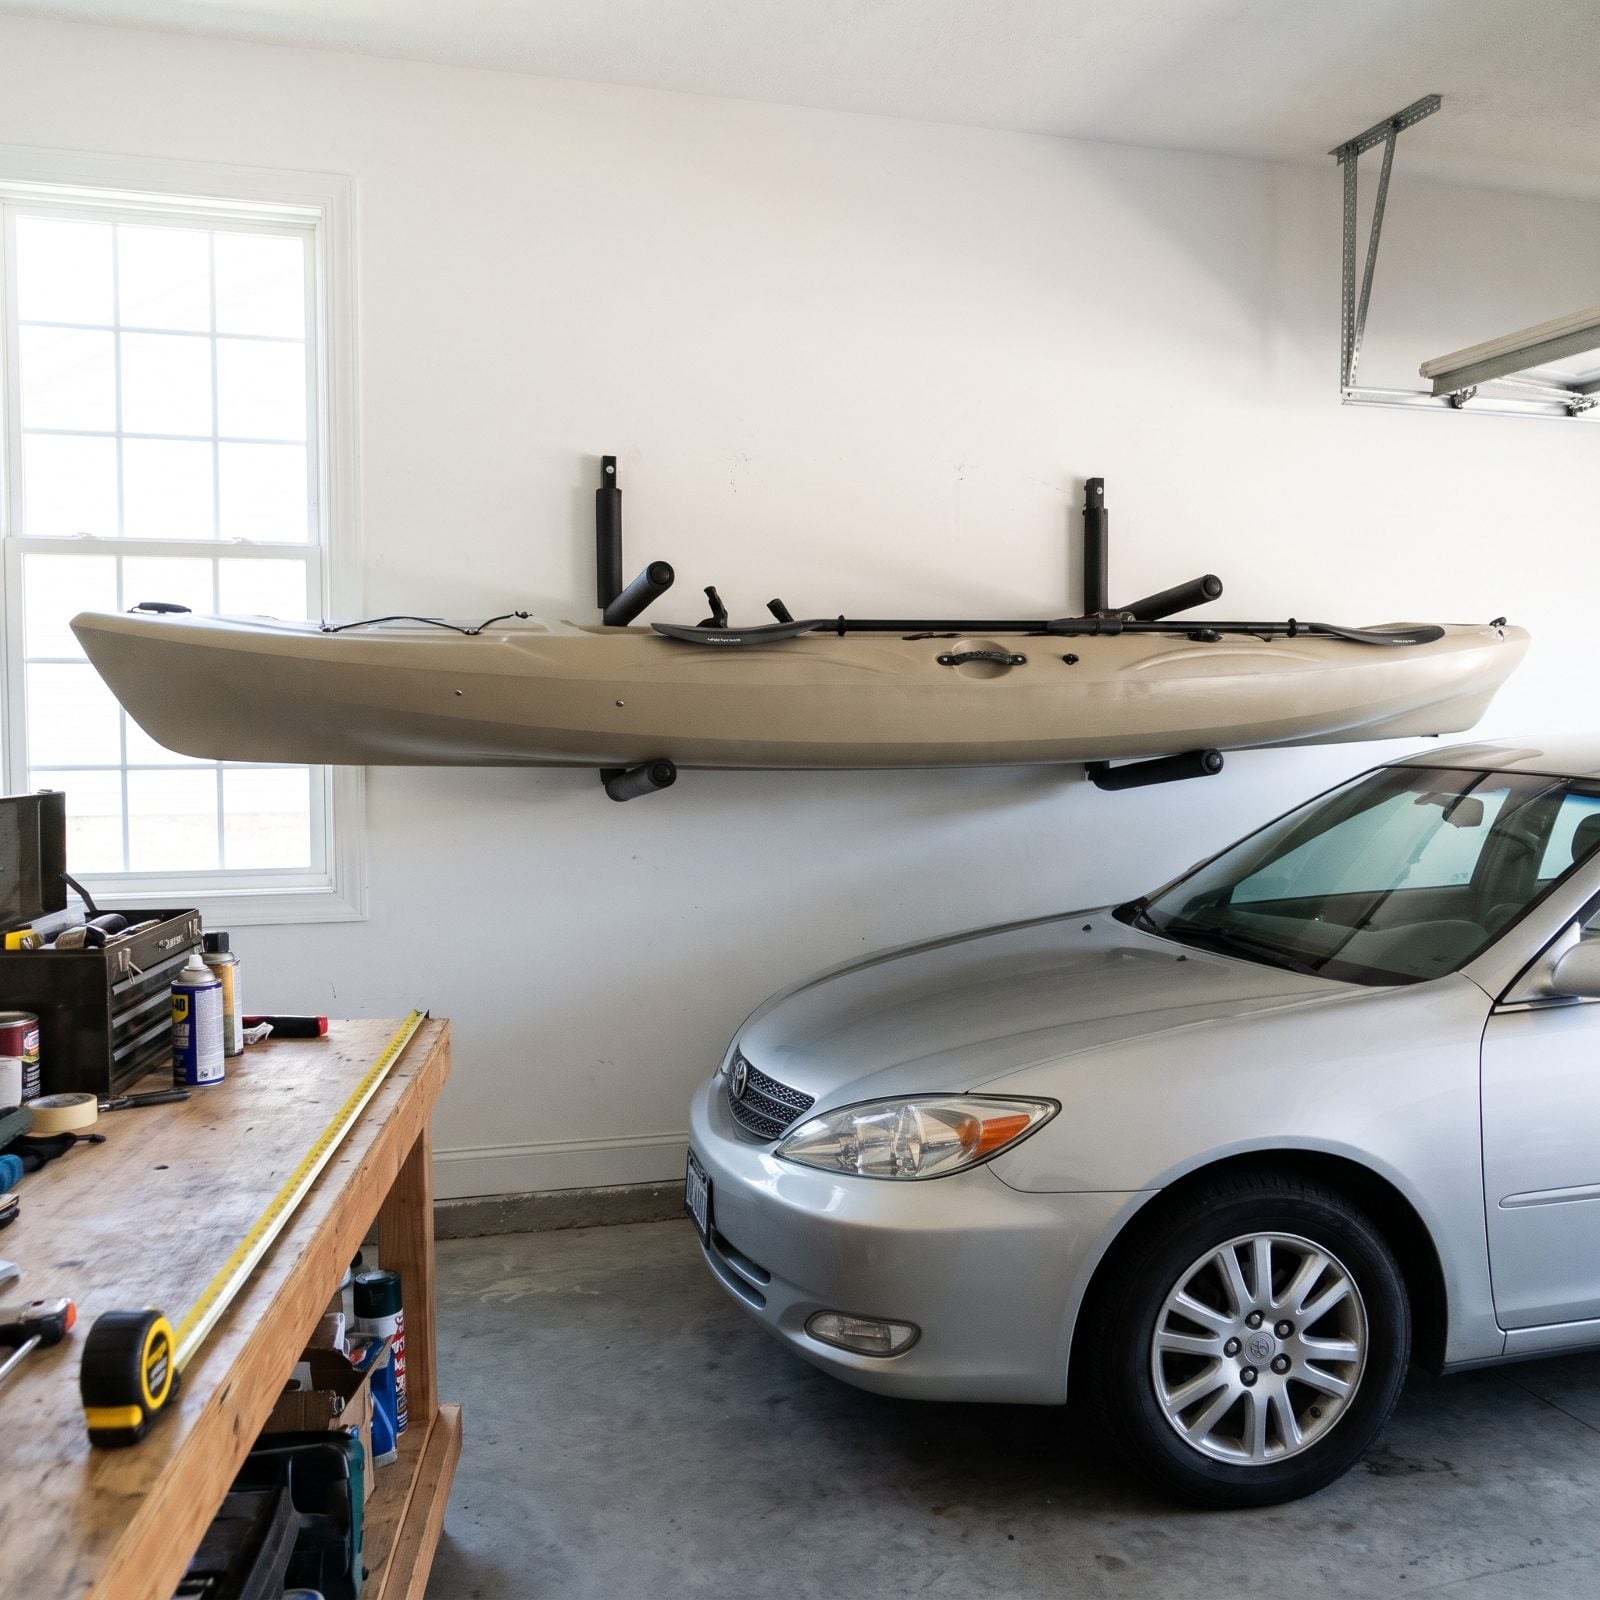
A fishing kayak is longer than you think and heavier than you’d like. Many run 11 to 13 feet, and loaded weight pushes past 100 pounds. That’s not a closet item.
Measure where it’ll actually live before you buy. Garage ceiling height for a hoist, wall length for horizontal J-arms, side-yard clearance if it’s going outside under a cover. Then measure the door you’ll haul it through.
UV is the quiet killer. Rotomolded hulls left baking in full sun go chalky and brittle over a few seasons, and no warranty saves you from that. Shade or a cover, pick one.
33. Choose Paddle or Pedal Propulsion

The honest tradeoff comes down to this. Paddle kayaks are lighter, cheaper, simpler, and draft shallower. Pedal kayaks free your hands to fish while you move, which changes how you work a shoreline.
Where do you fish? Tight, skinny creeks and quick float trips favor a paddle. Open flats, wind, and current reward the legs. I’m a convert to pedal on big water, but I still grab a paddle boat for small streams where a drive would just bang the bottom.
And reckon with the price gap. Pedal drives often add a thousand dollars or more — a serious jump — so buy the propulsion your water actually calls for, not the one that looks slickest on the showroom floor.
32. Compare Fin and Propeller Pedal Drives
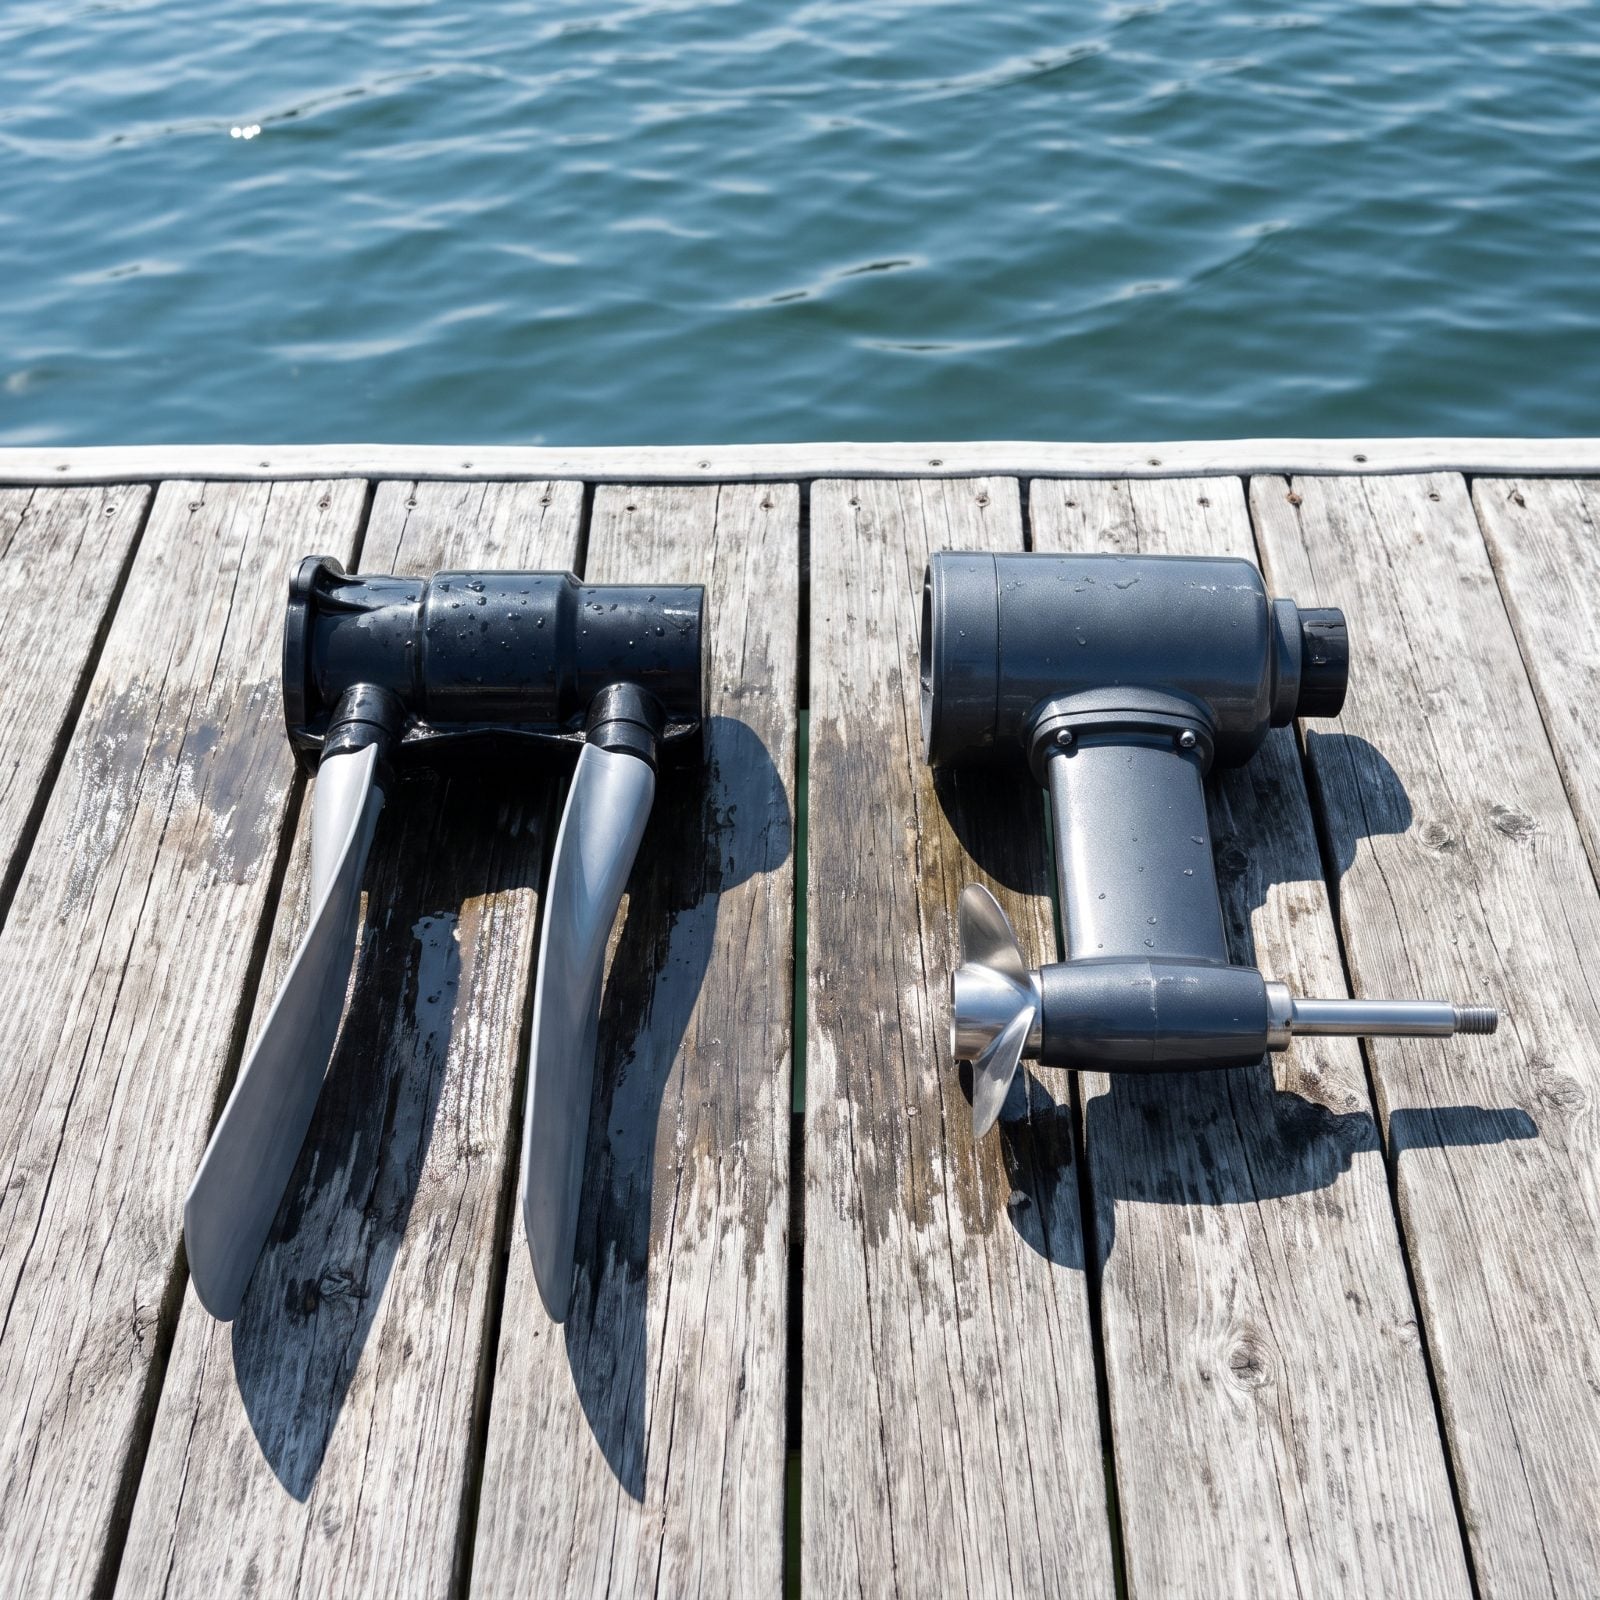
Two schools, two feels.
- Fin drives flipper back and forth, kick up almost nothing, and slip through weeds and skinny water with real grace. Most won’t reverse without an added kit.
- Propeller drives spin for torque and speed, bite into wind and current better, and usually reverse by pedaling backward.
Grass is the prop’s weakness. A weedy bay will wrap the blades and stall you cold, while a fin shrugs most of it off. Fish lily pads and matted vegetation? Lean fin. Fighting current and distance? Lean prop. Neither is wrong. They’re built for different water, that’s all.
31. Check Pedal-Drive Reverse Capability
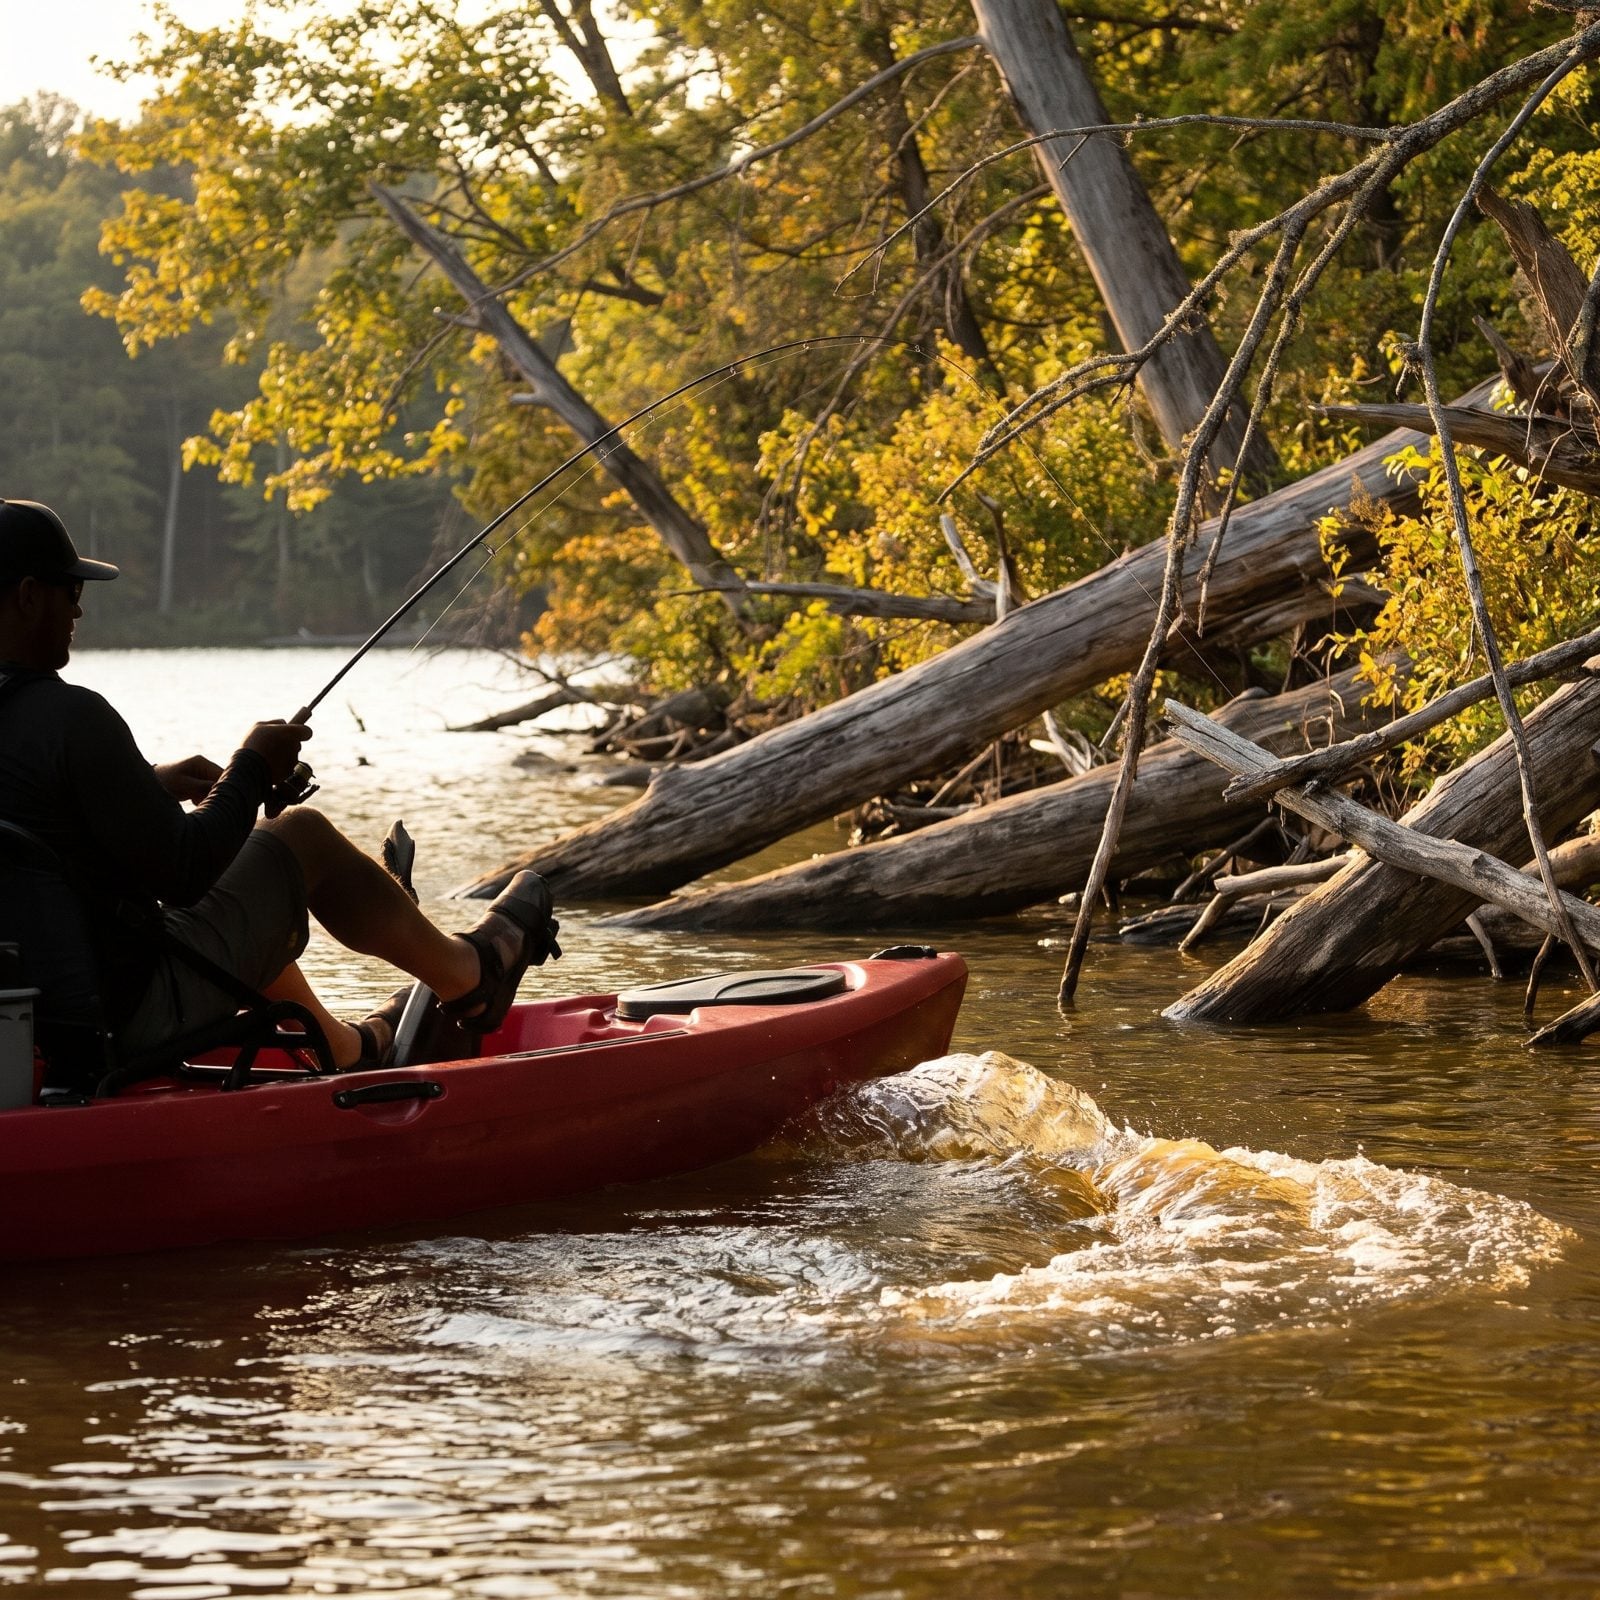
Reverse sounds like a luxury right up until you’re pinned against a laydown with a fish trying to wrap you around a branch. Then it’s the difference between landing it and losing it.
Test the reverse at the shop or on a demo day. Instant and controllable, or a clunky toggle you have to reach down and flip? A good reverse backs you off structure without you ever setting down the rod.
30. Test Pedal Clearance in Shallows
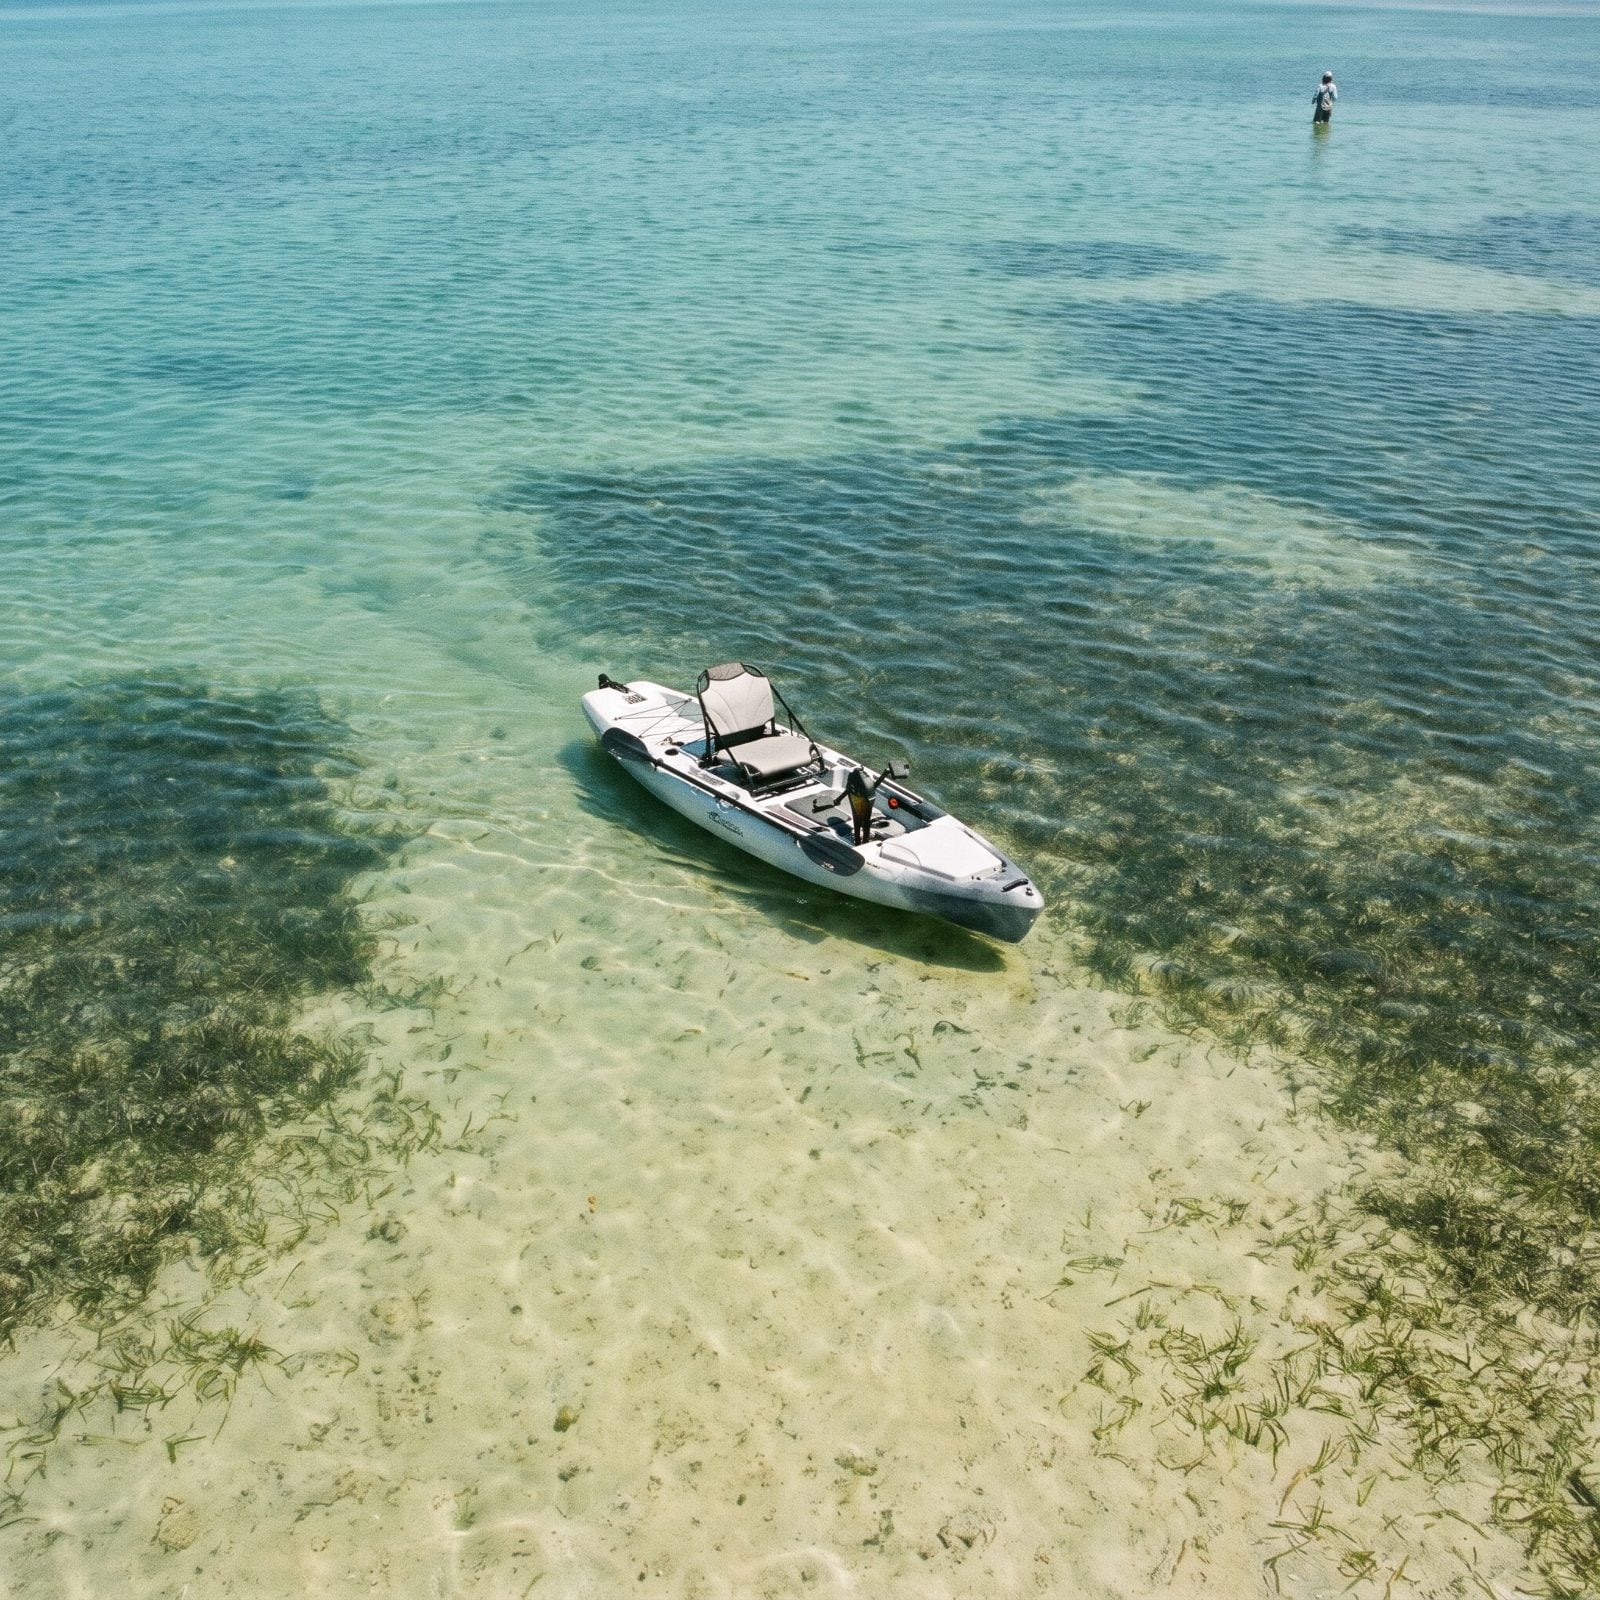
Pedal drives hang below the hull, and skinny water is where they get humbled. A drive that needs 18 inches of depth is dead weight on a flat you could wade across in sneakers.
Find the minimum operating depth on the spec sheet, then be honest about your water. Marsh flats, backwaters, and creek mouths run shallow. Grind the drive across sand and oyster all day and you’ll chew up fins or props and spend good money replacing them.
Smart move: keep a paddle clipped on deck for exactly these stretches. Pedal the open runs, paddle the skinny parts, and nothing meets the bottom at speed.
29. Confirm the Drive Retracts Quickly
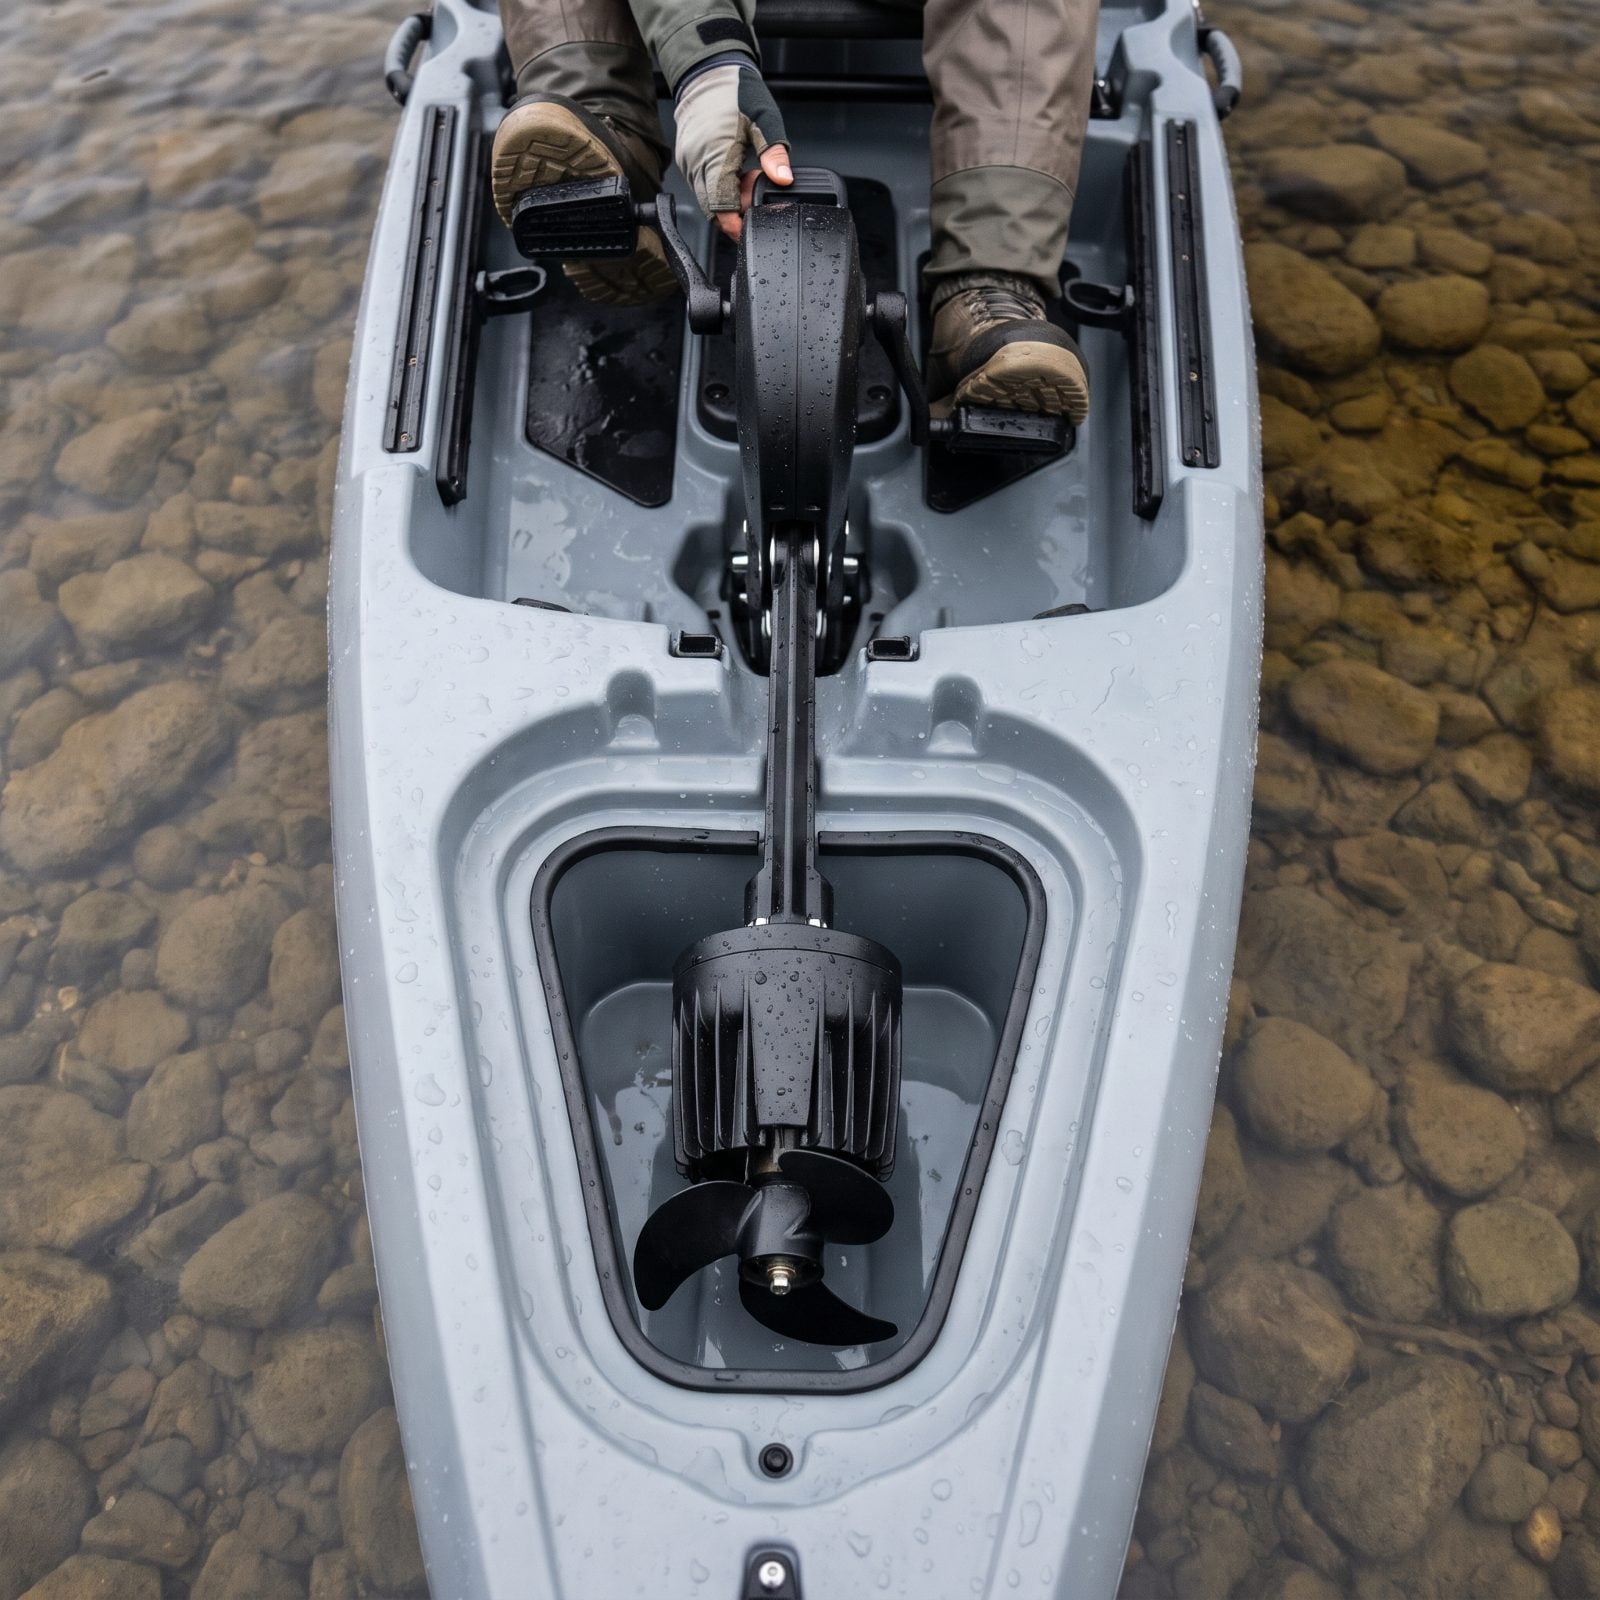
You’re drifting into a rocky shallow and the bottom is rising fast. Can you yank that drive up in two seconds, or do you have to stop, reach, and fumble with a pin?
Test the retract dry, at the shop. The best drives pull up or kick up in a hurry, letting you float over hazards clean. The worst make you lean over and wrestle — and leaning over the gunwale is precisely how a rod ends up on the bottom of the lake.
It matters at the ramp too. A quick-stowing drive lets you pedal right up to the sand, lift, and step out, instead of stranding yourself in six inches of water.
28. Research Replacement Drive Availability
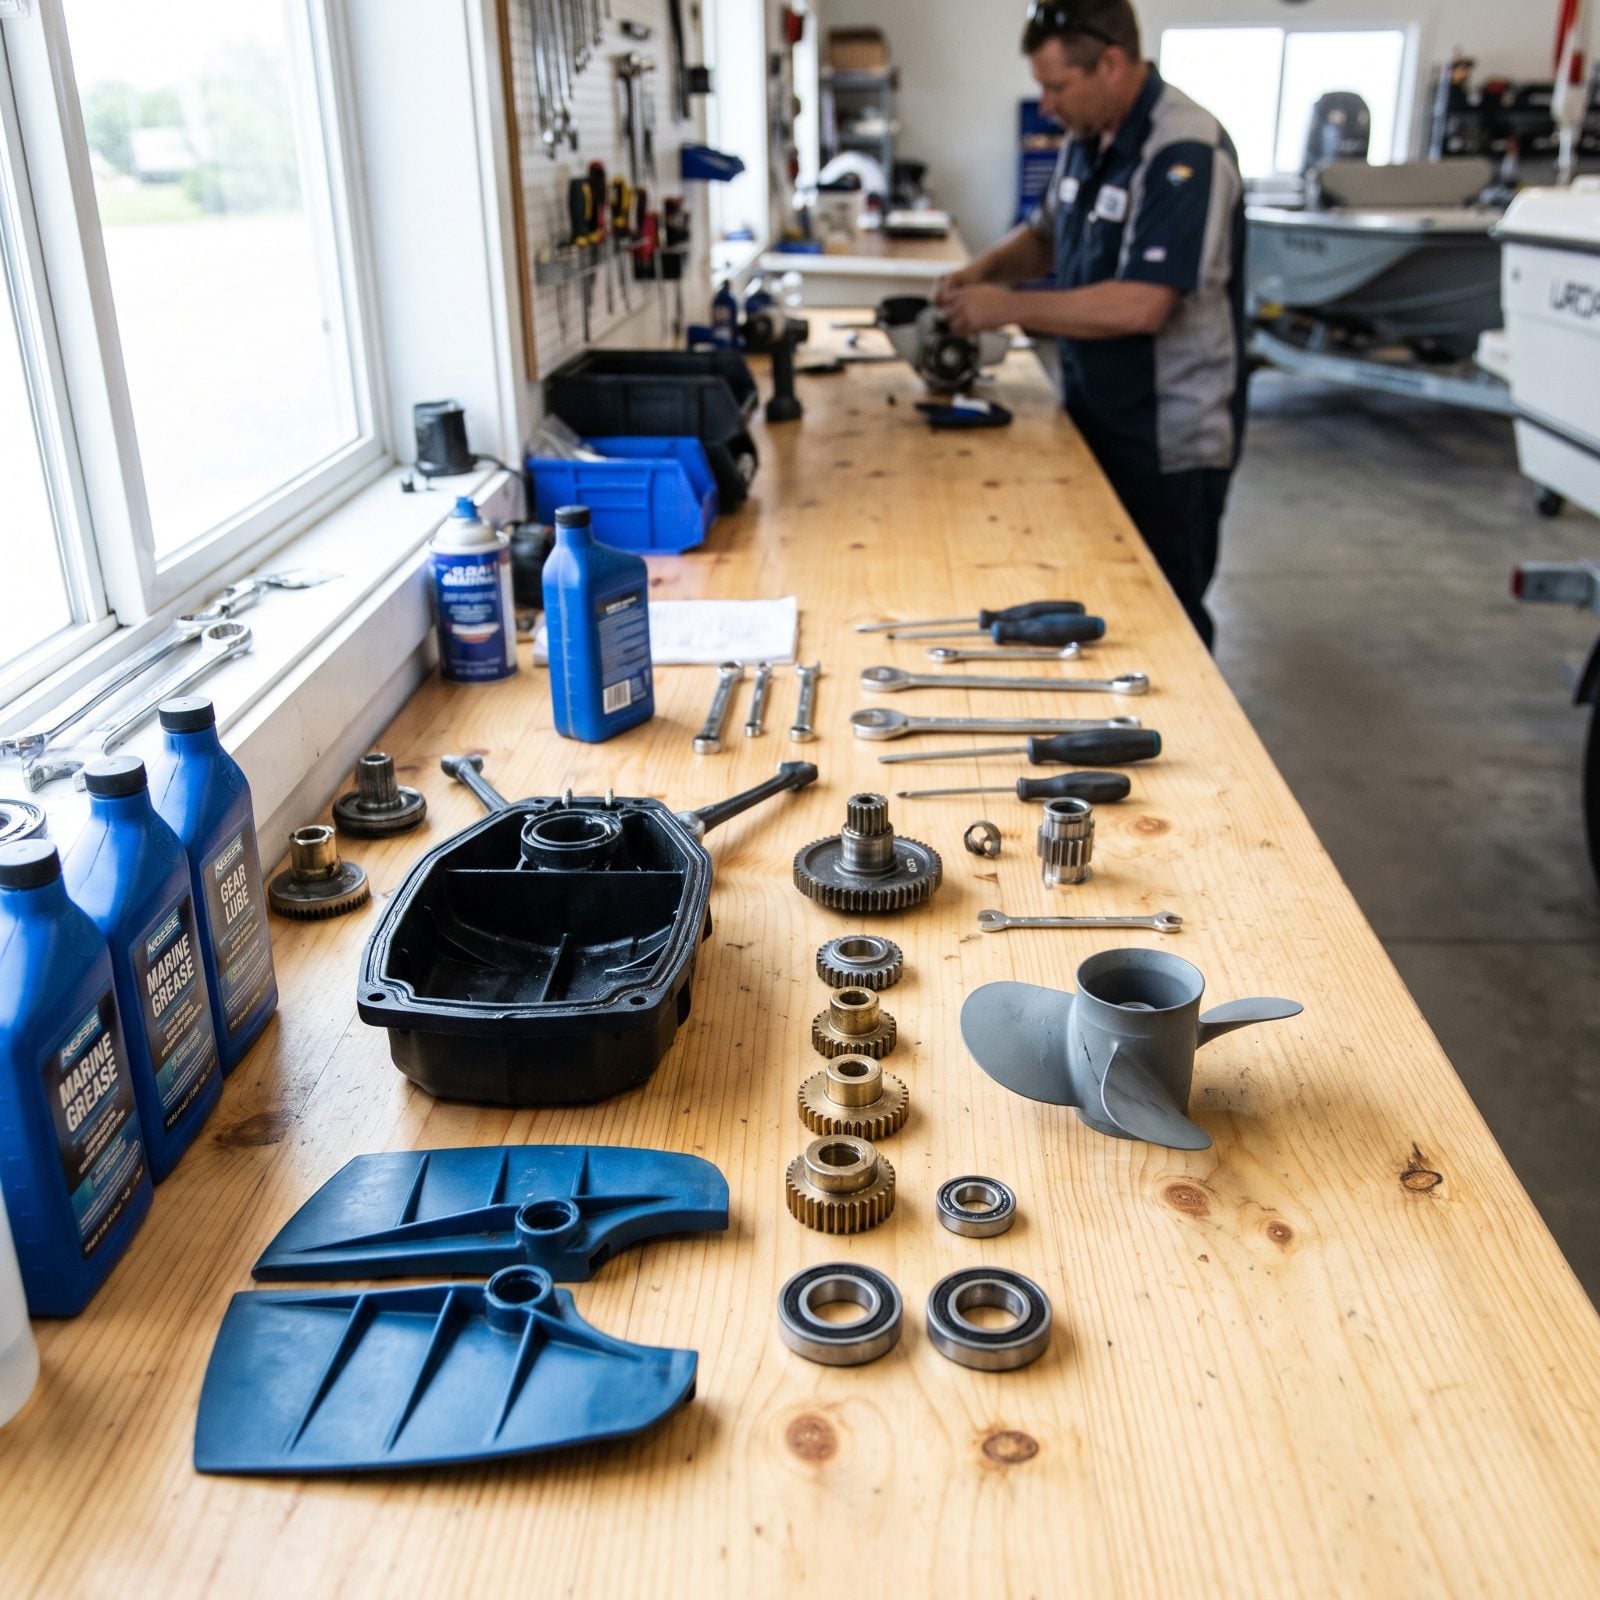
A pedal drive is a machine, and machines break. The real question isn’t if — it’s whether you can get the part when it does.
Before you buy, look up what replacement fins, props, gears, and seals cost, and whether they ship in days or sit back-ordered for months. A niche or discontinued drive can turn a fine boat into an expensive paperweight.
Established brands with a dealer network and stocked parts earn their premium here. Stranded out on the water with a dead drive, you’ve got a long, grumpy paddle home.
27. Check Motor-Mount Compatibility
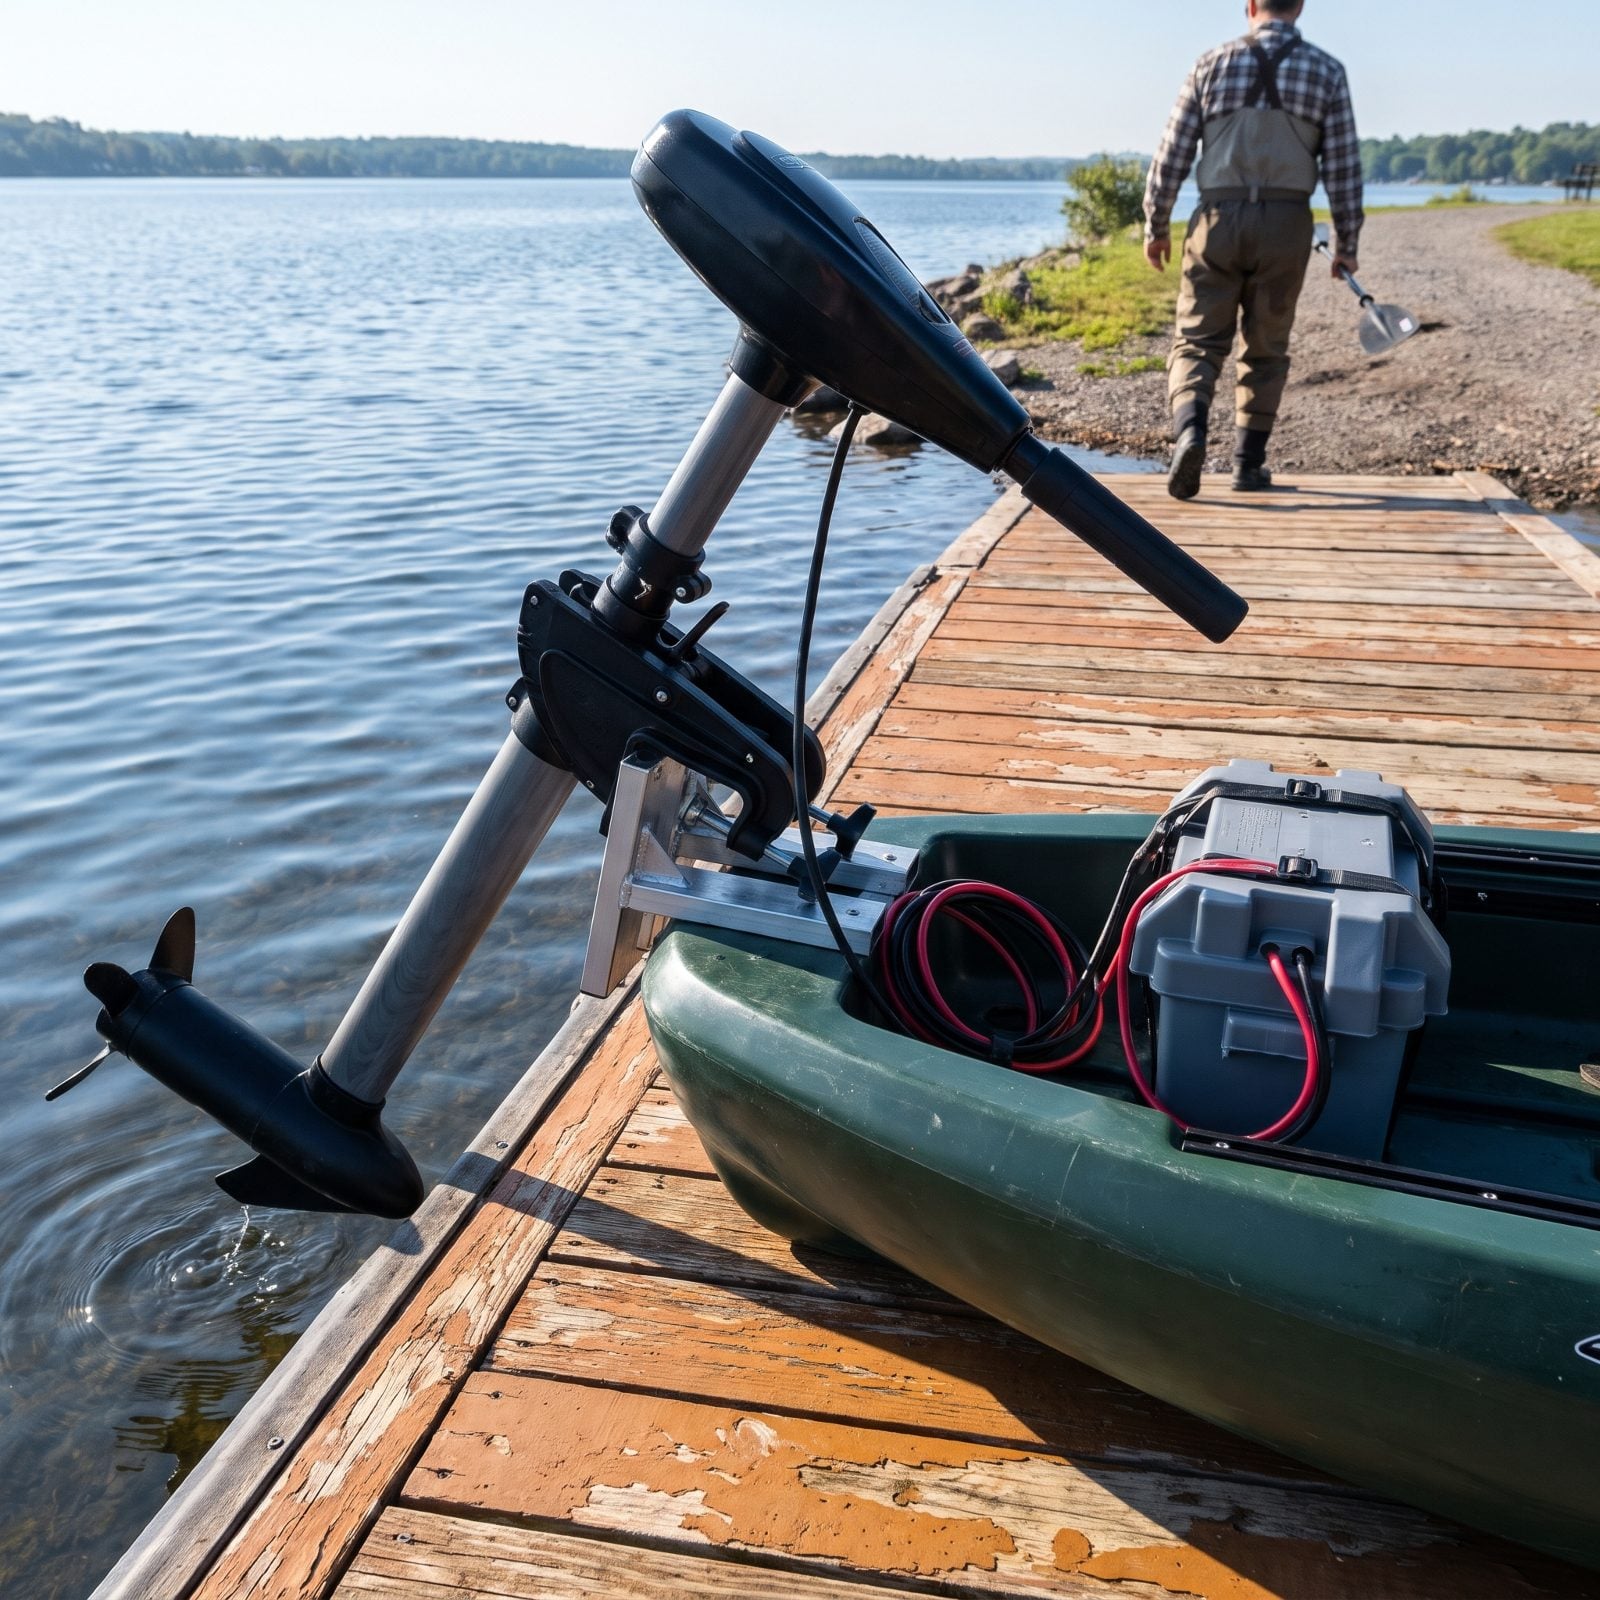
Even if you’re not going electric today, think about tomorrow. More anglers are bolting small trolling motors onto kayaks every season, and the boat you pick will either welcome that or fight it tooth and nail.
Look for factory motor mounts, molded transom pads, or published compatibility with a drive-in-place motor system. A hull built for it already has the attachment points, the stability, and often the wiring channels waiting.
Weigh capacity, too. A motor, a battery, and a full tackle load pile on fast, and you don’t want to be riding the boat’s limit before your lunch cooler even goes in. Buy a motor-ready hull now and you spare yourself a whole second kayak purchase later, when the electric bug bites — and it usually does.
26. Budget for Battery Weight and Cost
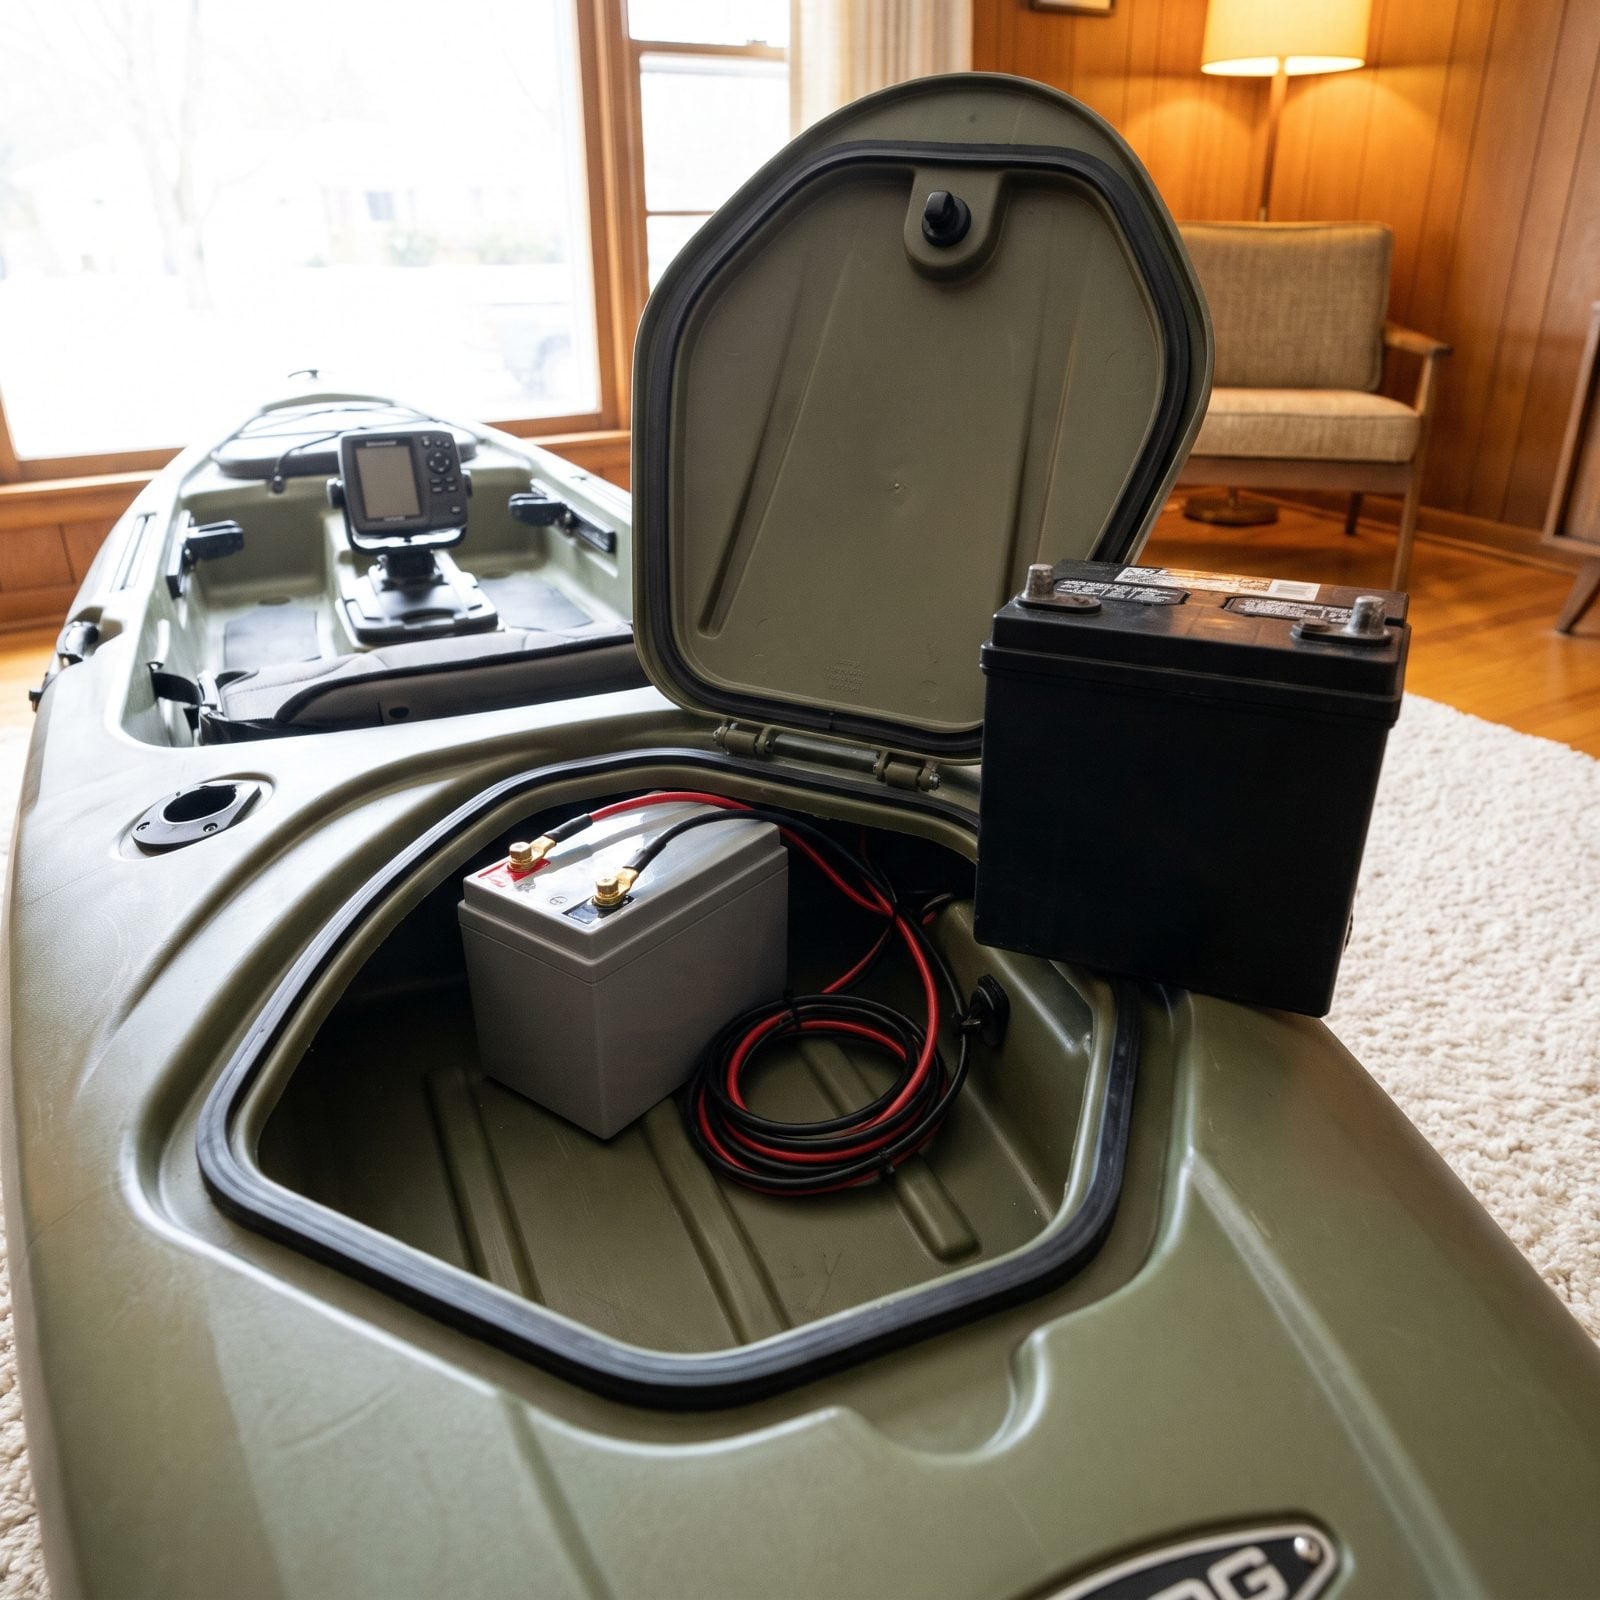
The sticker price on the kayak is only half the story. A pedal or motorized fishing kayak that runs electronics, a trolling motor, or a powered drive needs a battery, and that battery is where plenty of first-time buyers get ambushed. A decent lithium pack can cost as much as a cheap kayak all by itself, which is the kind of surprise nobody wants after they’ve already handed over the credit card.
Weigh the whole loaded rig in your head before you buy. Lead-acid adds real pounds, and you’ll feel every one of them the second you’re dragging the hull up a muddy bank alone at the end of a long day. Lithium costs more up front but saves your back and lasts longer.
Ask what amp-hours you actually need for a full day. A fish finder sips power. A trolling motor drinks it.
25. Test the Seat for Long Sessions
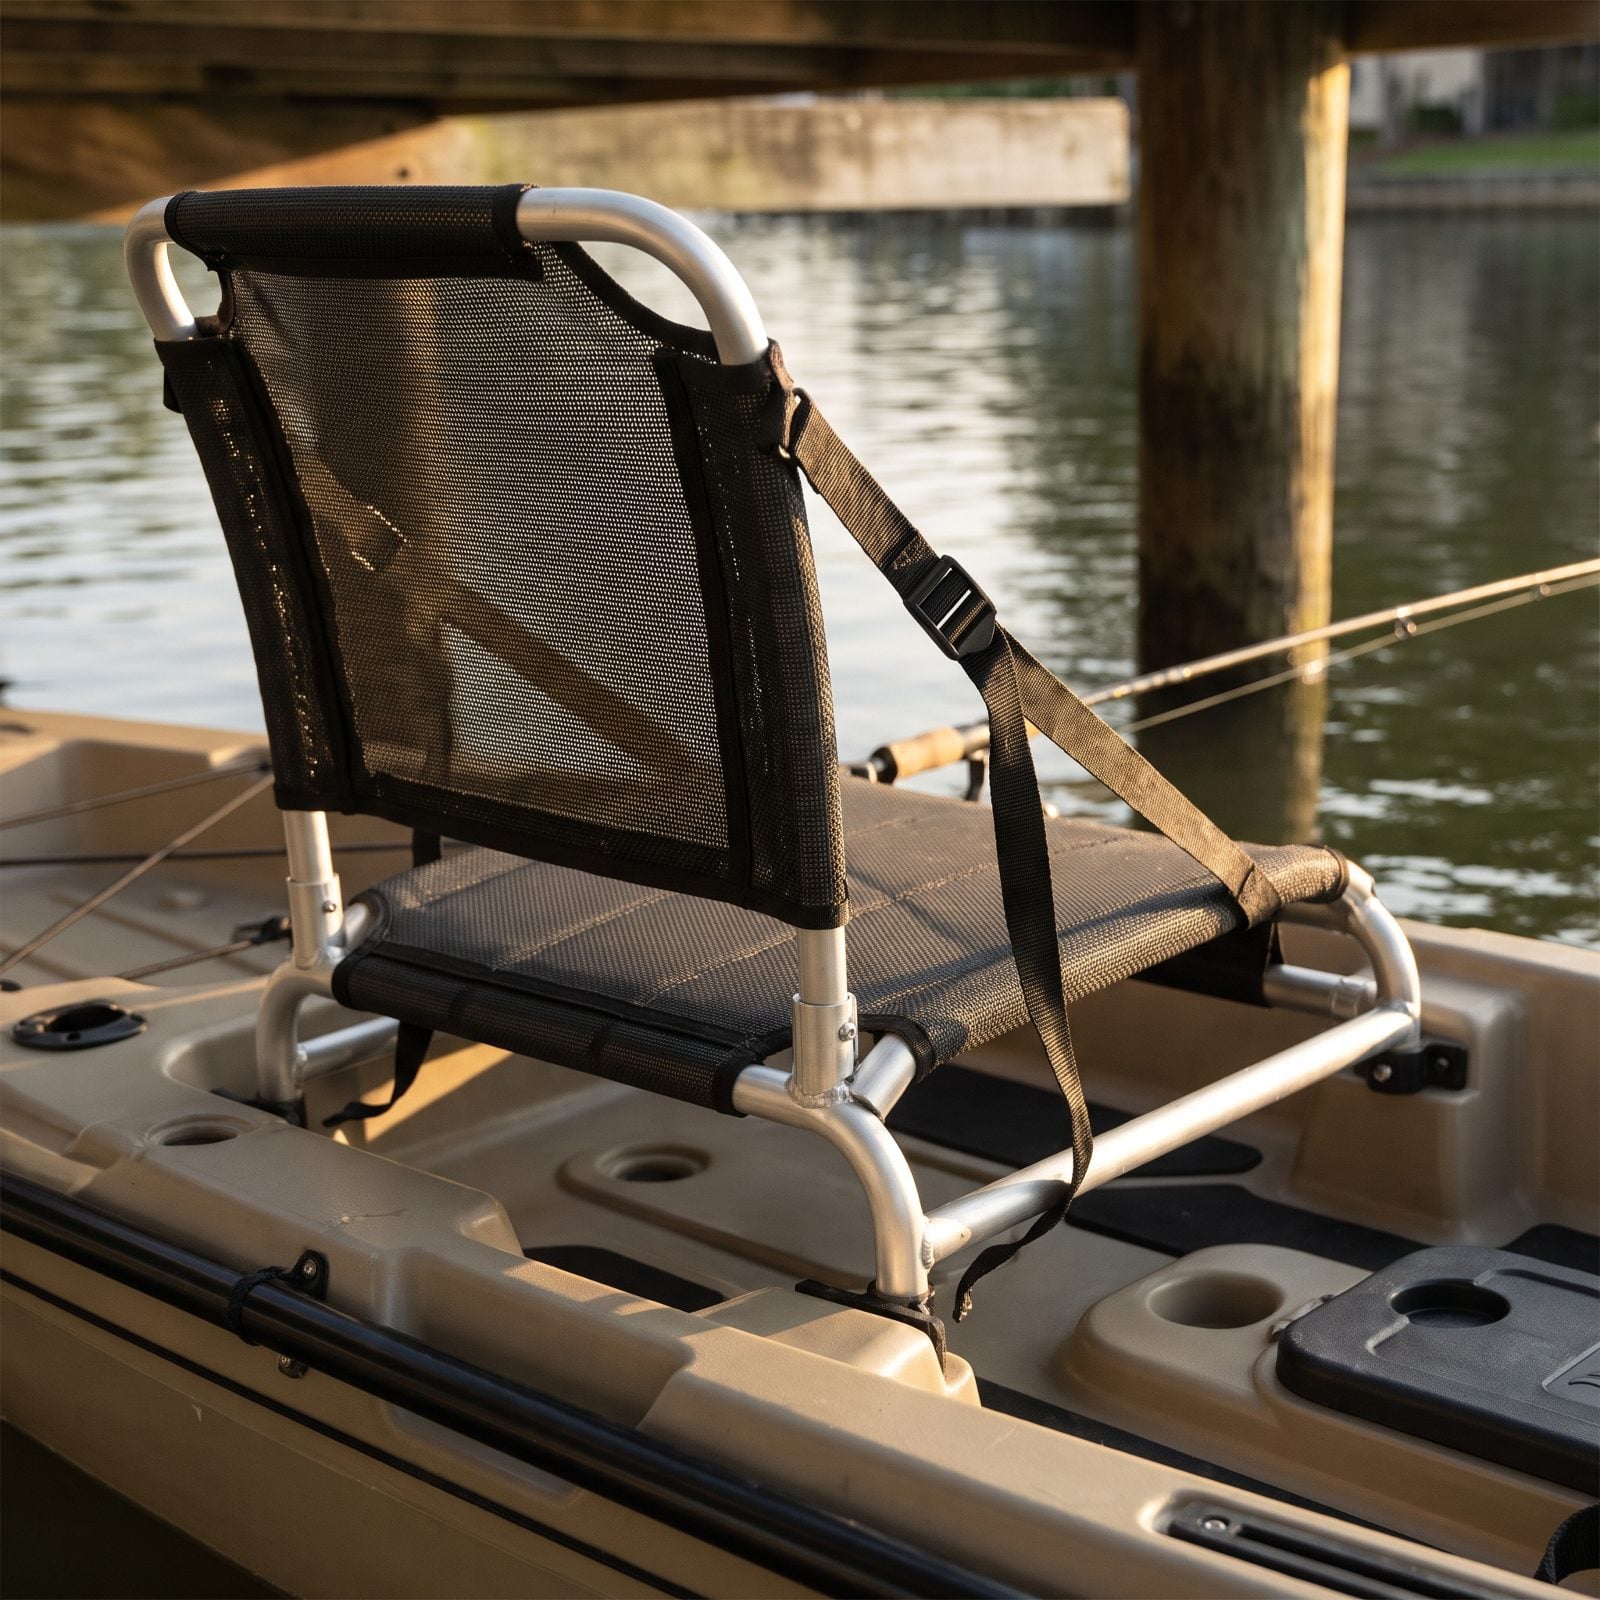
You’ll be in this seat for hours, so sit in it like you mean it. A ten-second showroom perch tells you nothing. Plant yourself and stay there. Lean back, shift your weight, slump the way you actually slump when the bite goes quiet and you’re just watching the water.
Look for a seat that holds your lower back without collapsing. Mesh breathes and dries fast, which matters on a hot afternoon when a padded foam seat turns into a sponge. And check that the frame doesn’t dig into the back of your thighs.
The detail most people miss? Adjustability. A seat you can slide fore and aft and recline changes everything about how your legs and back feel at hour four.
24. Check Seat Height Above the Deck
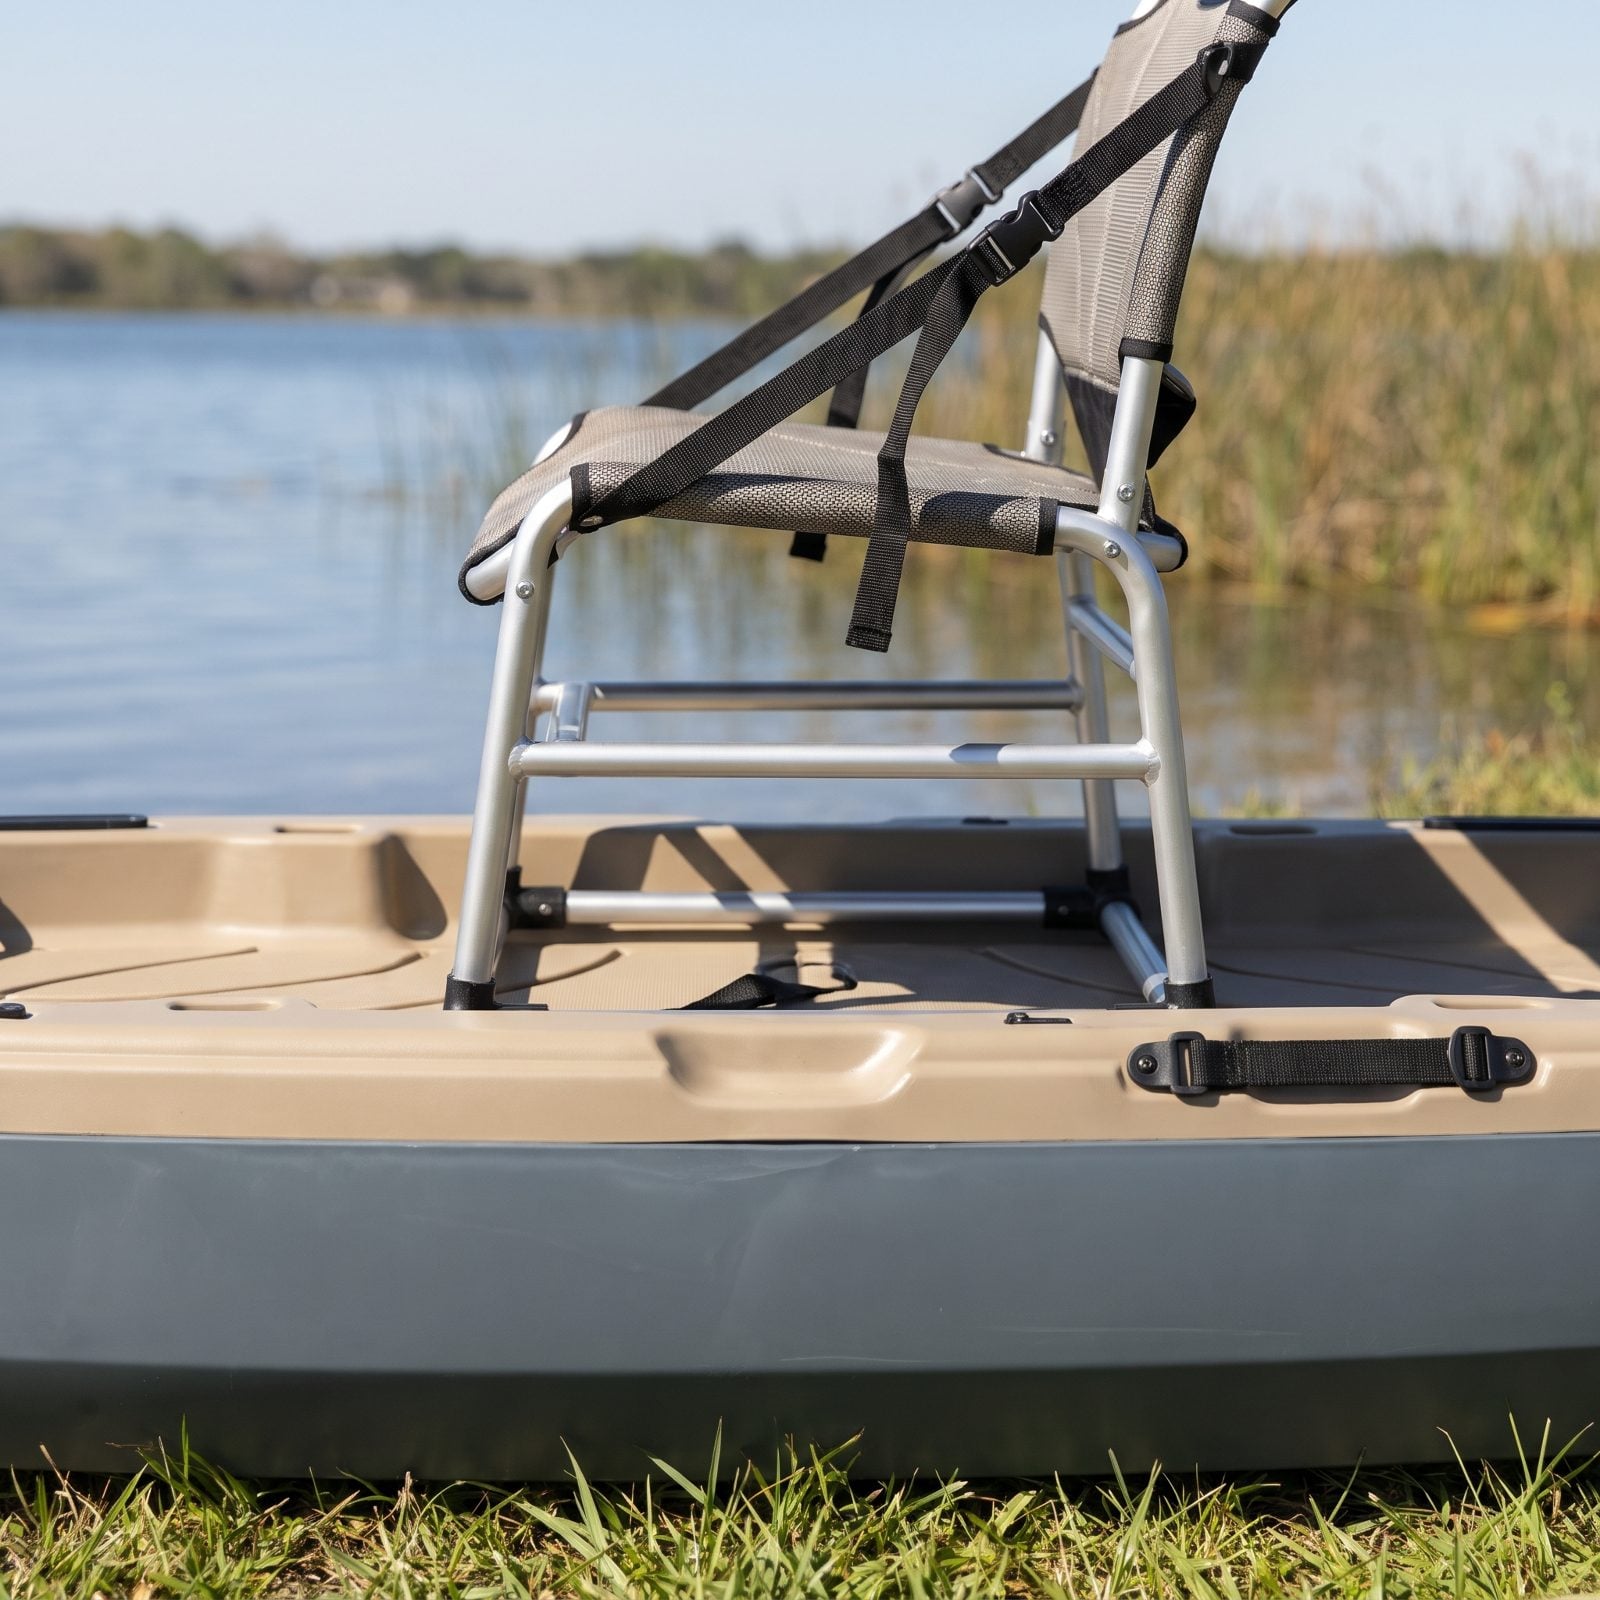
Seat height is the quiet decision that shapes your whole day on the water. Sit low and you ride drier, steadier, and better in wind. Sit high and you spot fish sooner, cast farther, and climb in and out without the knee-grinding struggle that comes with a certain stage of life.
Most good fishing kayaks offer two positions. Check that the high setting doesn’t feel tippy and the low one doesn’t bury your knees under your chin.
The right height is the one that lets you stand up without a grunt and sit down without a wobble.
I spent years riding too low out of caution and missed half the fish I could’ve spotted. Lesson learned.
23. Inspect Legroom and Foot-Brace Range
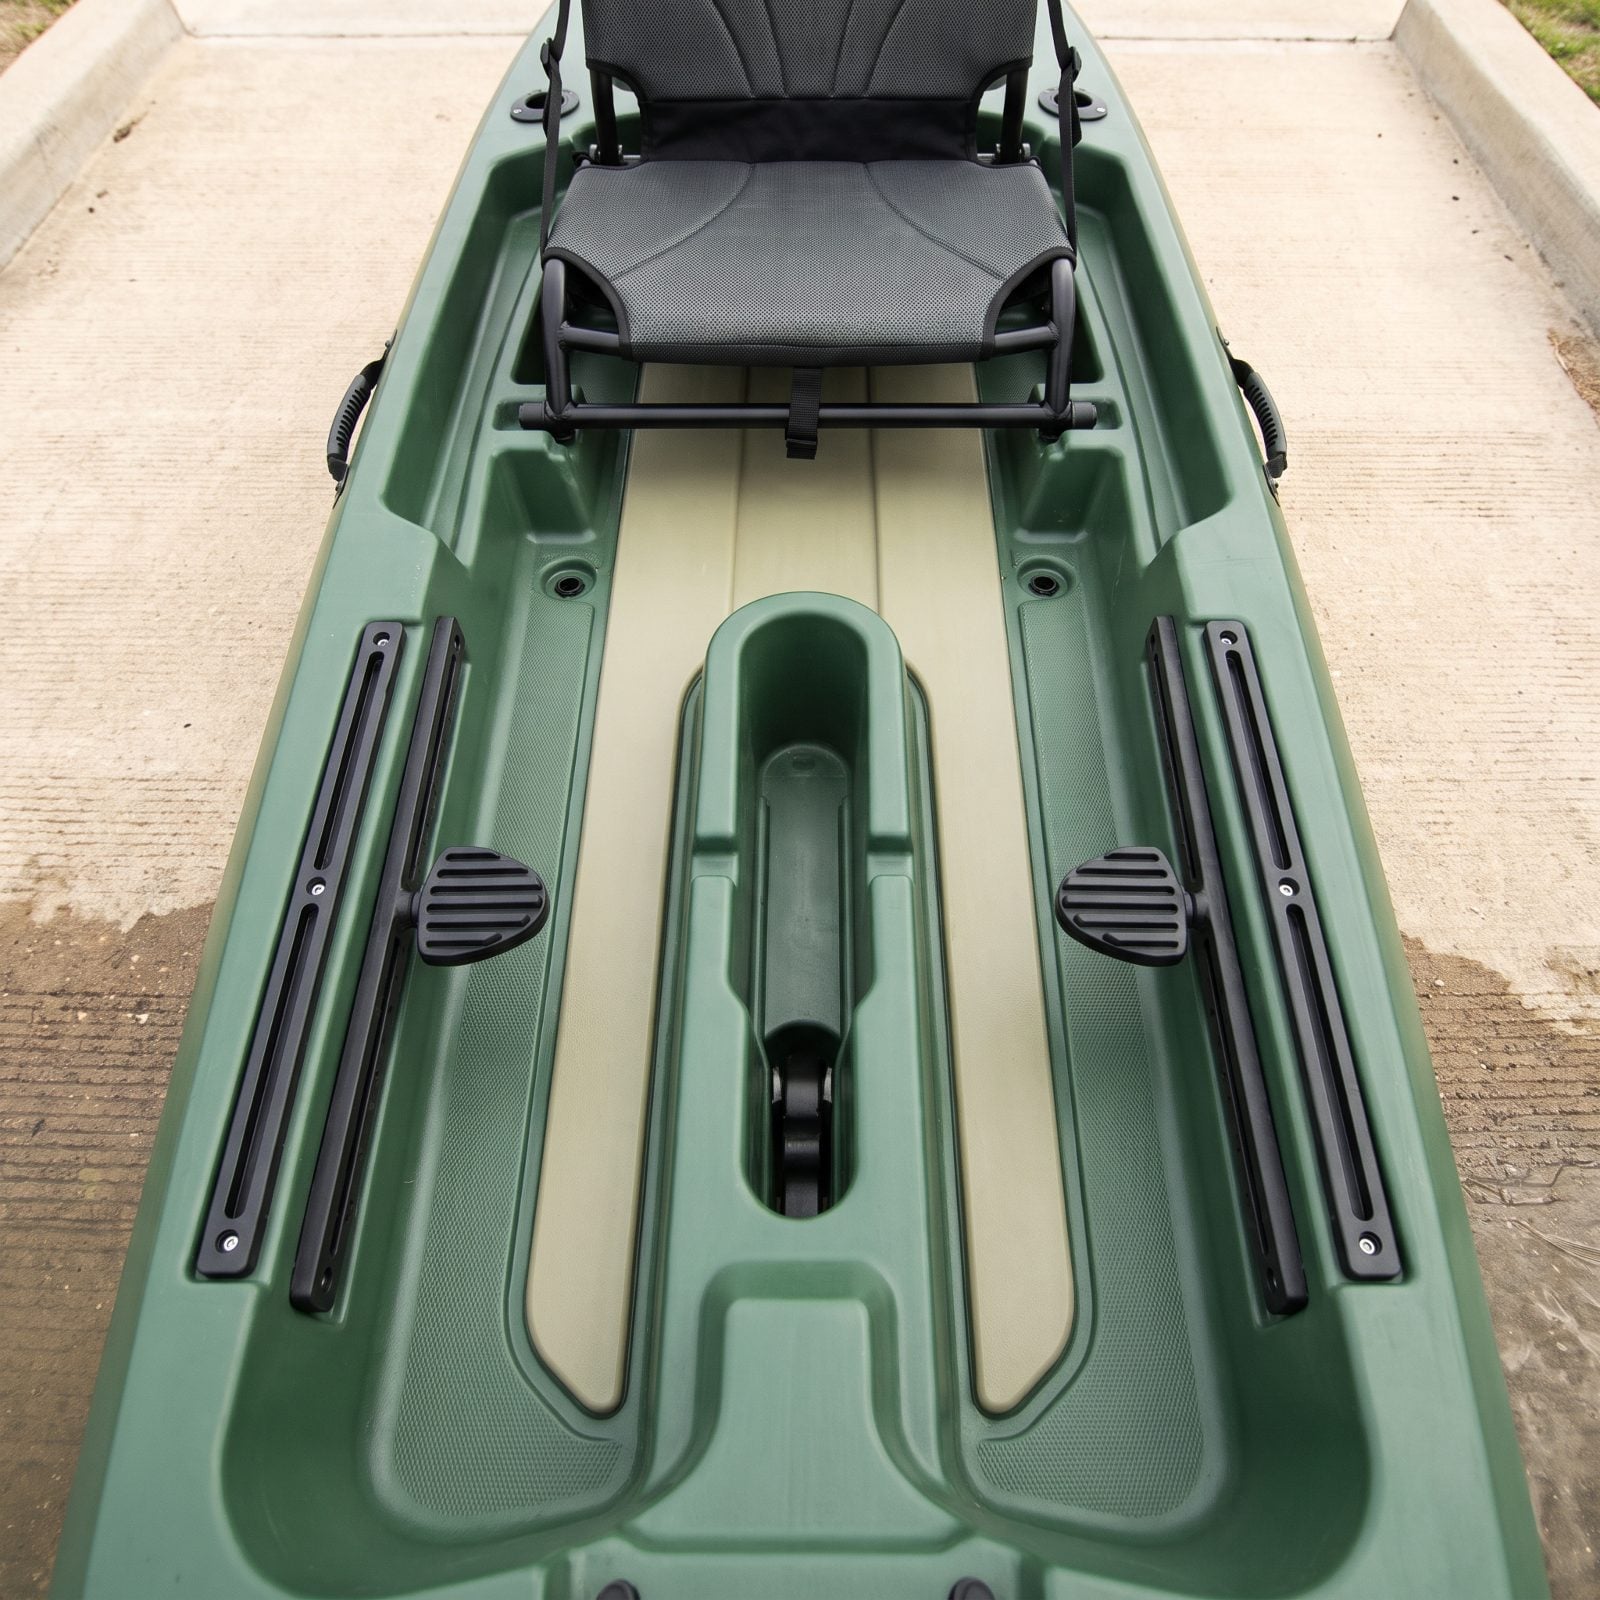
Tall anglers, listen up. A kayak built for a five-foot-eight frame can fold a six-foot-two angler into a lawn chair, legs cramped, feet going numb. Numb legs make standing to cast genuinely dangerous.
Sit in the seat and extend your legs to the foot braces. They should let you push off firmly with a slight bend in the knee, not a locked straight leg and not a tucked crouch. Slide the braces through their full range and confirm you’ve got room left over, because your thickest boots in cold water eat an inch you didn’t know you needed.
Pedal drives change the math too. Make sure your knees clear the drive at full extension.
22. Check Deck Traction When Wet
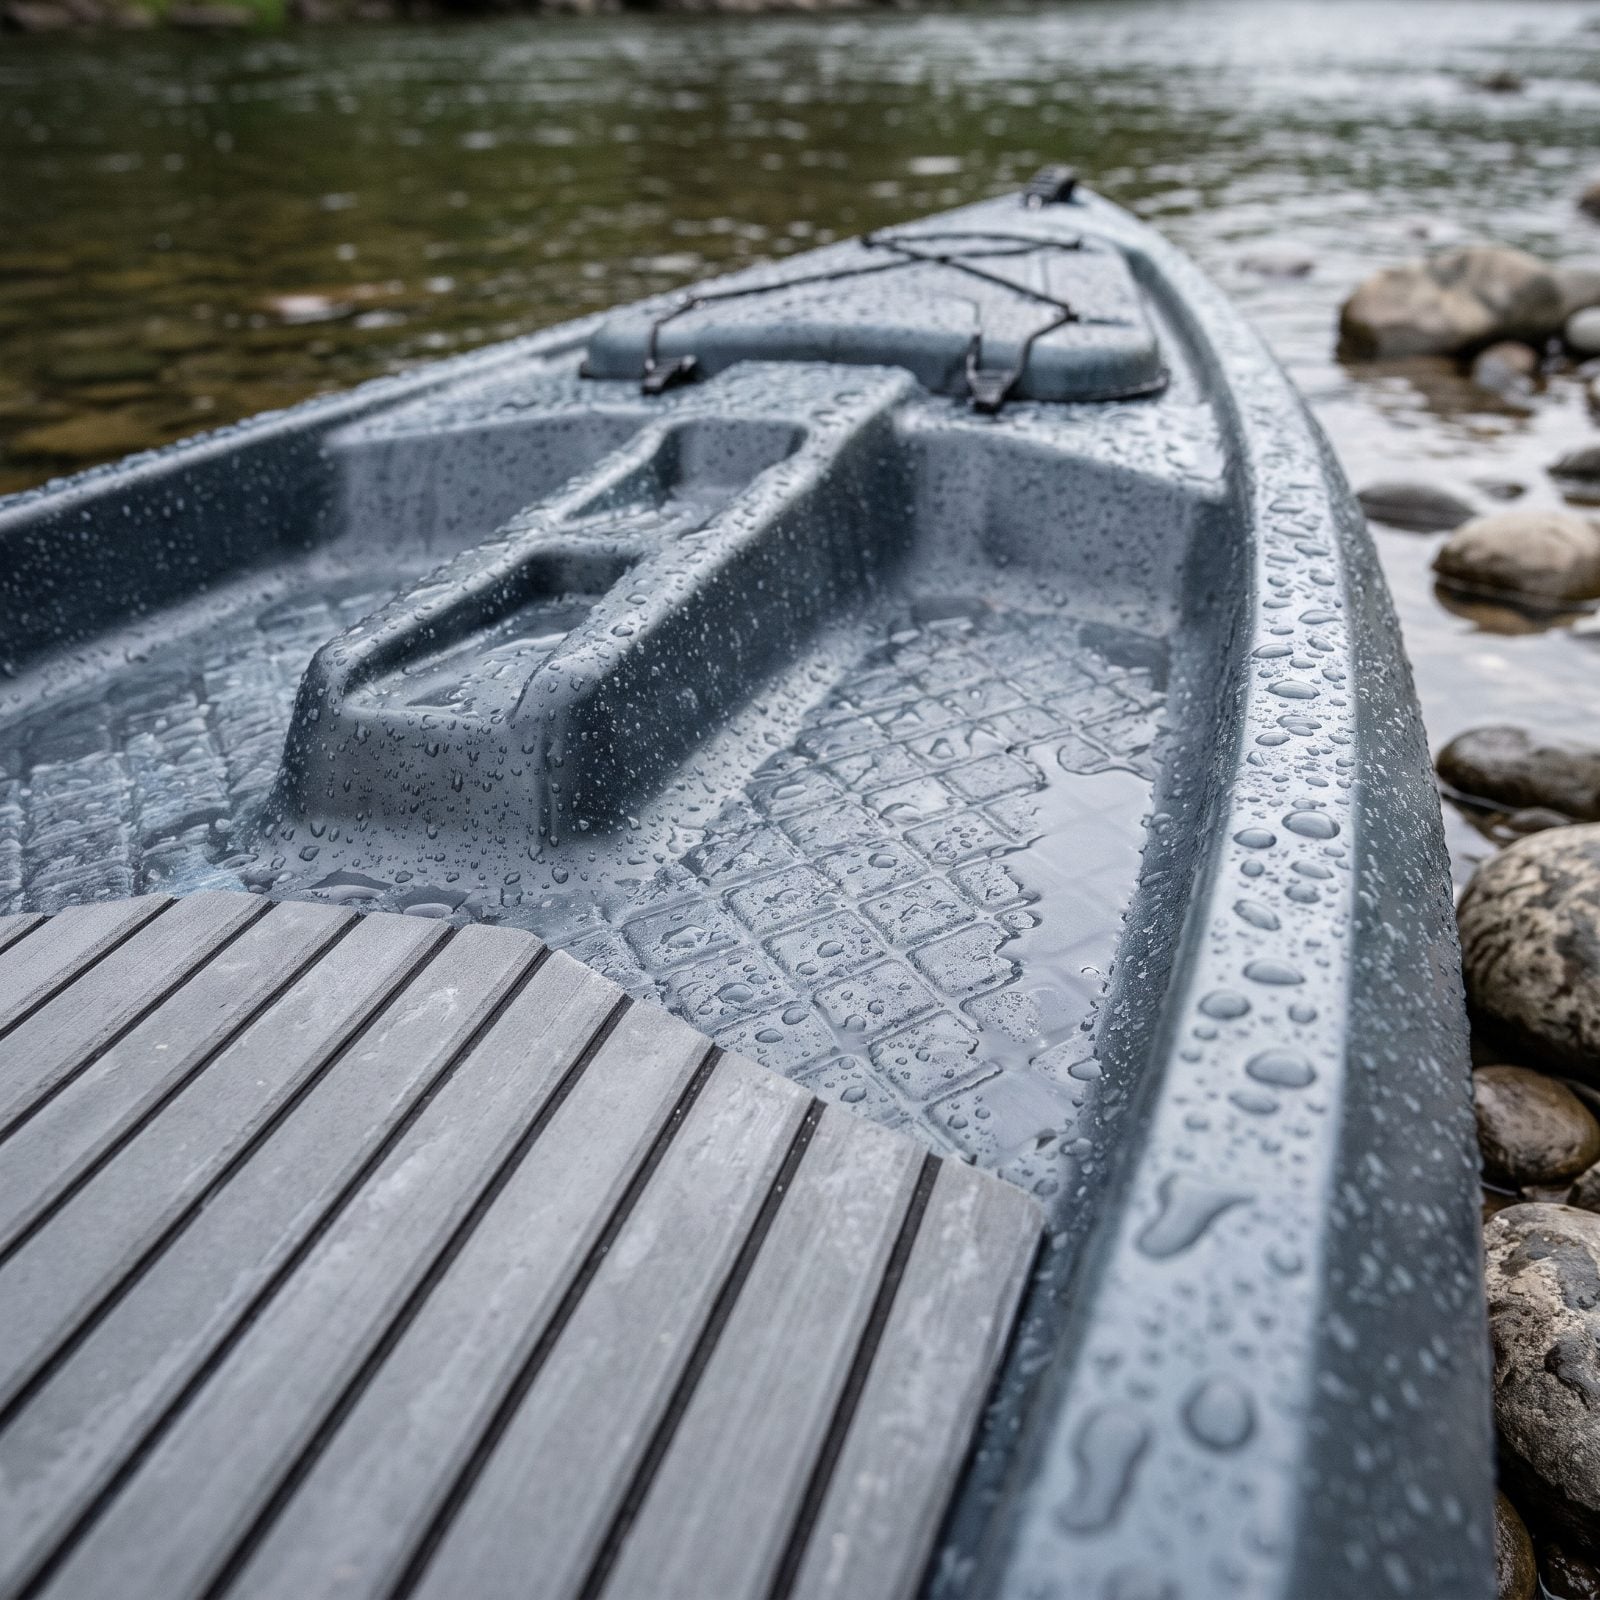
Every kayak deck looks grippy dry in a showroom. Wet is the only test that counts.
Pour a little water on the standing area if the shop lets you, or at the very least run your palm firmly across it and feel for real texture. Molded diamond grip helps. But the gold standard is EVA foam deck padding, the same stuff you’ll find on a paddleboard, which grips wet, treats bare feet kindly, and doesn’t turn scalding in the sun.
21. Look for Uncluttered Standing Space
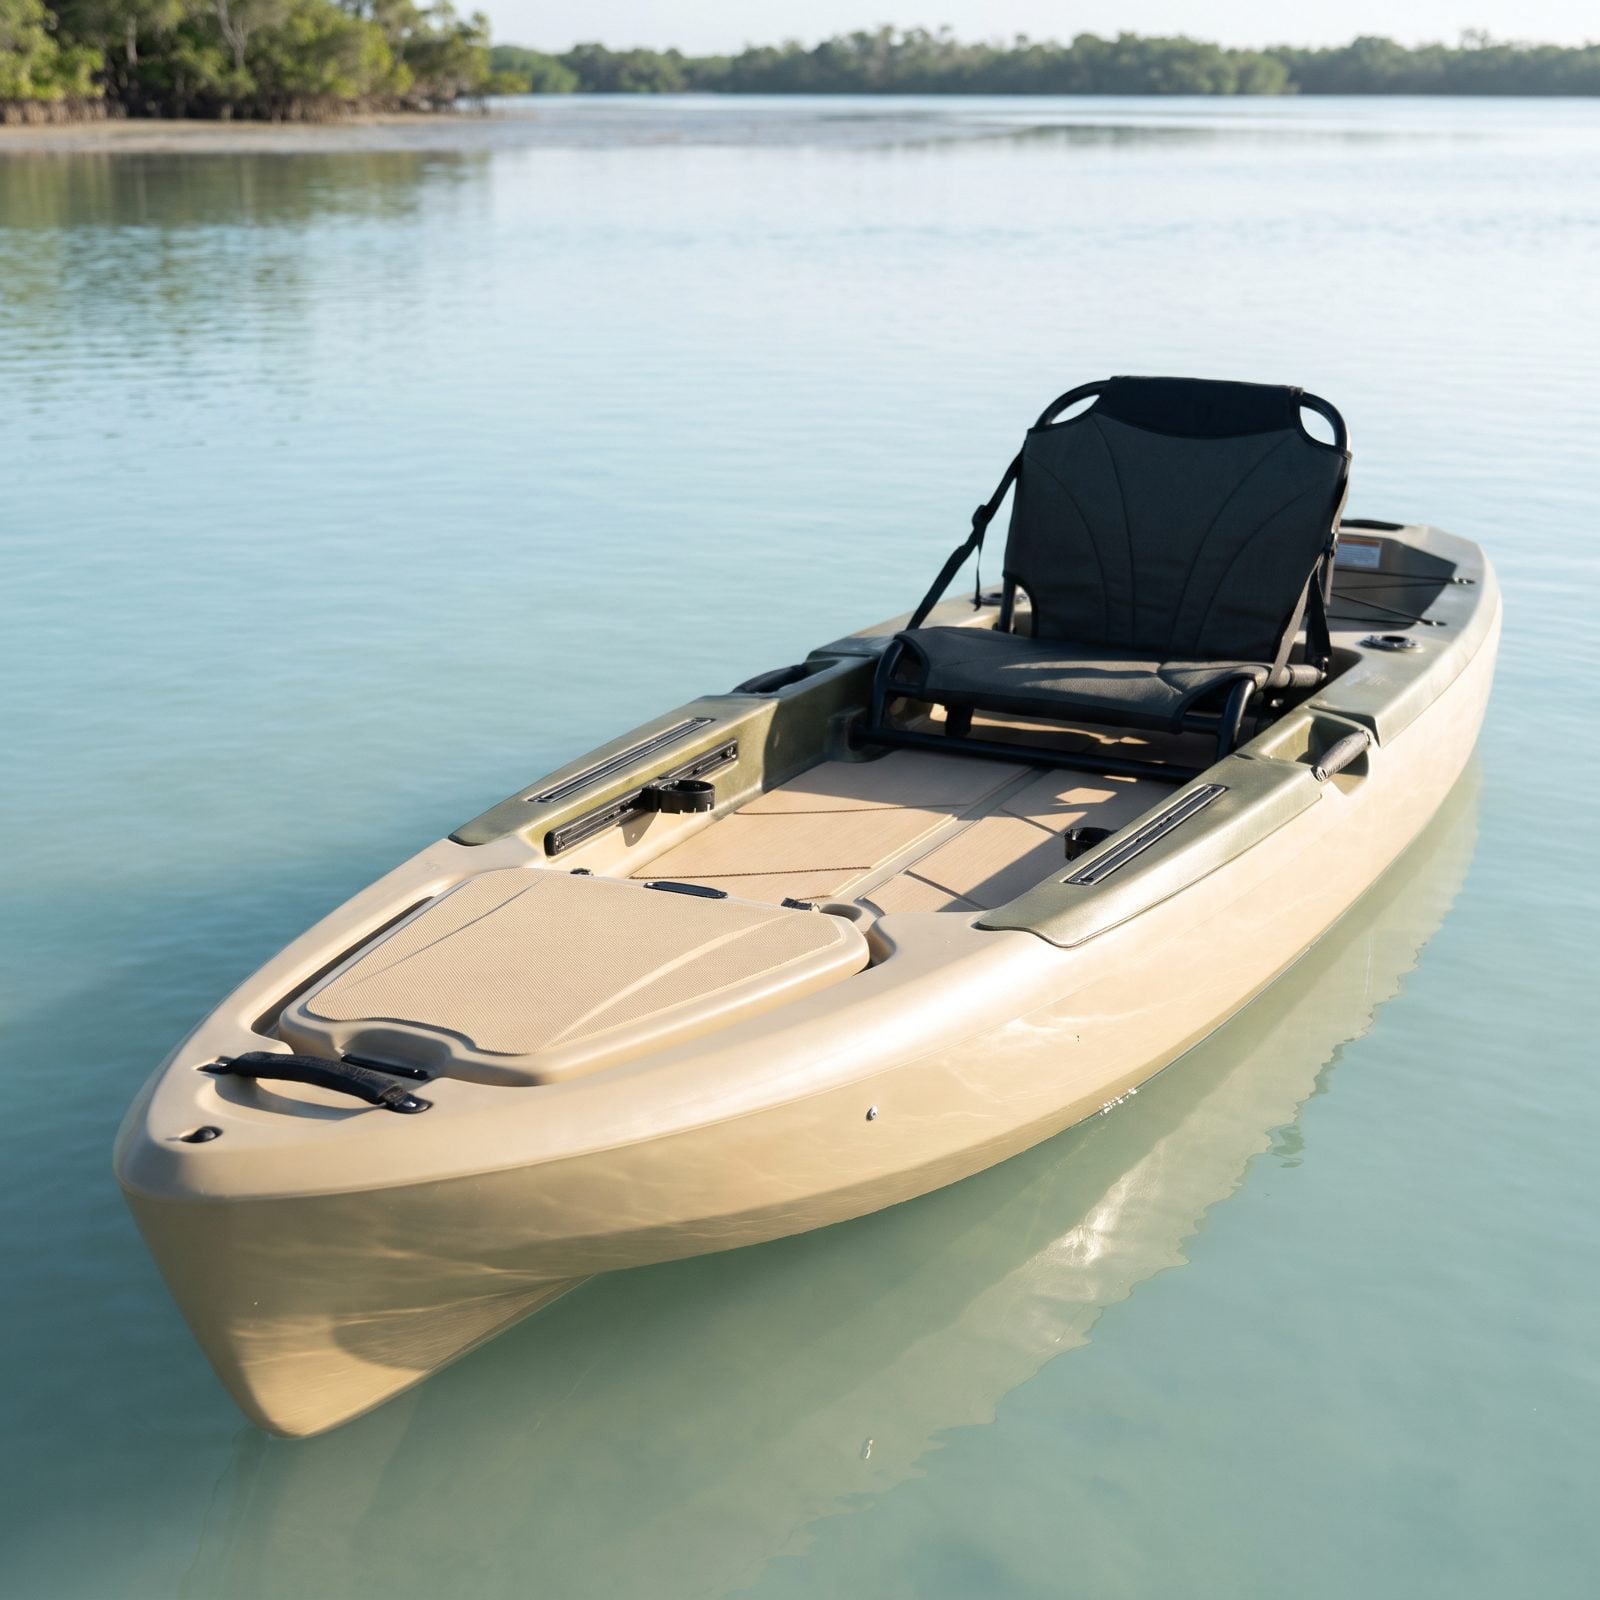
A flat deck means nothing if you can’t actually stand on it. Plenty of kayaks advertise a standing platform that’s really just a patch of floor hemmed in by rod holders, a tackle crate, and a drive well all fighting for the same square footage.
Look for a genuinely open, flat zone wide enough to plant both feet shoulder-width and pivot. Stability comes from hull width, and the clear space is what lets you fight a fish on your feet.
Stand in it at the shop. If your toes hit hardware before your heels settle, keep looking. Sight-casting on your feet is one of the real joys of this sport, and a cluttered deck robs you of it.
20. Inspect Scupper Placement and Cockpit Drainage
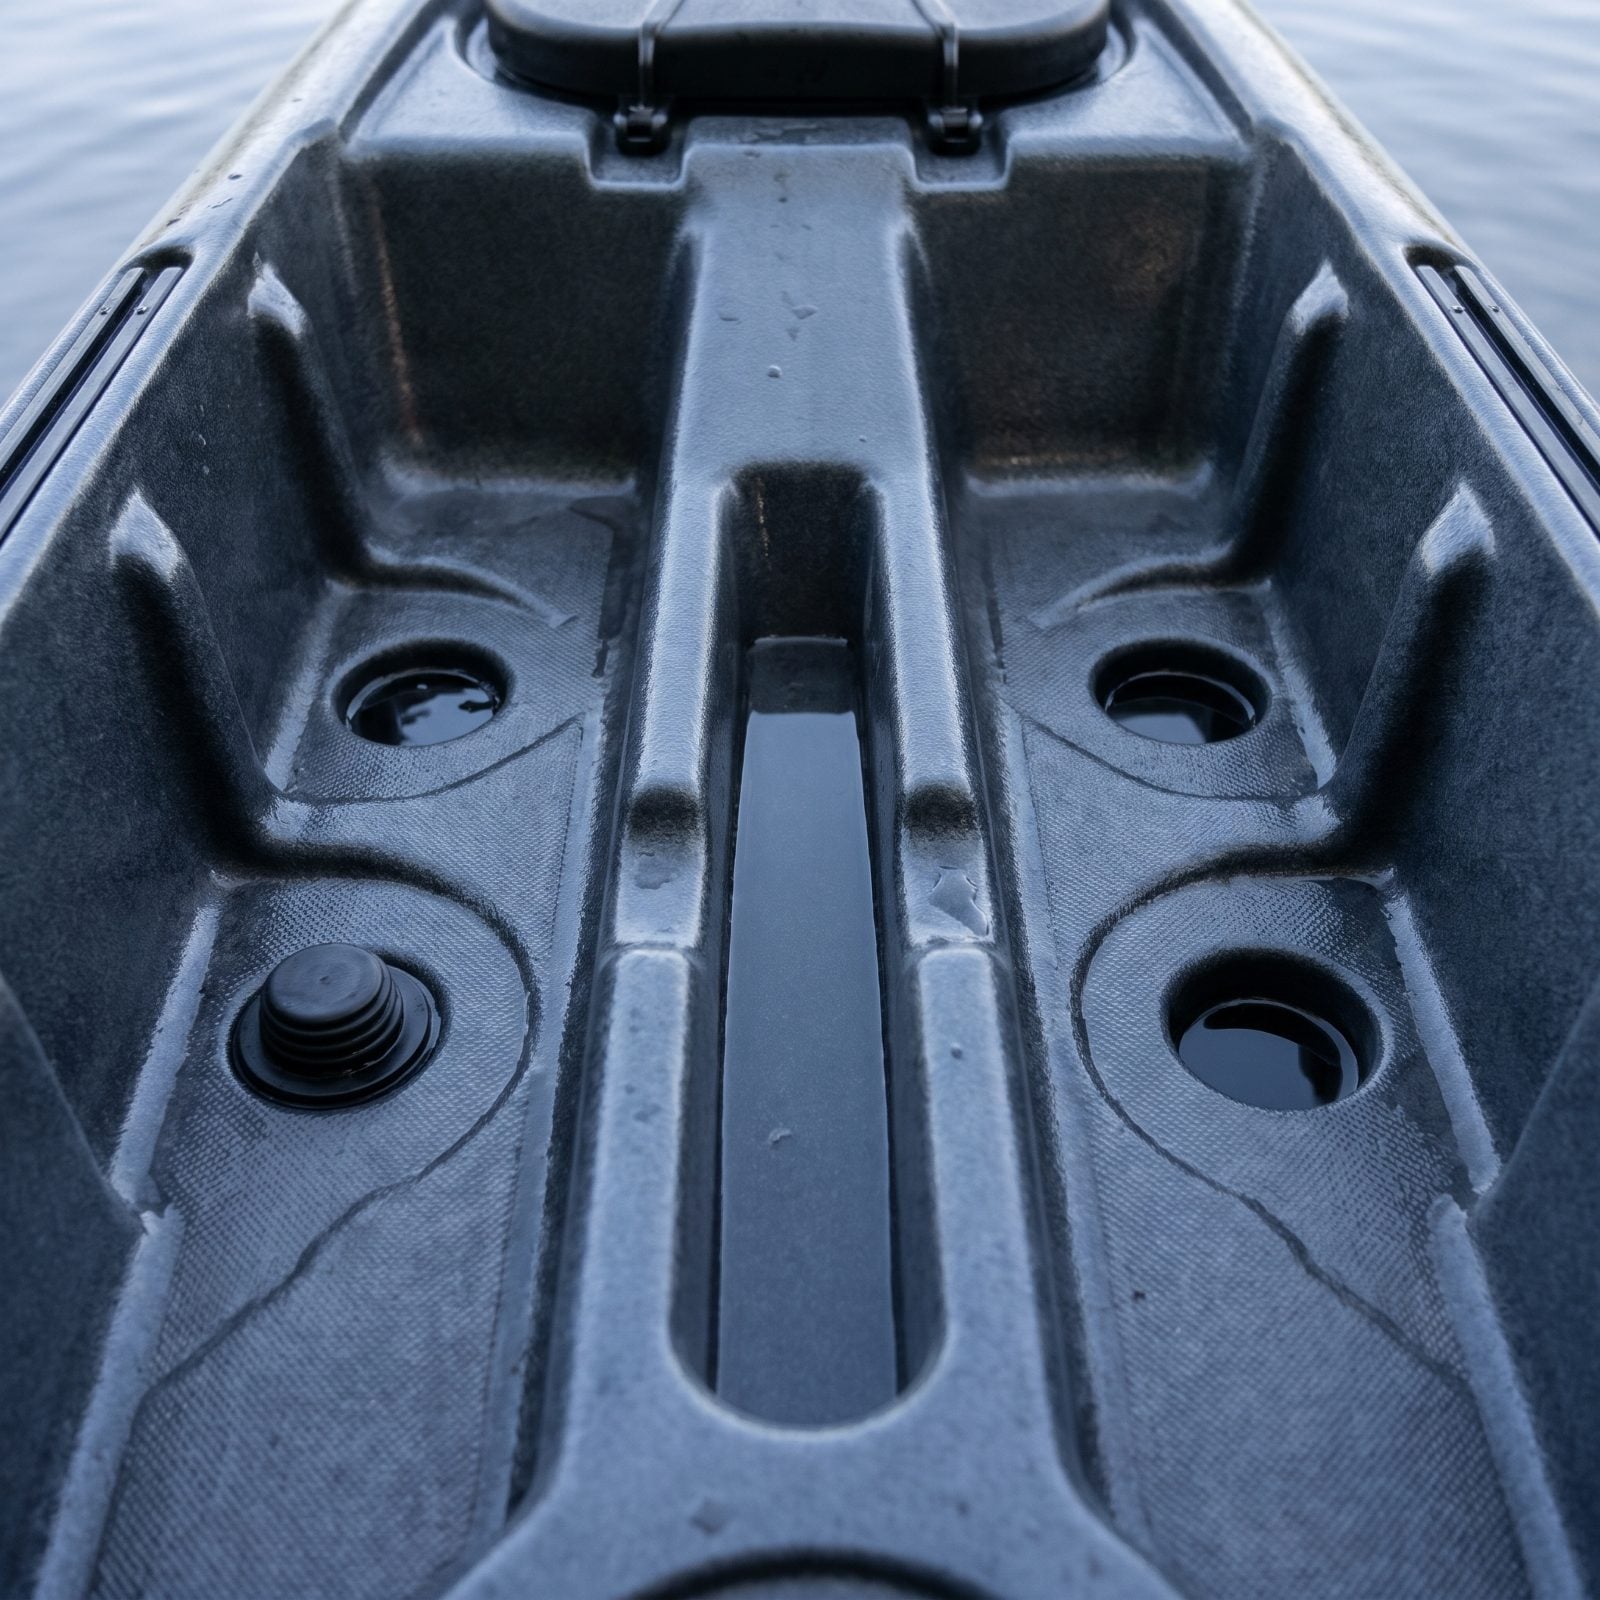
Scuppers are the little holes in the floor that let water drain out instead of pooling around your gear. Smart placement keeps your feet dry and your tackle afloat, while bad placement leaves a puddle sloshing under your seat all day.
Check where the scuppers sit relative to the low points of the deck. Water should run toward them, not away. Count them and see if they come with plugs, because open scuppers in choppy water can let a little water back up through the floor.
Here’s the piece people overlook: some scuppers are sized for installing a transducer or a stake-out pole. A kayak with a dedicated electronics scupper saves you from drilling holes later.
19. Inspect Hatch Seals and Hardware
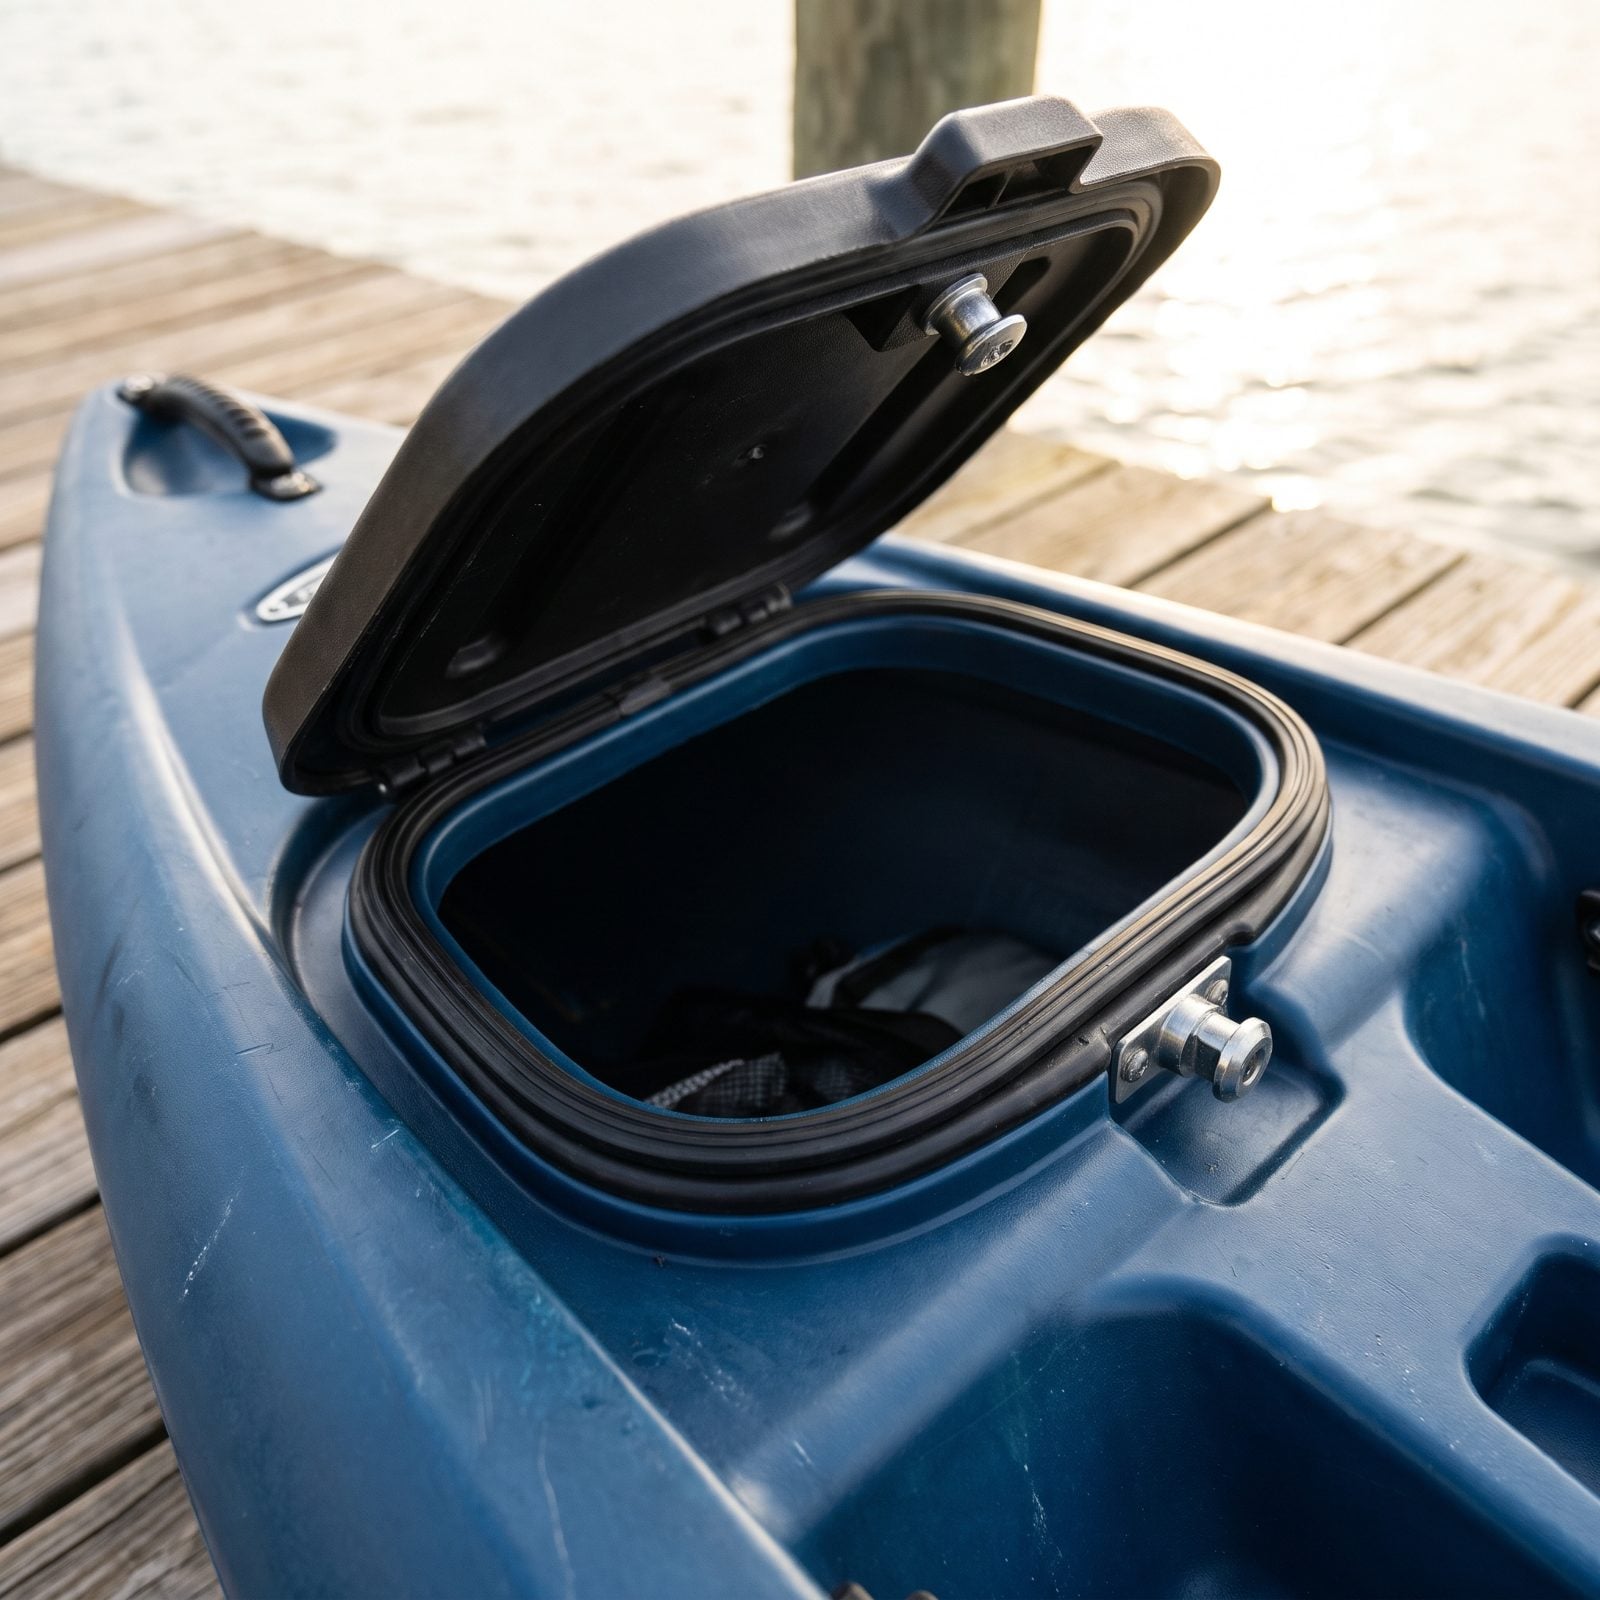
A hatch is only as good as its seal, and a leaky one turns your dry gear into a wet mess the first time a wave slaps the bow.
Open and close it a few times. The lid should seat firmly against a continuous rubber gasket, not slap down loose. Press around the rim and feel for gaps. Wiggle the latch and look for cheap plastic that’ll crack in two cold winters.
Check the hinge too. A hatch that only lifts off entirely is a hatch you’ll eventually lose on the water.
18. Look for Protected Horizontal Rod Storage
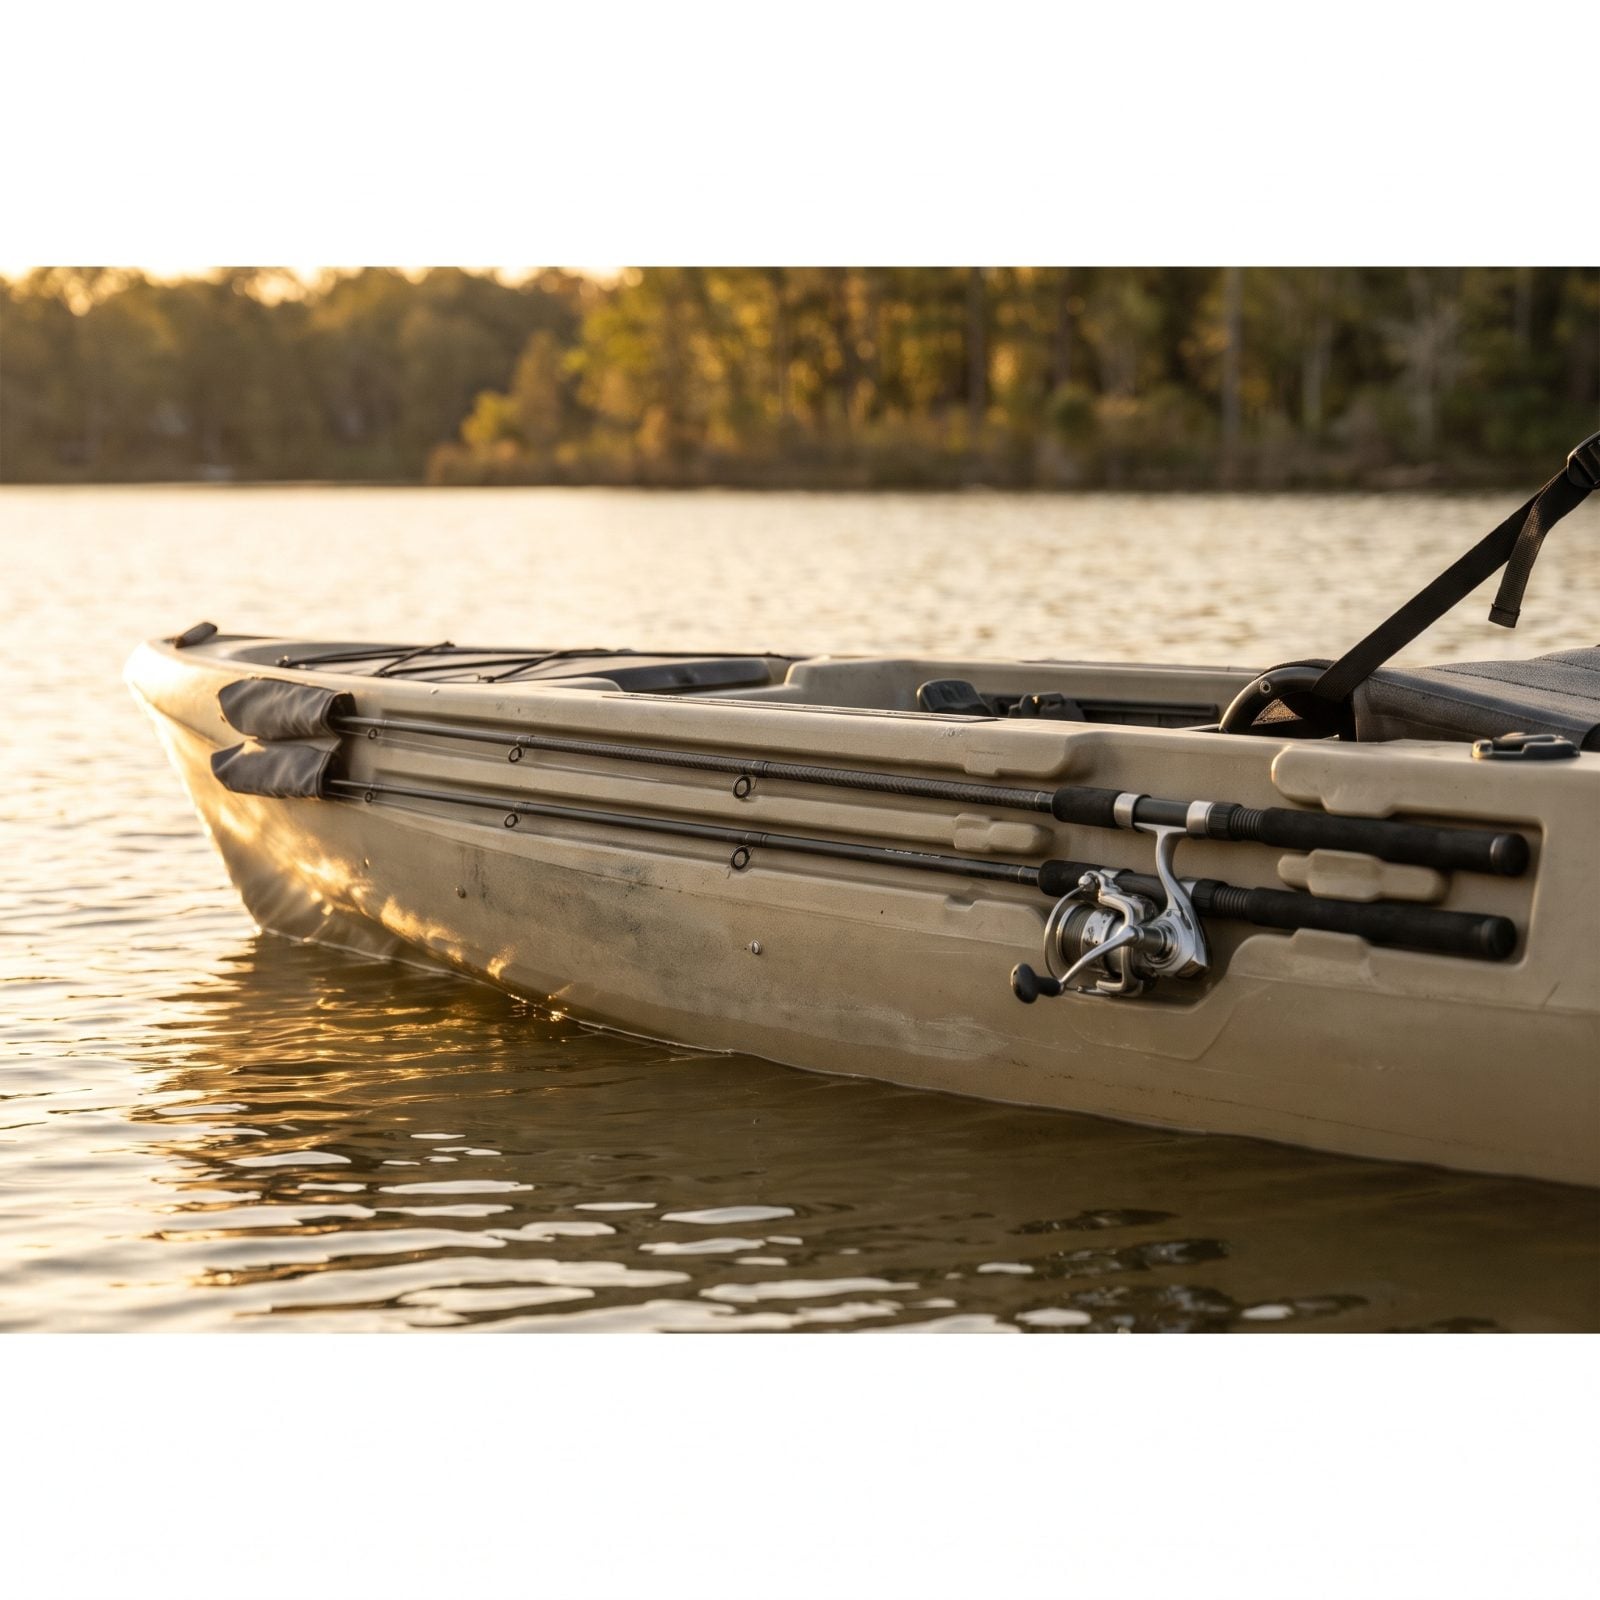
Flush-mount rod holders behind the seat are fine for trolling. But when you’re storing rods while you paddle or pedal through tight cover, you want them lying flat and protected, not standing up like antennas waiting to catch a branch.
Look for horizontal rod storage along the gunwales, ideally with the tips tucked into molded channels or under the bow deck. Standing rods snag limbs, flip in the wind, and bang into your fishing partner’s kayak.
Count how many rods you actually fish in a session, then count the storage spots. Serious kayak anglers carry three or four rigged rods and want every one secured and out of the way until it’s needed. A tangle of standing rods is a headache you’ll regret the first time you duck under a laydown.
17. Test Paddle Holder Accessibility
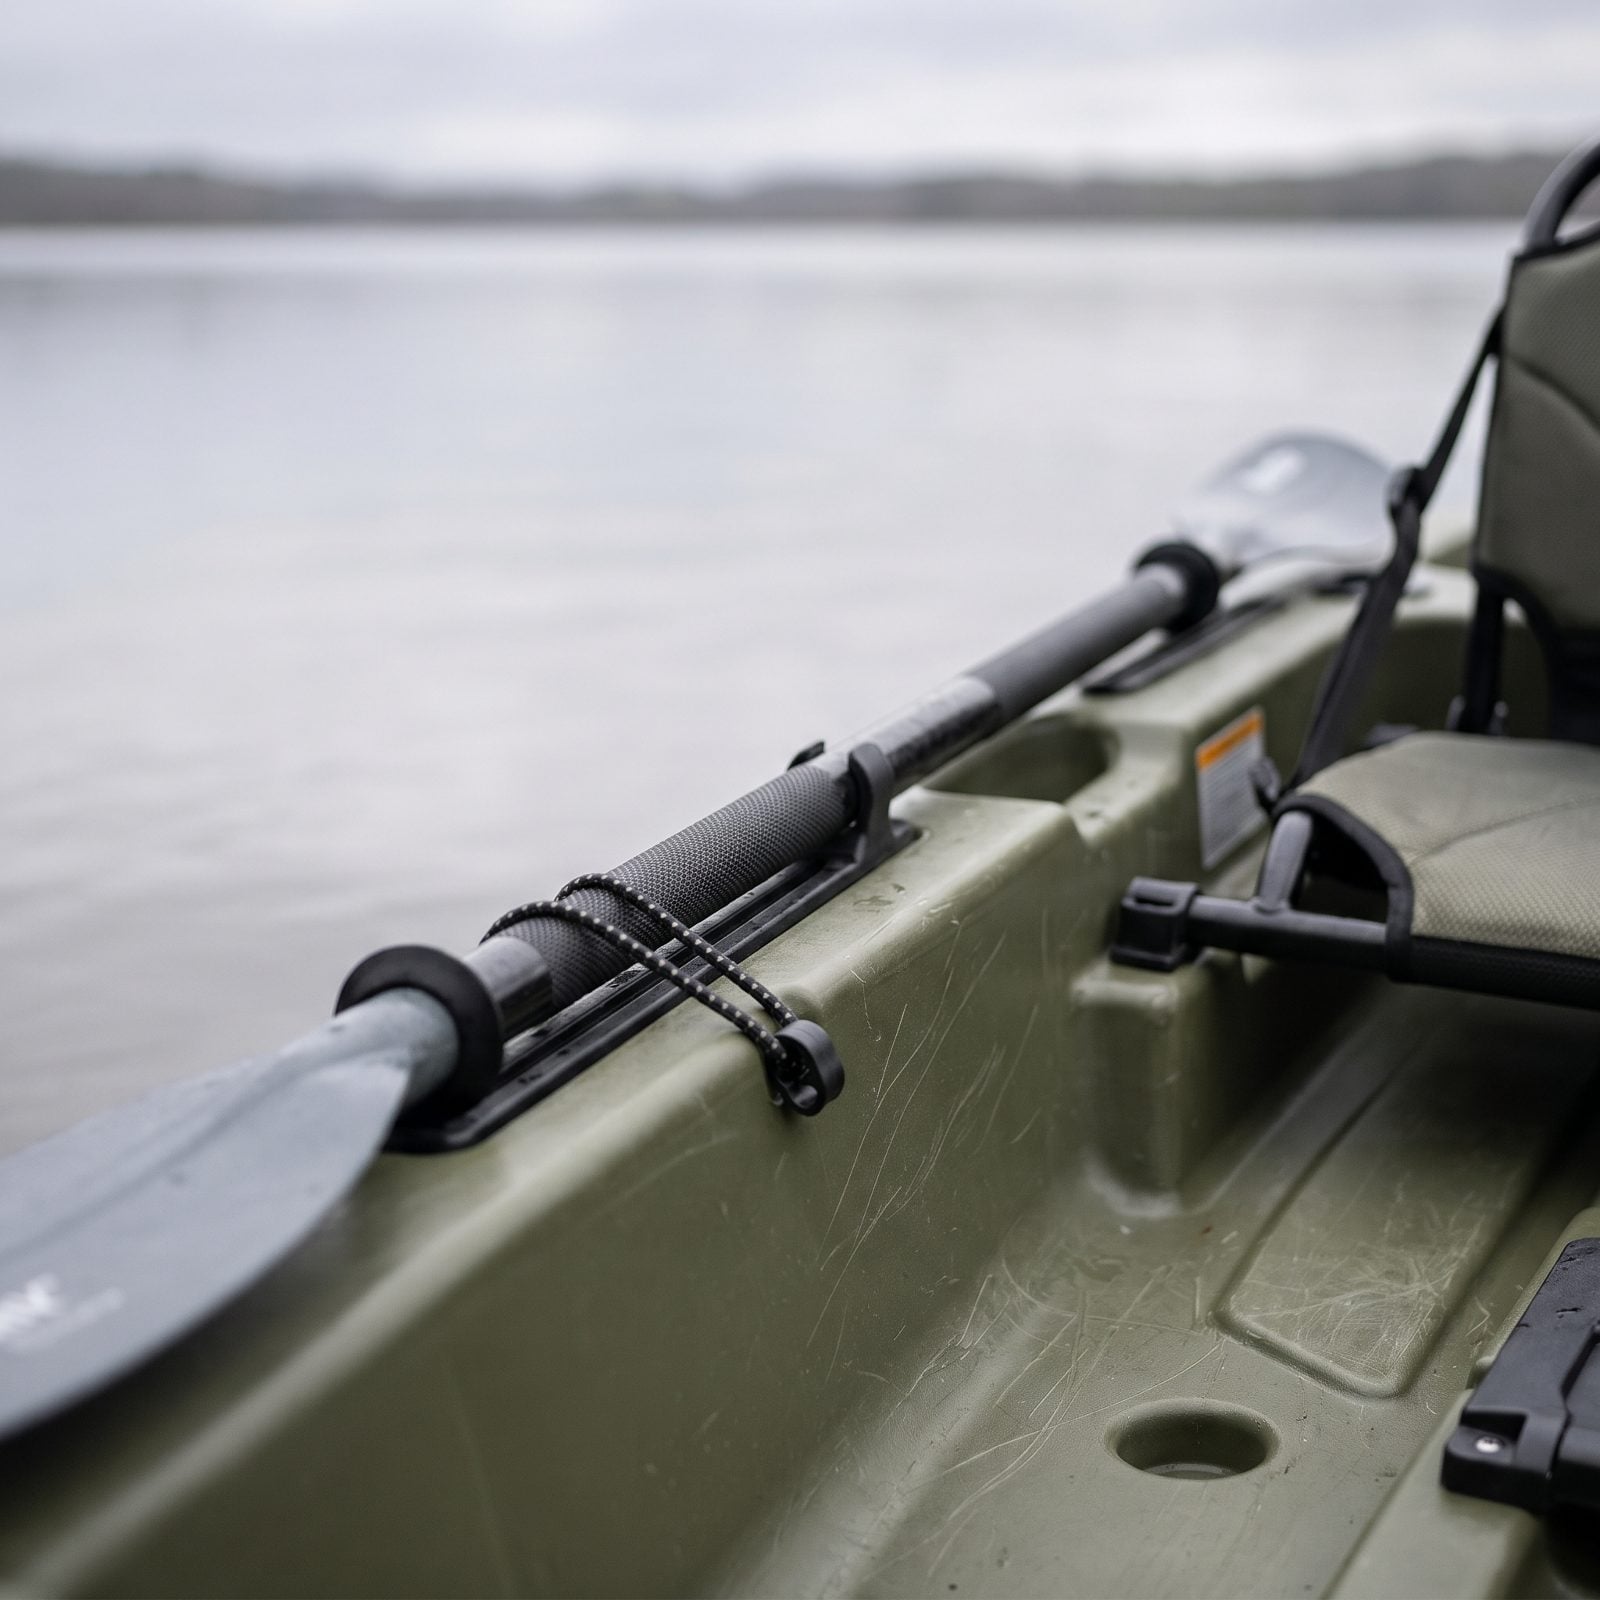
On a pedal kayak the paddle is your backup, and backups only count if you can grab them fast. The moment you need it is the moment the wind kicks up or the drive jams, and fumbling behind your seat in a current is no fun at all.
Sit in the seat and reach for the paddle holders without looking. You should be able to find the paddle, free it from its clip, and have it in your hands in a couple of seconds.
Side-mounted holders within arm’s reach beat rear tucks every time.
16. Inspect Anchor Trolley Compatibility
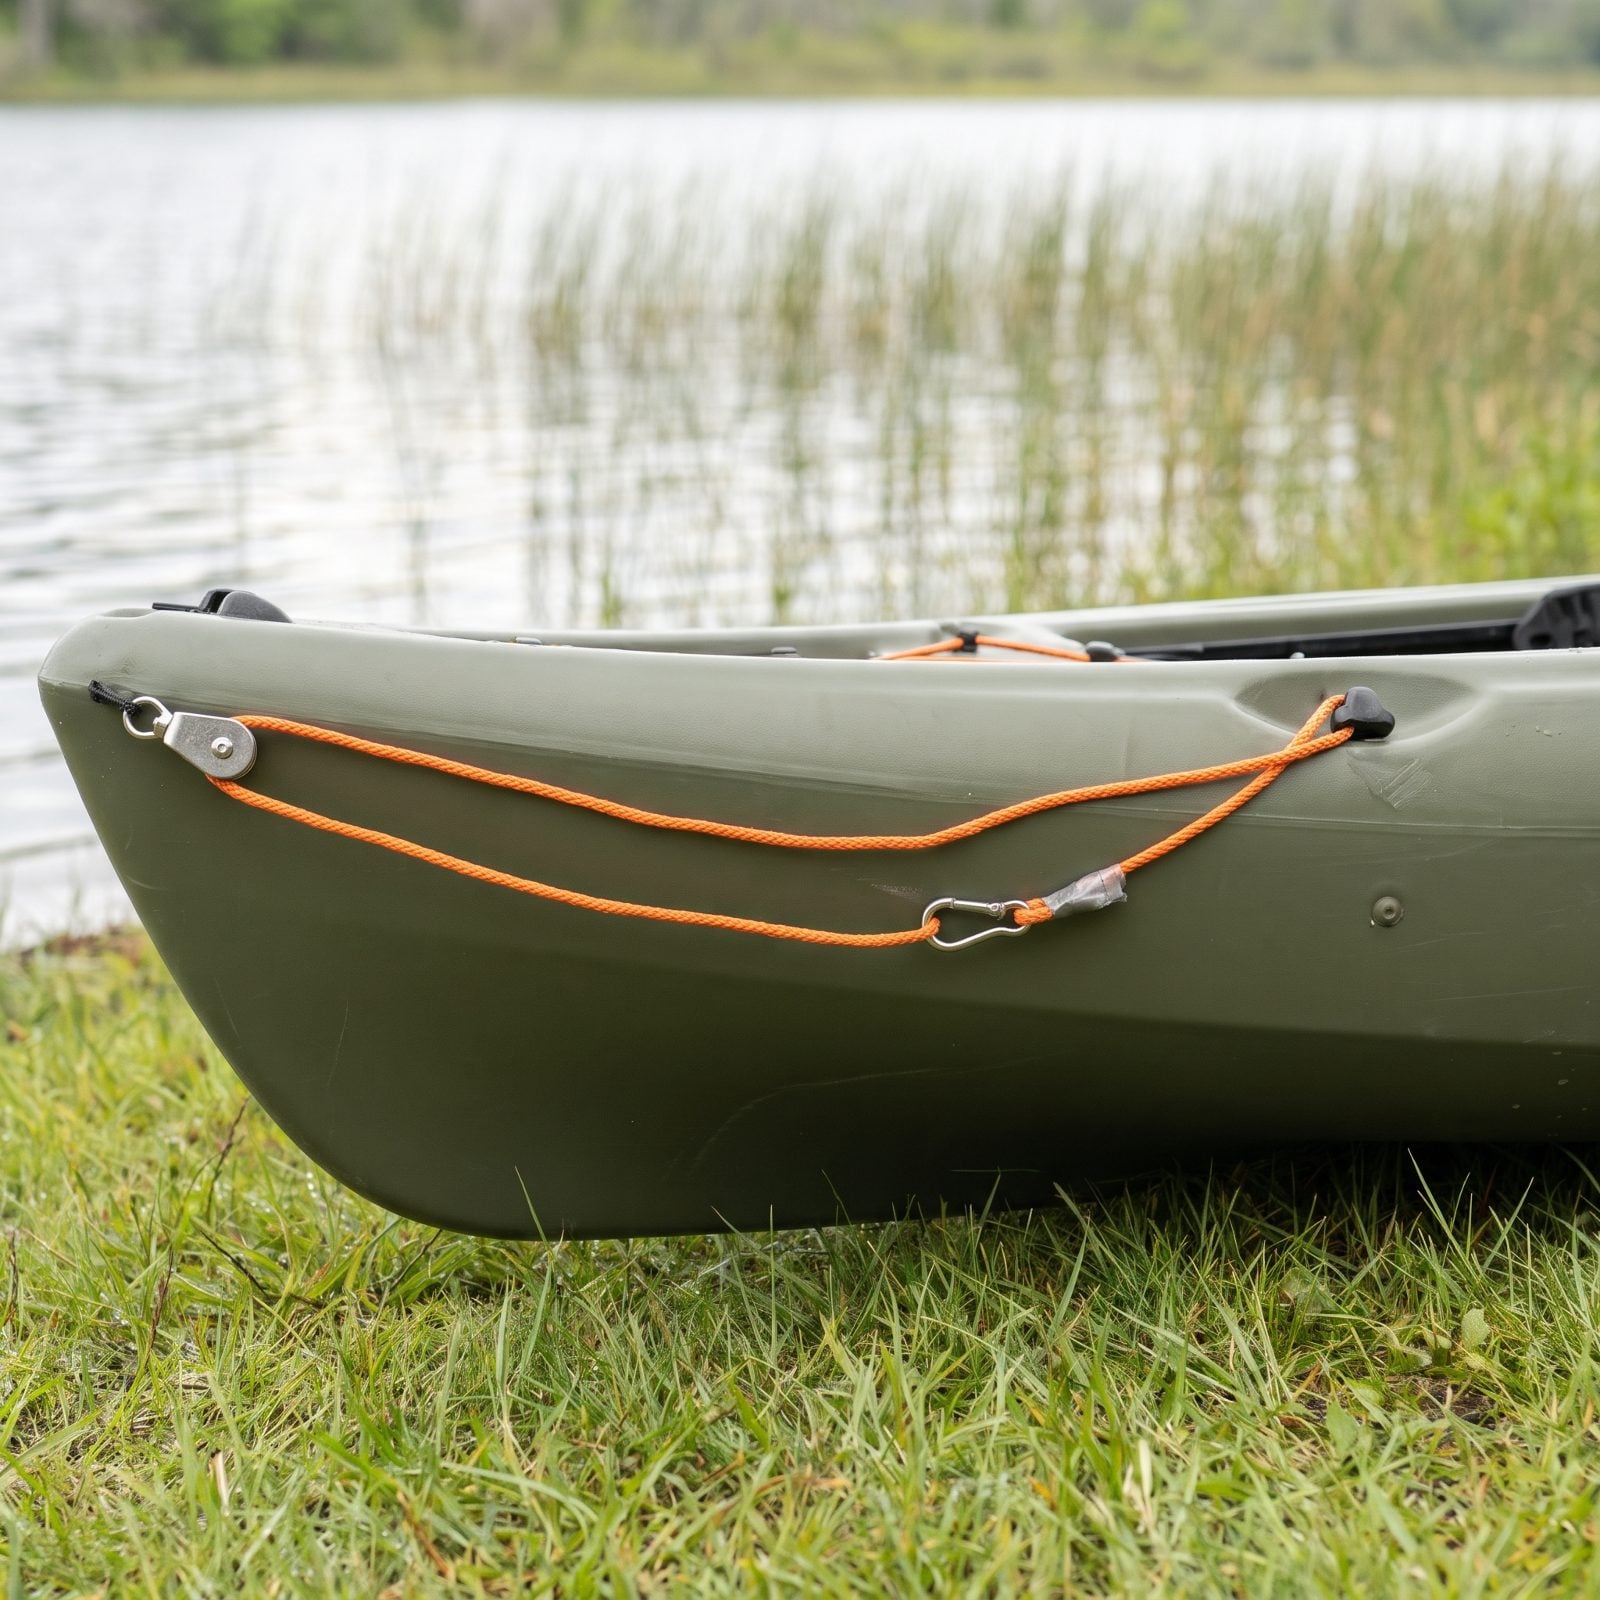
Most beginners assume every kayak comes anchor-ready. It doesn’t. Plenty of hulls ship with padeyes in the wrong spots, or none at all, which means you’re drilling into a brand-new boat before your first trip.
Run your hand along both sides and look for existing trolley attachment points, like padeyes and pulley brackets mounted along the hull side. You want a clear path for the line to travel the full length, with nothing blocking the line as it runs through the pulley — no seat rails, no console, no cup holders in the way. And if drilling is your only option, check that the hull wall there is thick enough to hold a well nut without cracking on a cold morning.
15. Locate a Protected Transducer Position
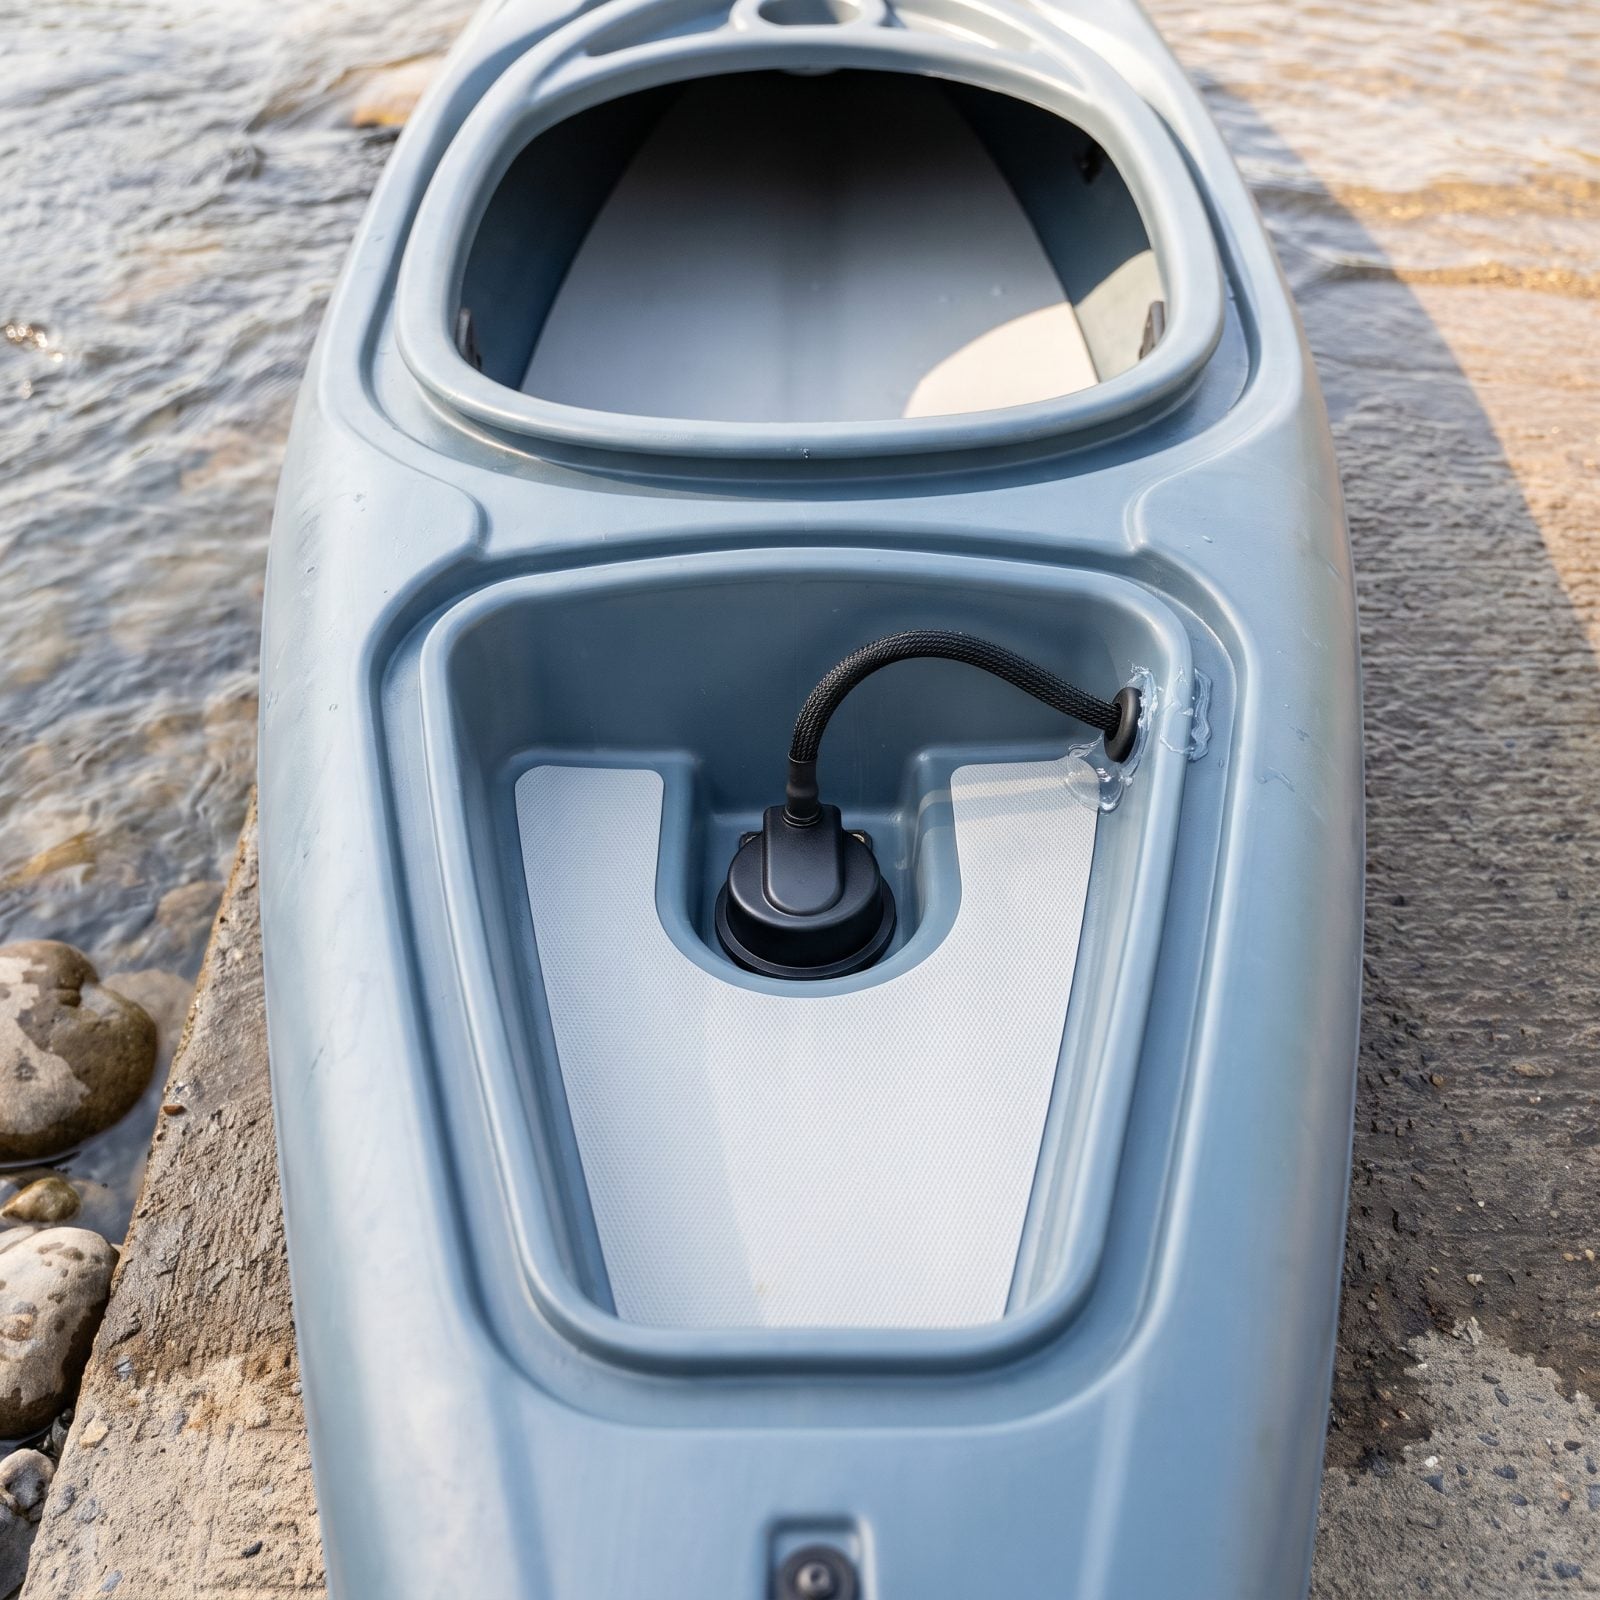
A transducer hanging off the back of the hull is a transducer waiting to get sheared off on the first submerged log. I watched one tear loose on a gravel bar and float away before anyone noticed.
Look for a factory scupper pocket or a shoot-through-hull mounting area toward the stern, somewhere the puck sits recessed and clear of the strike path. Does the cable have a protected route to the console? A loose run across the floor is exactly where your foot will find it. Shoot-through mounting is cleaner, but it only works reliably in single-layer polyethylene, so confirm the hull isn’t foam-cored in that spot.
14. Plan Protected Battery Storage for Electronics
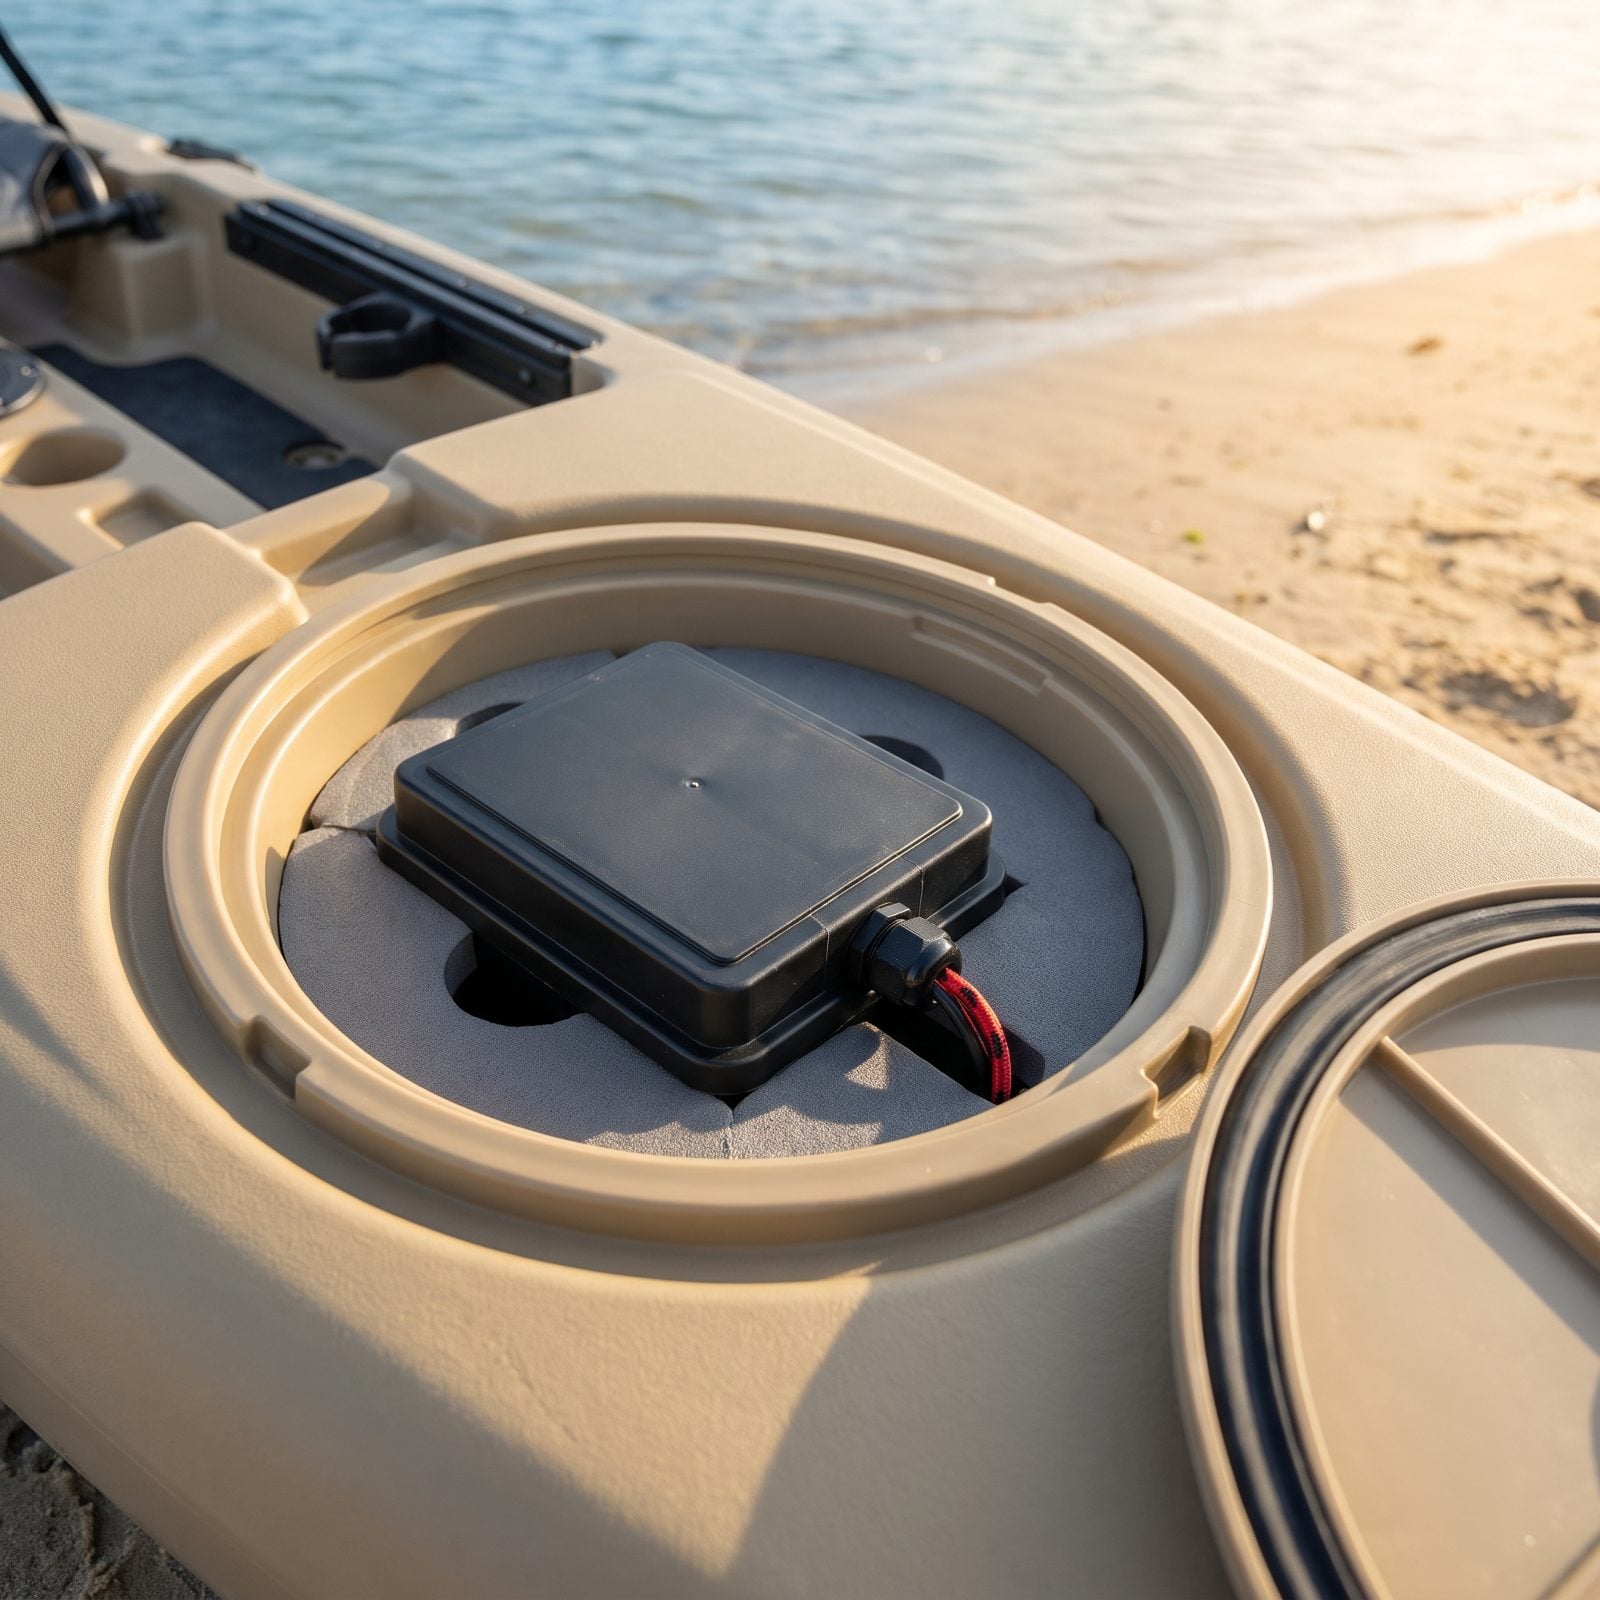
Water and lithium batteries are a bad pairing, and kayaks are, by design, wet. You need a spot inside the hull where a sealed battery box can live dry, upright, and padded — not sliding into the hull wall every time you lean into a paddle stroke.
Open every hatch and ask where the battery actually goes. A good setup has a flat shelf or a molded well near the center of mass, plus a cable gland so wiring exits without letting water follow it in. Center placement matters more than people think. Jam a battery in the bow and you throw off your trim, and the boat plows.
13. Confirm Gear-Track Hardware Is Standardized
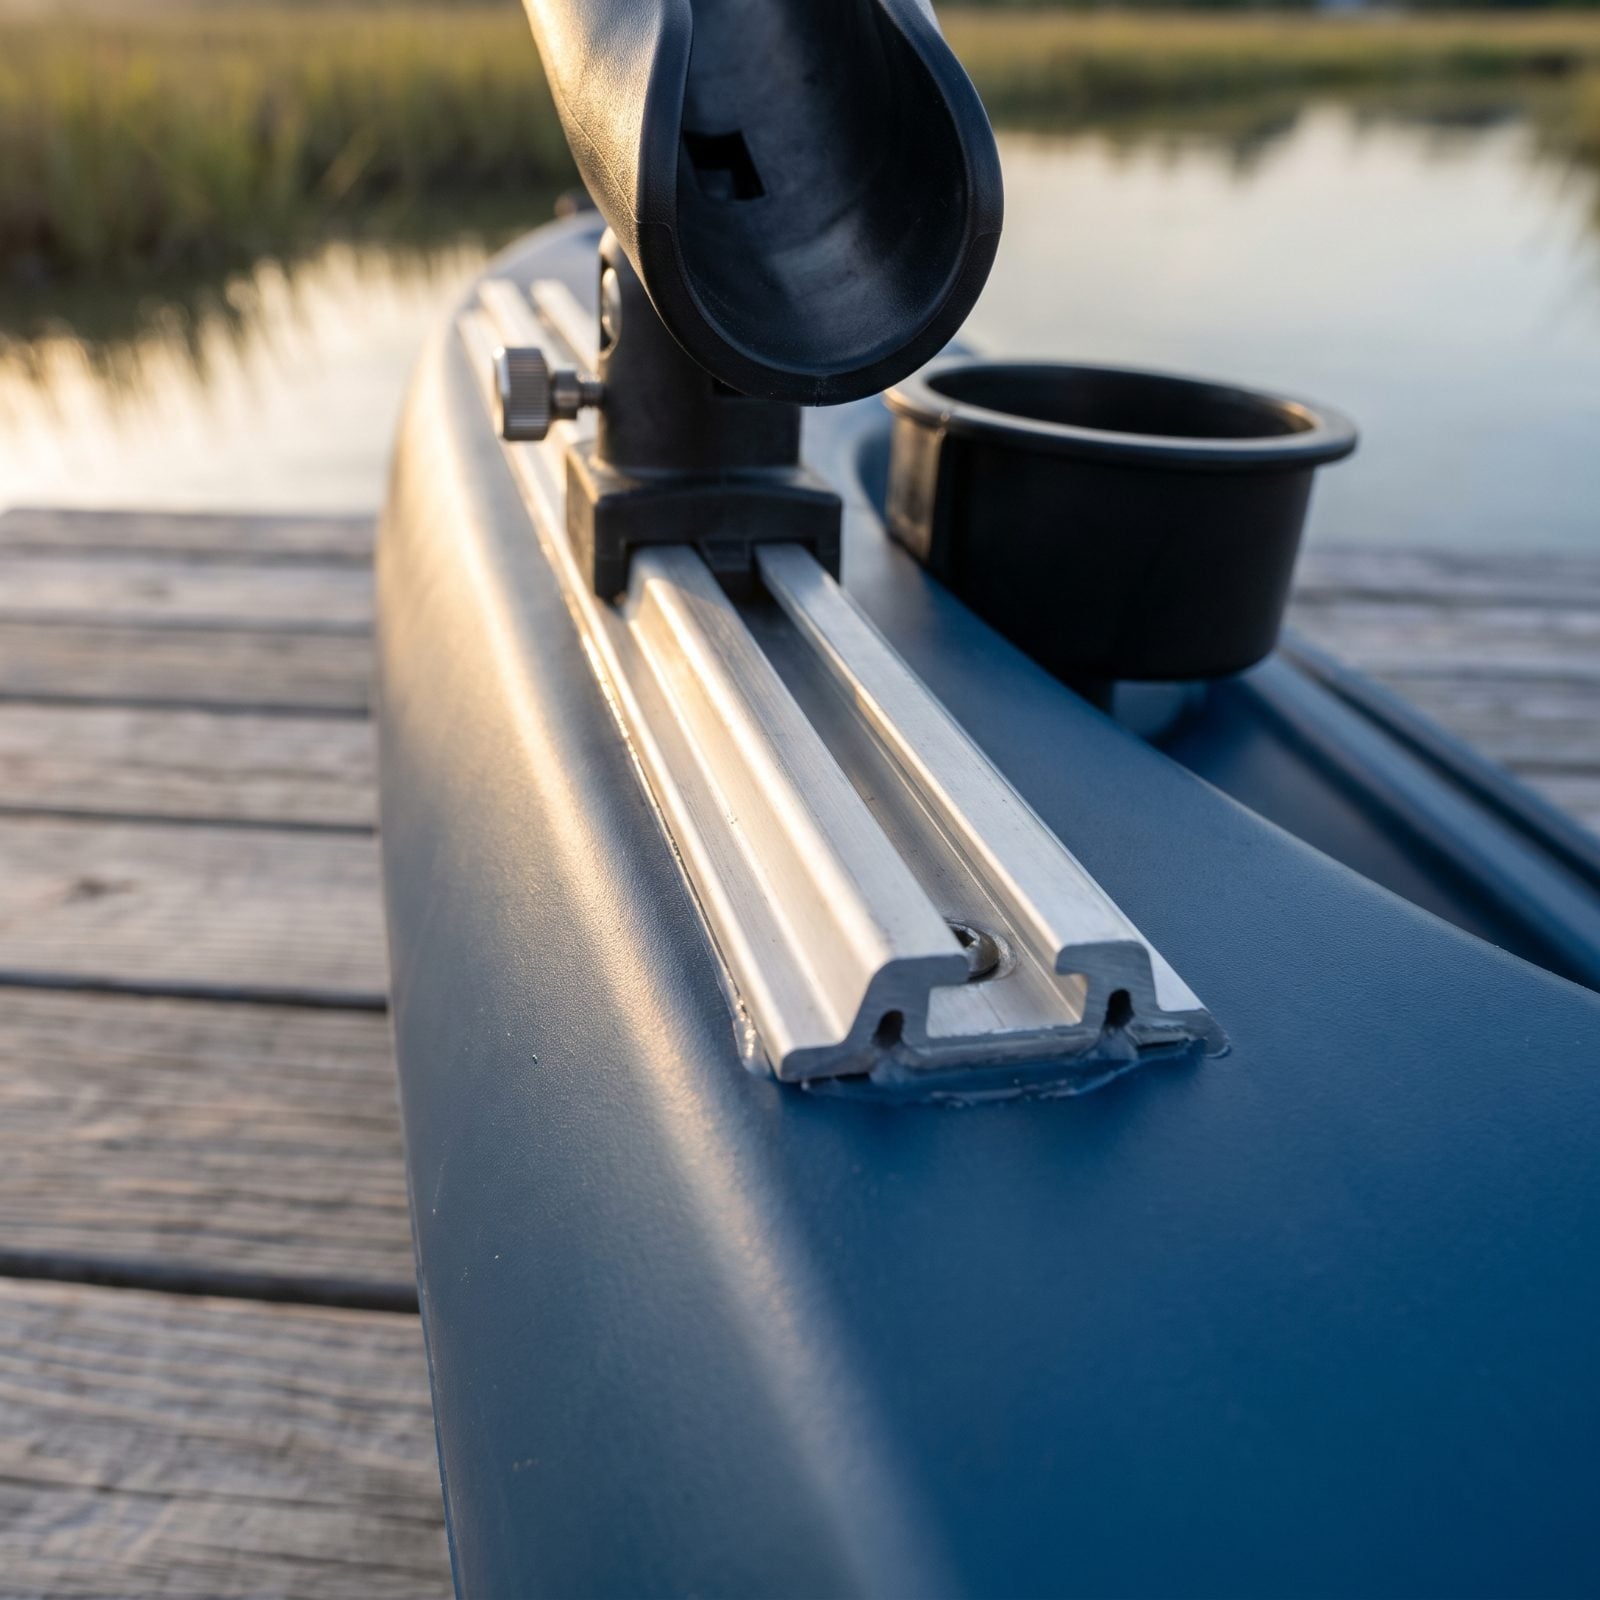
Gear tracks are only useful if the rest of the industry agrees on their shape. Some brands run proprietary slots that lock you into buying only their accessories — usually at a markup, and often with a long wait when they’re out of stock.
Bring a common T-slot base or a known-standard track mount and try sliding it in. If it seats and the thumb screw bites, the whole aftermarket is open to you. If it won’t fit, every rod holder, camera arm, and light mount you ever add costs more and comes from one source.
12. Inspect Rigging Access Inside the Hull
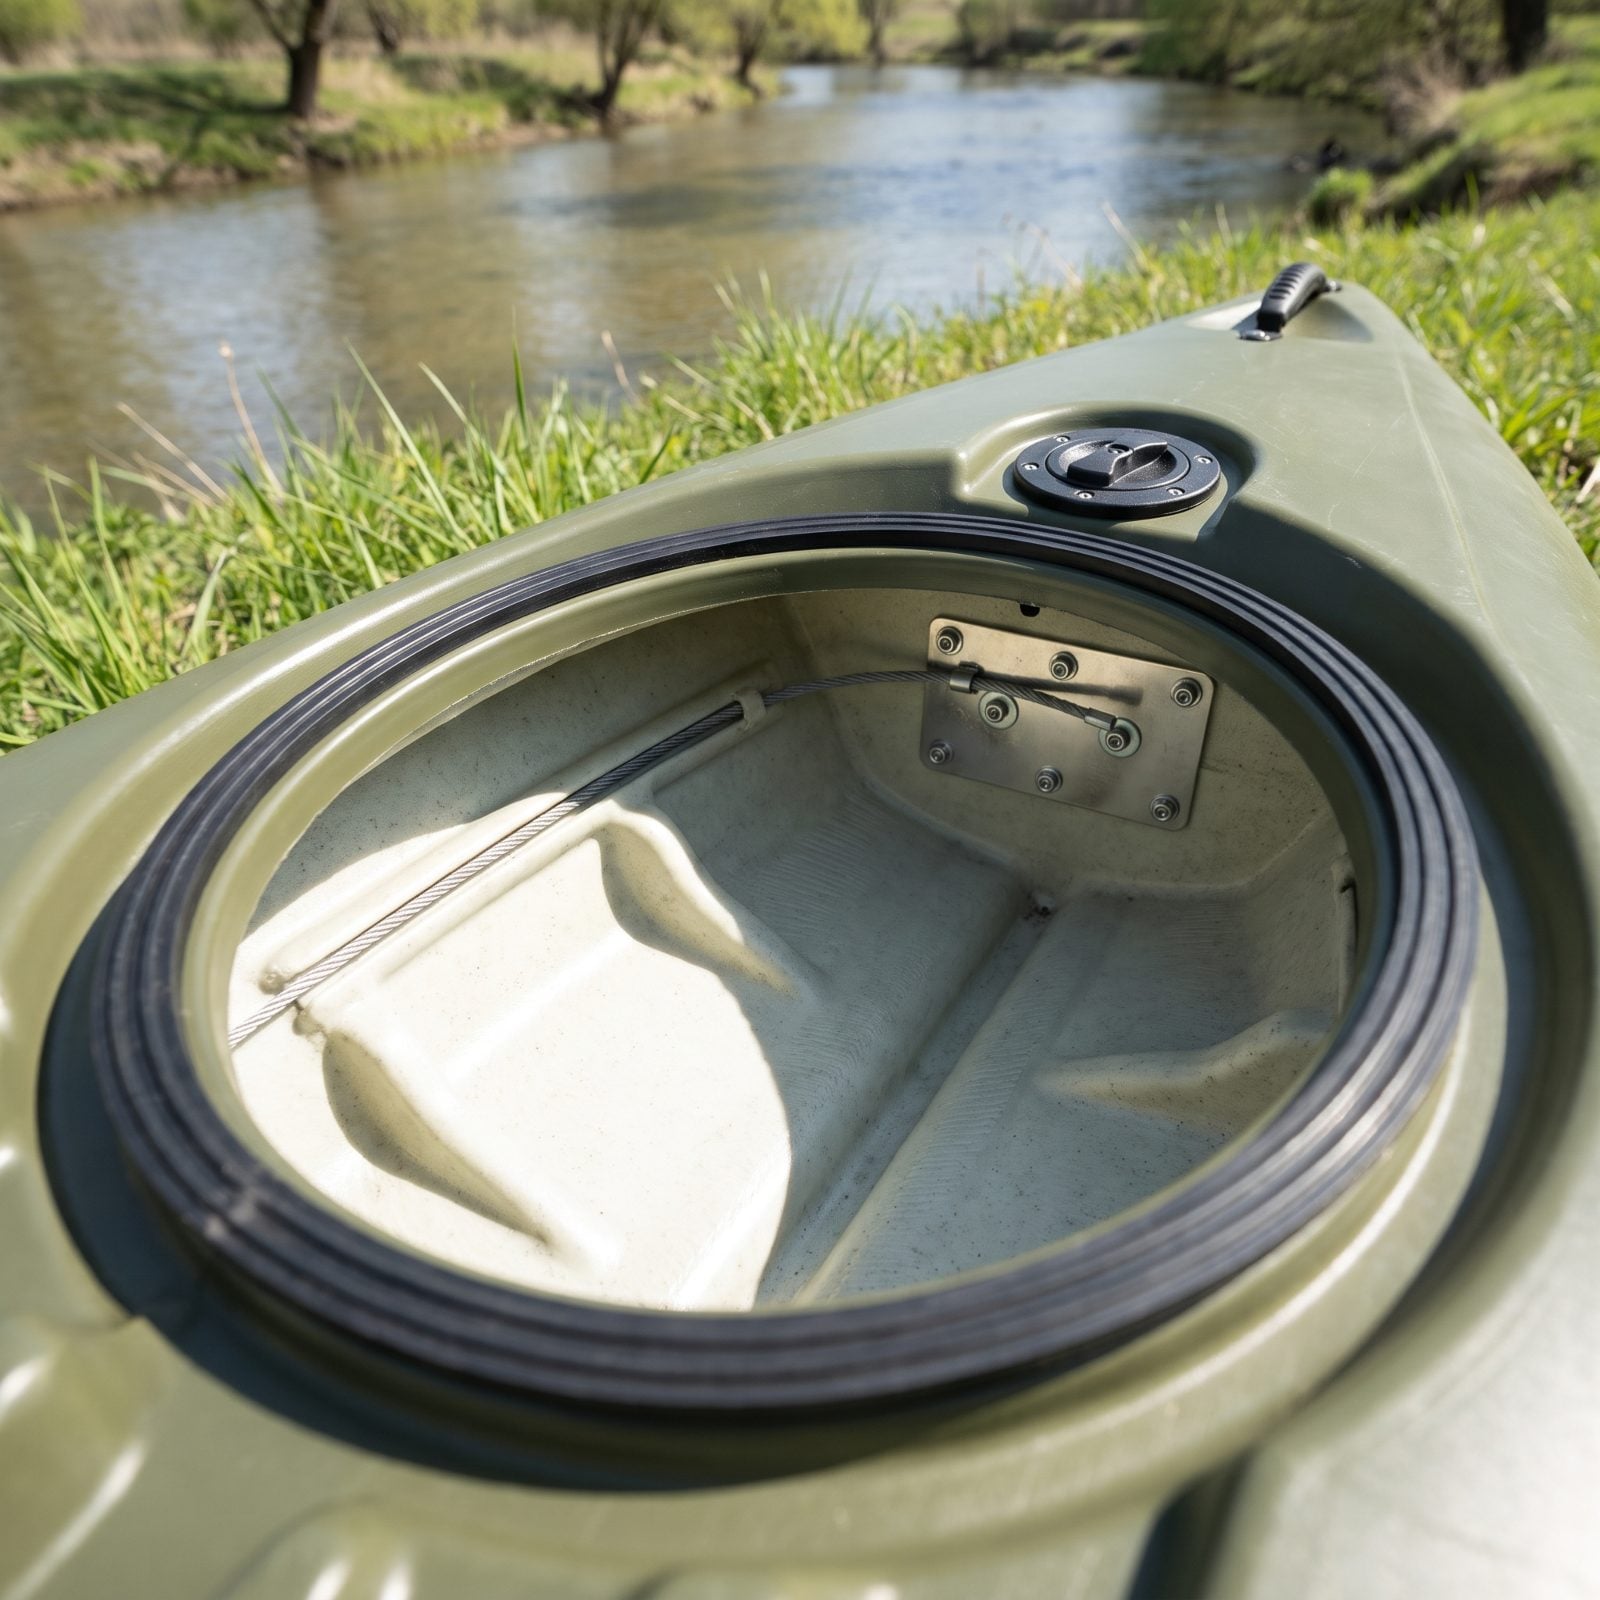
Nobody warns you about this one. You can add all the deck accessories you want, but if you can’t reach behind the deck to install a backing plate, every screw is just biting into thin plastic. Those pull out.
Open the hatches and actually put your arm in. Can you reach the underside of the main rigging zones around the console and seat? Is there room to hold a nut while someone tops the bolt? A hull with sealed, unreachable chambers forces you into well nuts everywhere — fine for light loads, awful for anything that takes real strain.
The kayak that lets your hand reach the deck from the inside is the one you’ll still be happy with three seasons of rigging later.
11. Check Drain-Plug Location and Security
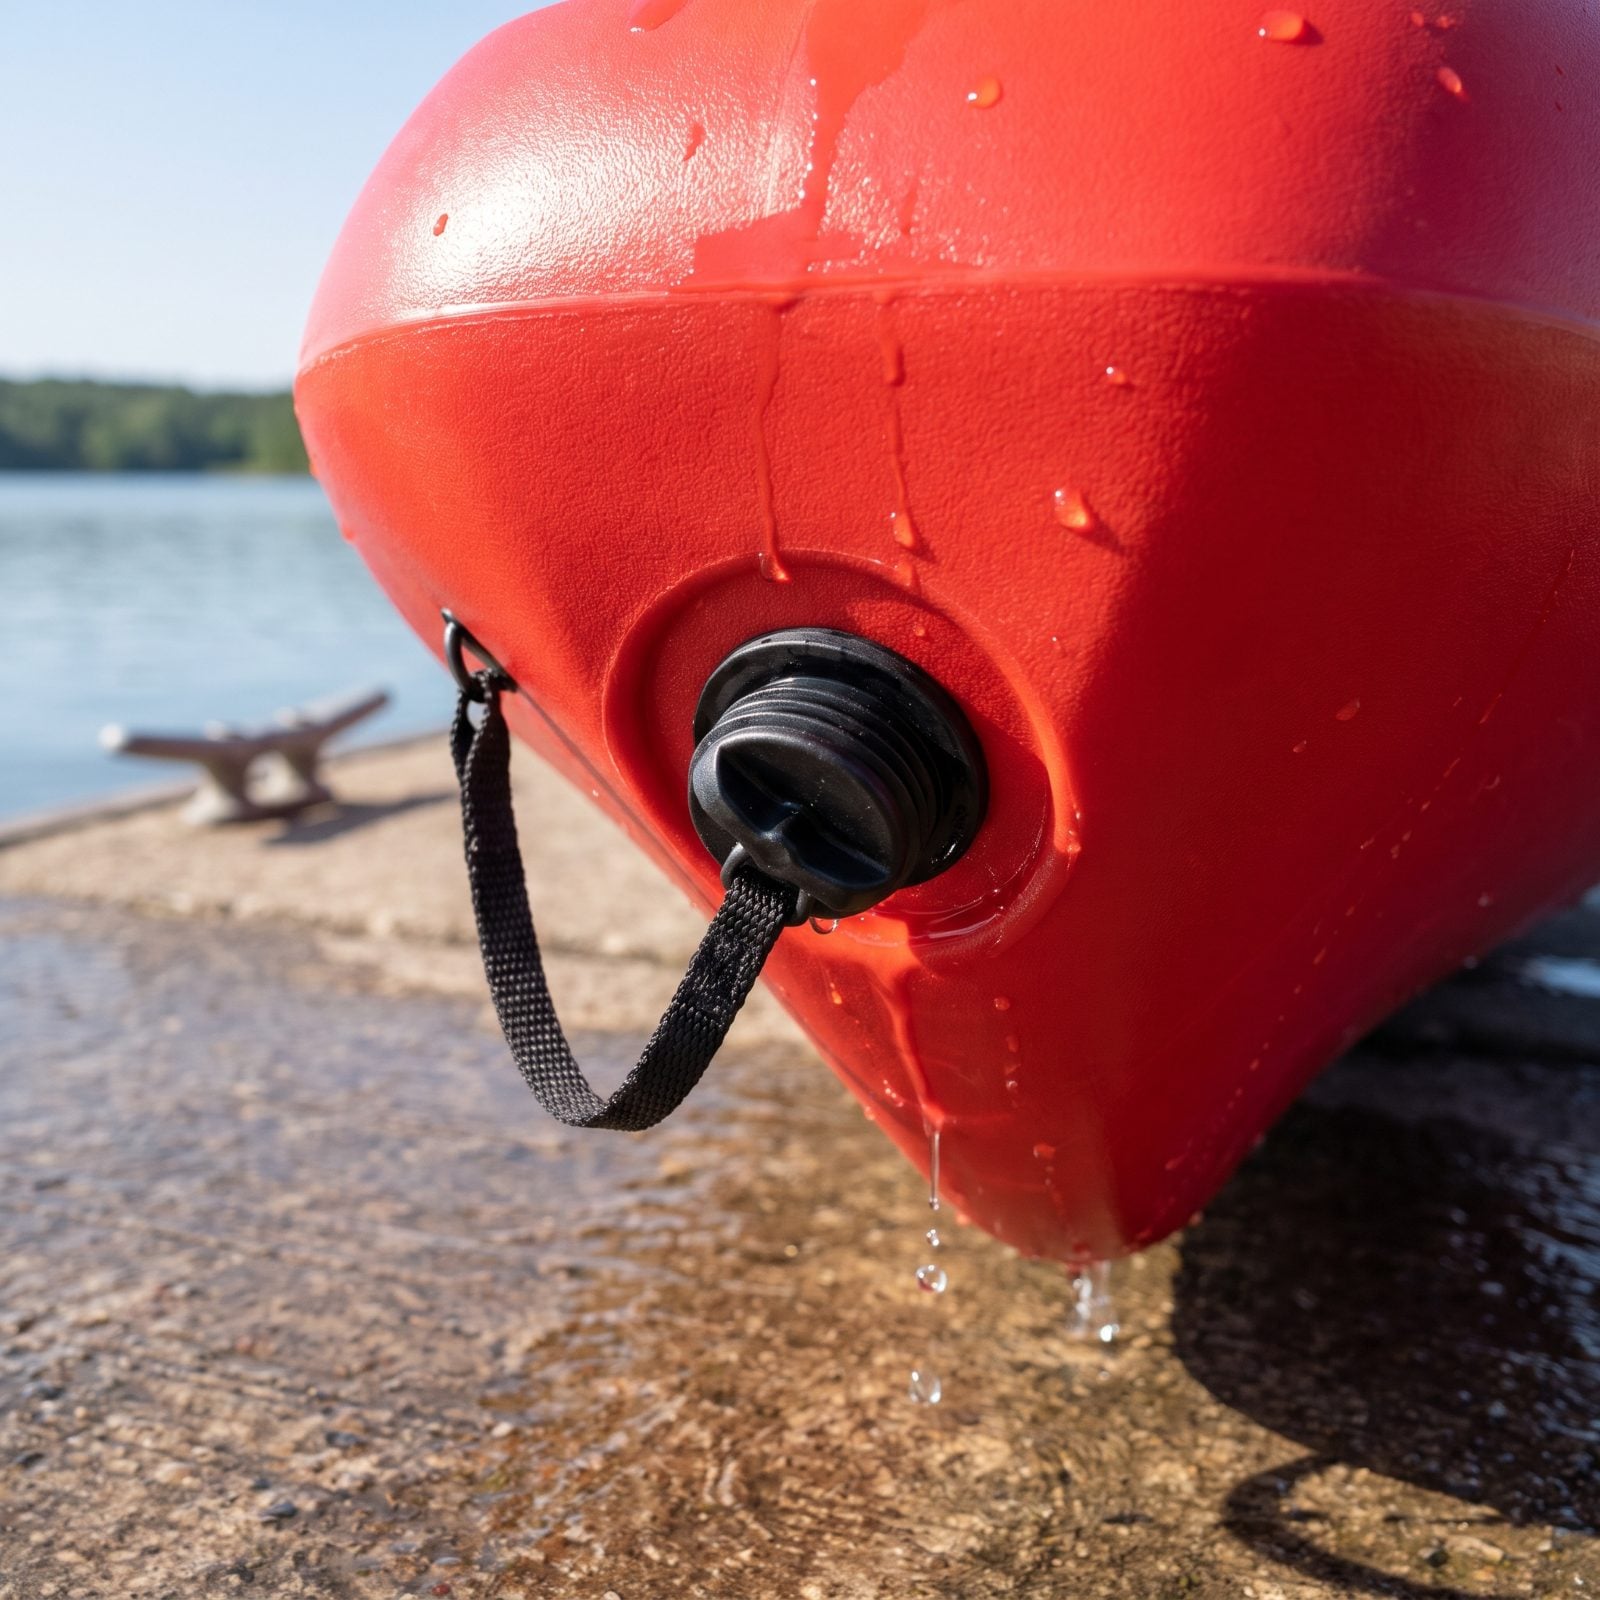
A drain plug seems like a trivial thing right up until it works itself loose offshore and your hull starts filling.
Find it — usually at the stern — and confirm two things. First, that it’s tethered to the hull with a short leash so it can’t drop into the water during a wet launch. Second, that it sits low enough to drain the whole hull when you tip the boat, instead of leaving a puddle sloshing around your electronics. A loose, untethered plug on threads that strip easily is a slow leak waiting to happen.
10. Inspect Carry Handles Under Load
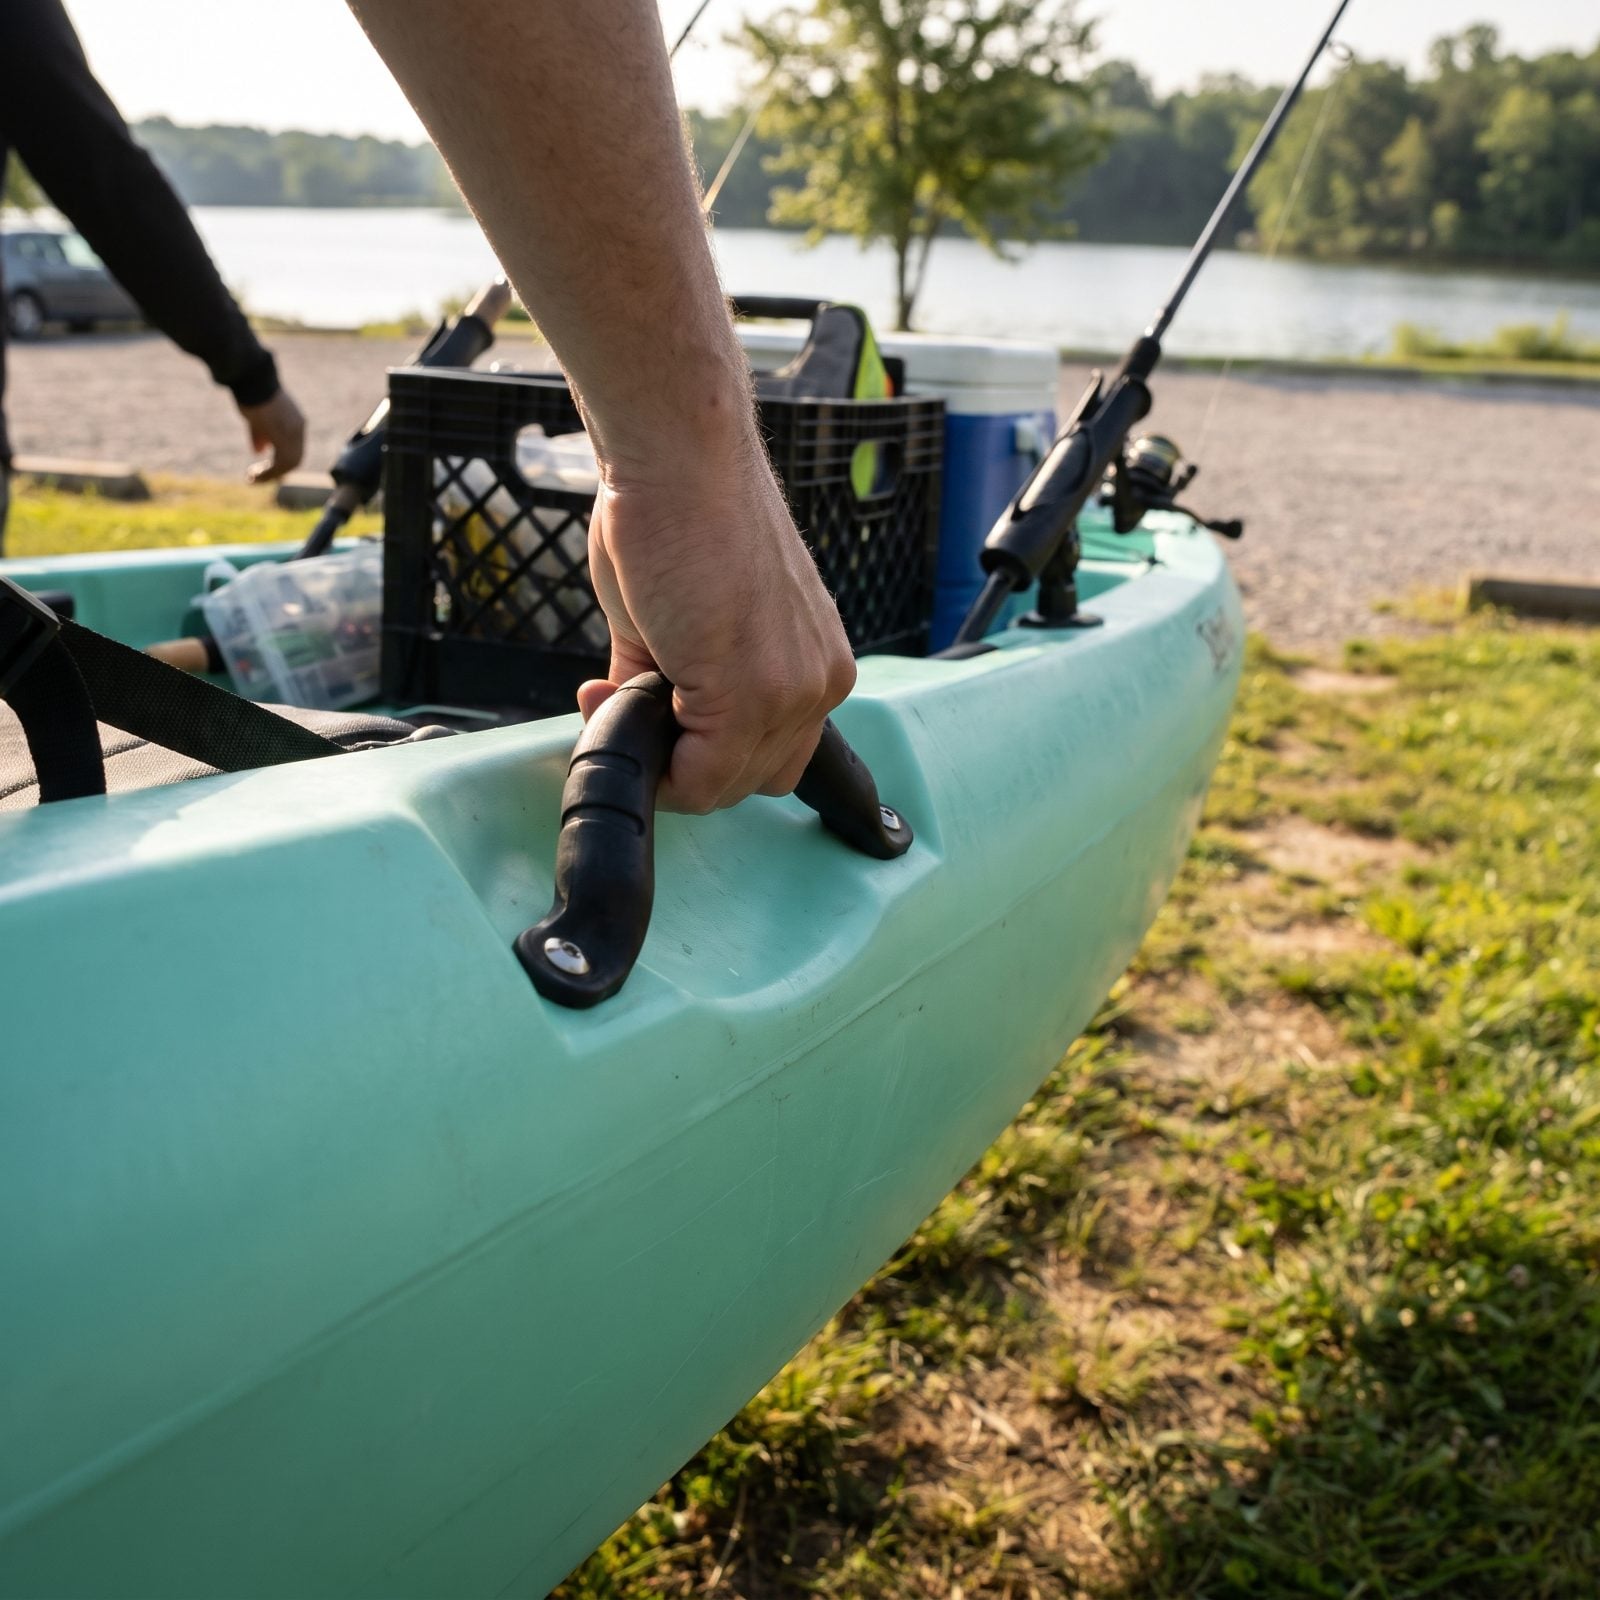
An empty kayak is light. A rigged fishing kayak loaded with a battery, a crate of tackle, and water in the hull gets heavy fast — and that loaded weight is what the handles actually have to carry.
Don’t judge the handles on the showroom floor with the boat empty. Grab each one and really pull up. A good handle is molded into a reinforced recess or anchored through a backing plate, and it sits where the boat balances so you’re not fighting the bow or stern. Flimsy webbing loops bolted through thin deck plastic? Those are the first thing to tear, usually right as you’re hauling up a boat ramp.
9. Confirm Rudder Compatibility and Cost
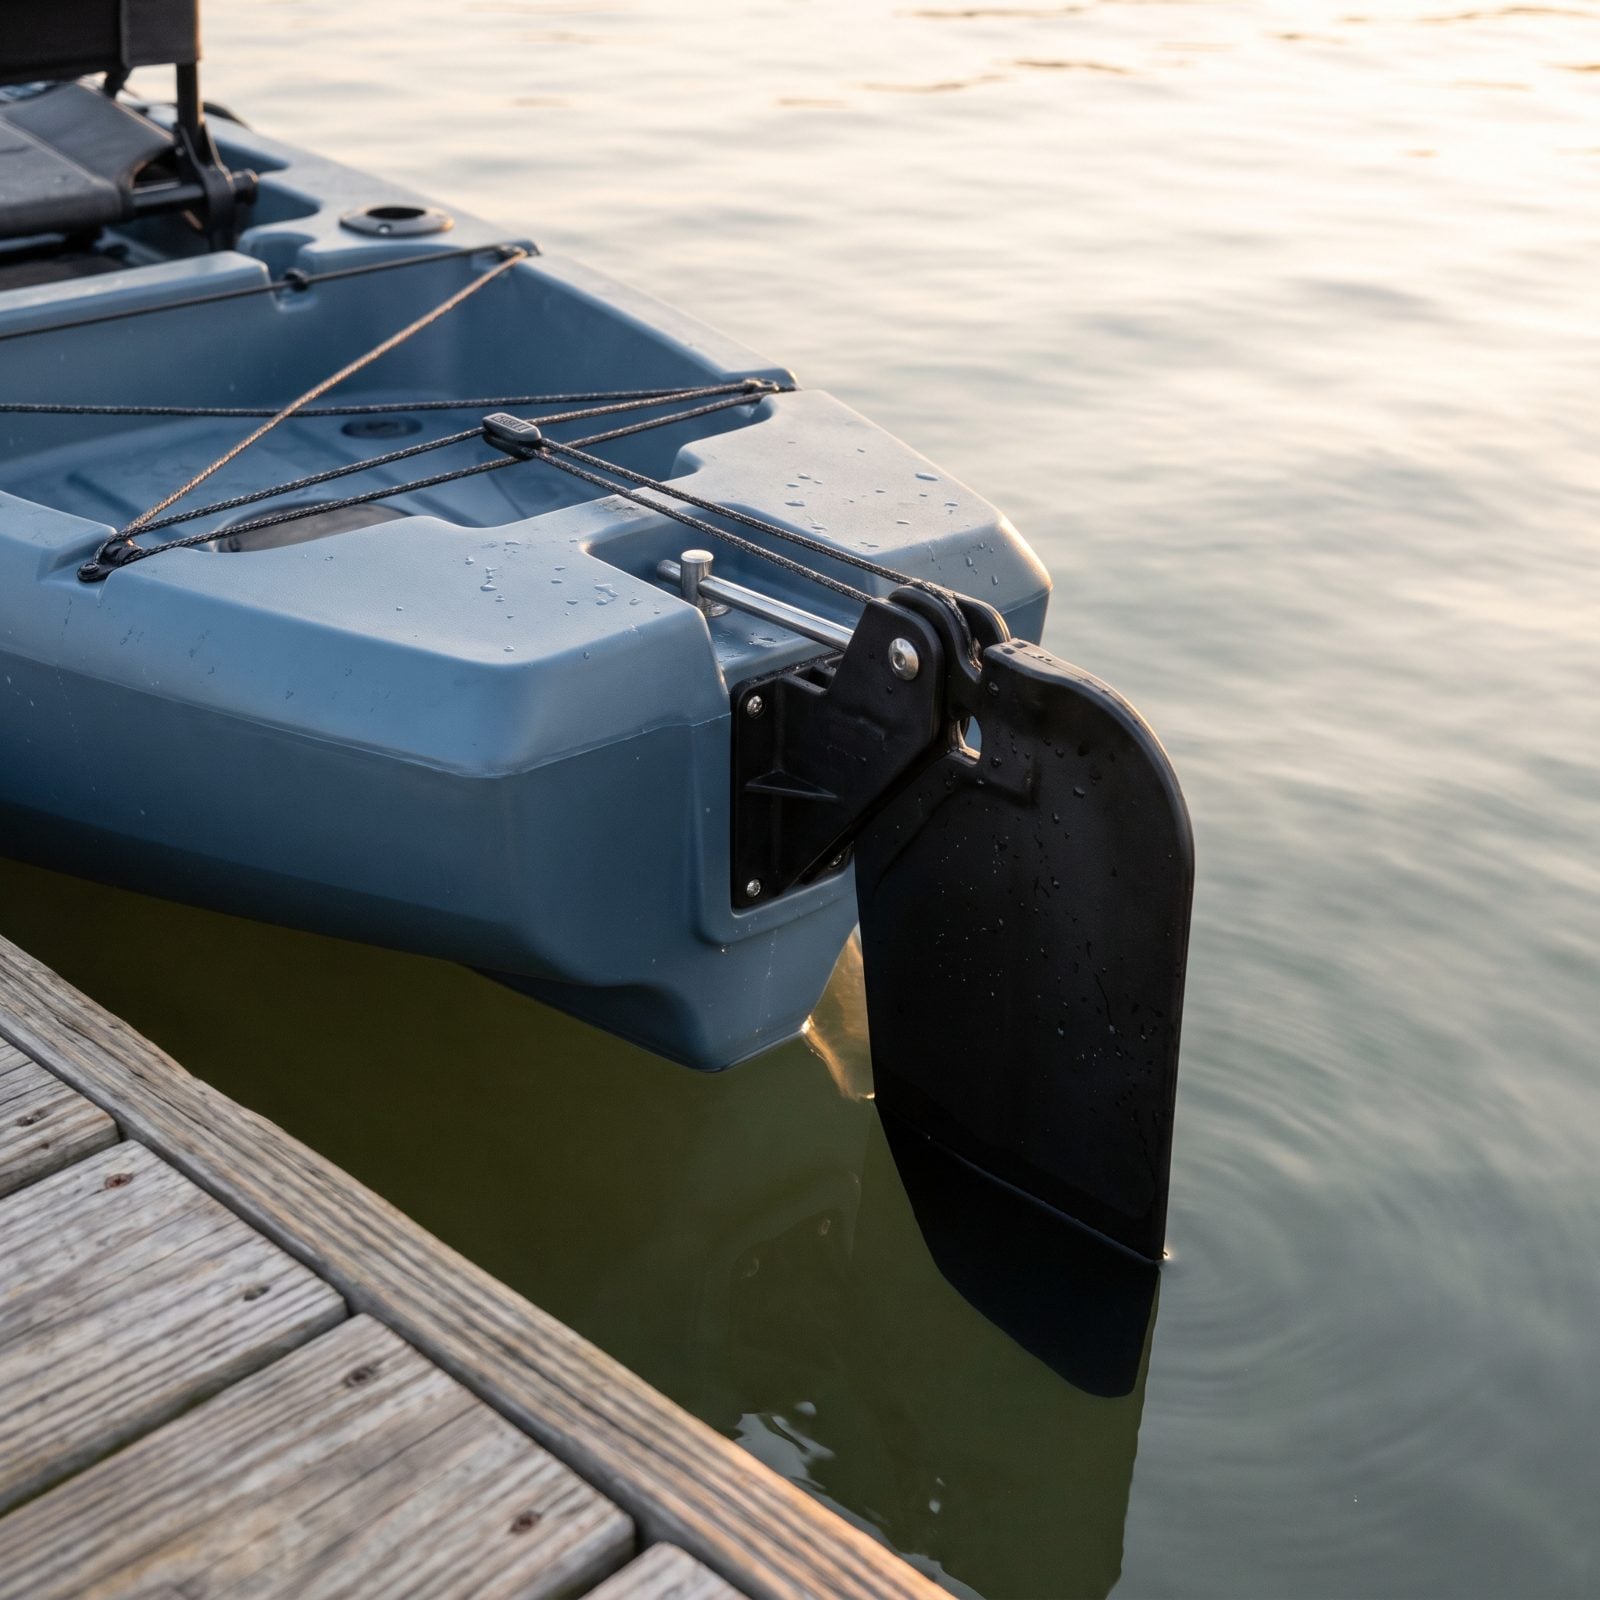
You can paddle or pedal into a crosswind for a while before you realize how much a rudder would save your arms and your patience. Then you go to add one and discover it’s a pricey kit that doesn’t quite fit.
Check whether the hull has a pre-molded rudder pocket and factory control-line routing. If it does, installing one later is clean. If the stern is just smooth plastic, you’re drilling and improvising. Ask the price of the brand’s rudder kit now — a cheap boat with an expensive mandatory rudder isn’t a cheap boat.
8. Check PFD Clearance Around the Seat
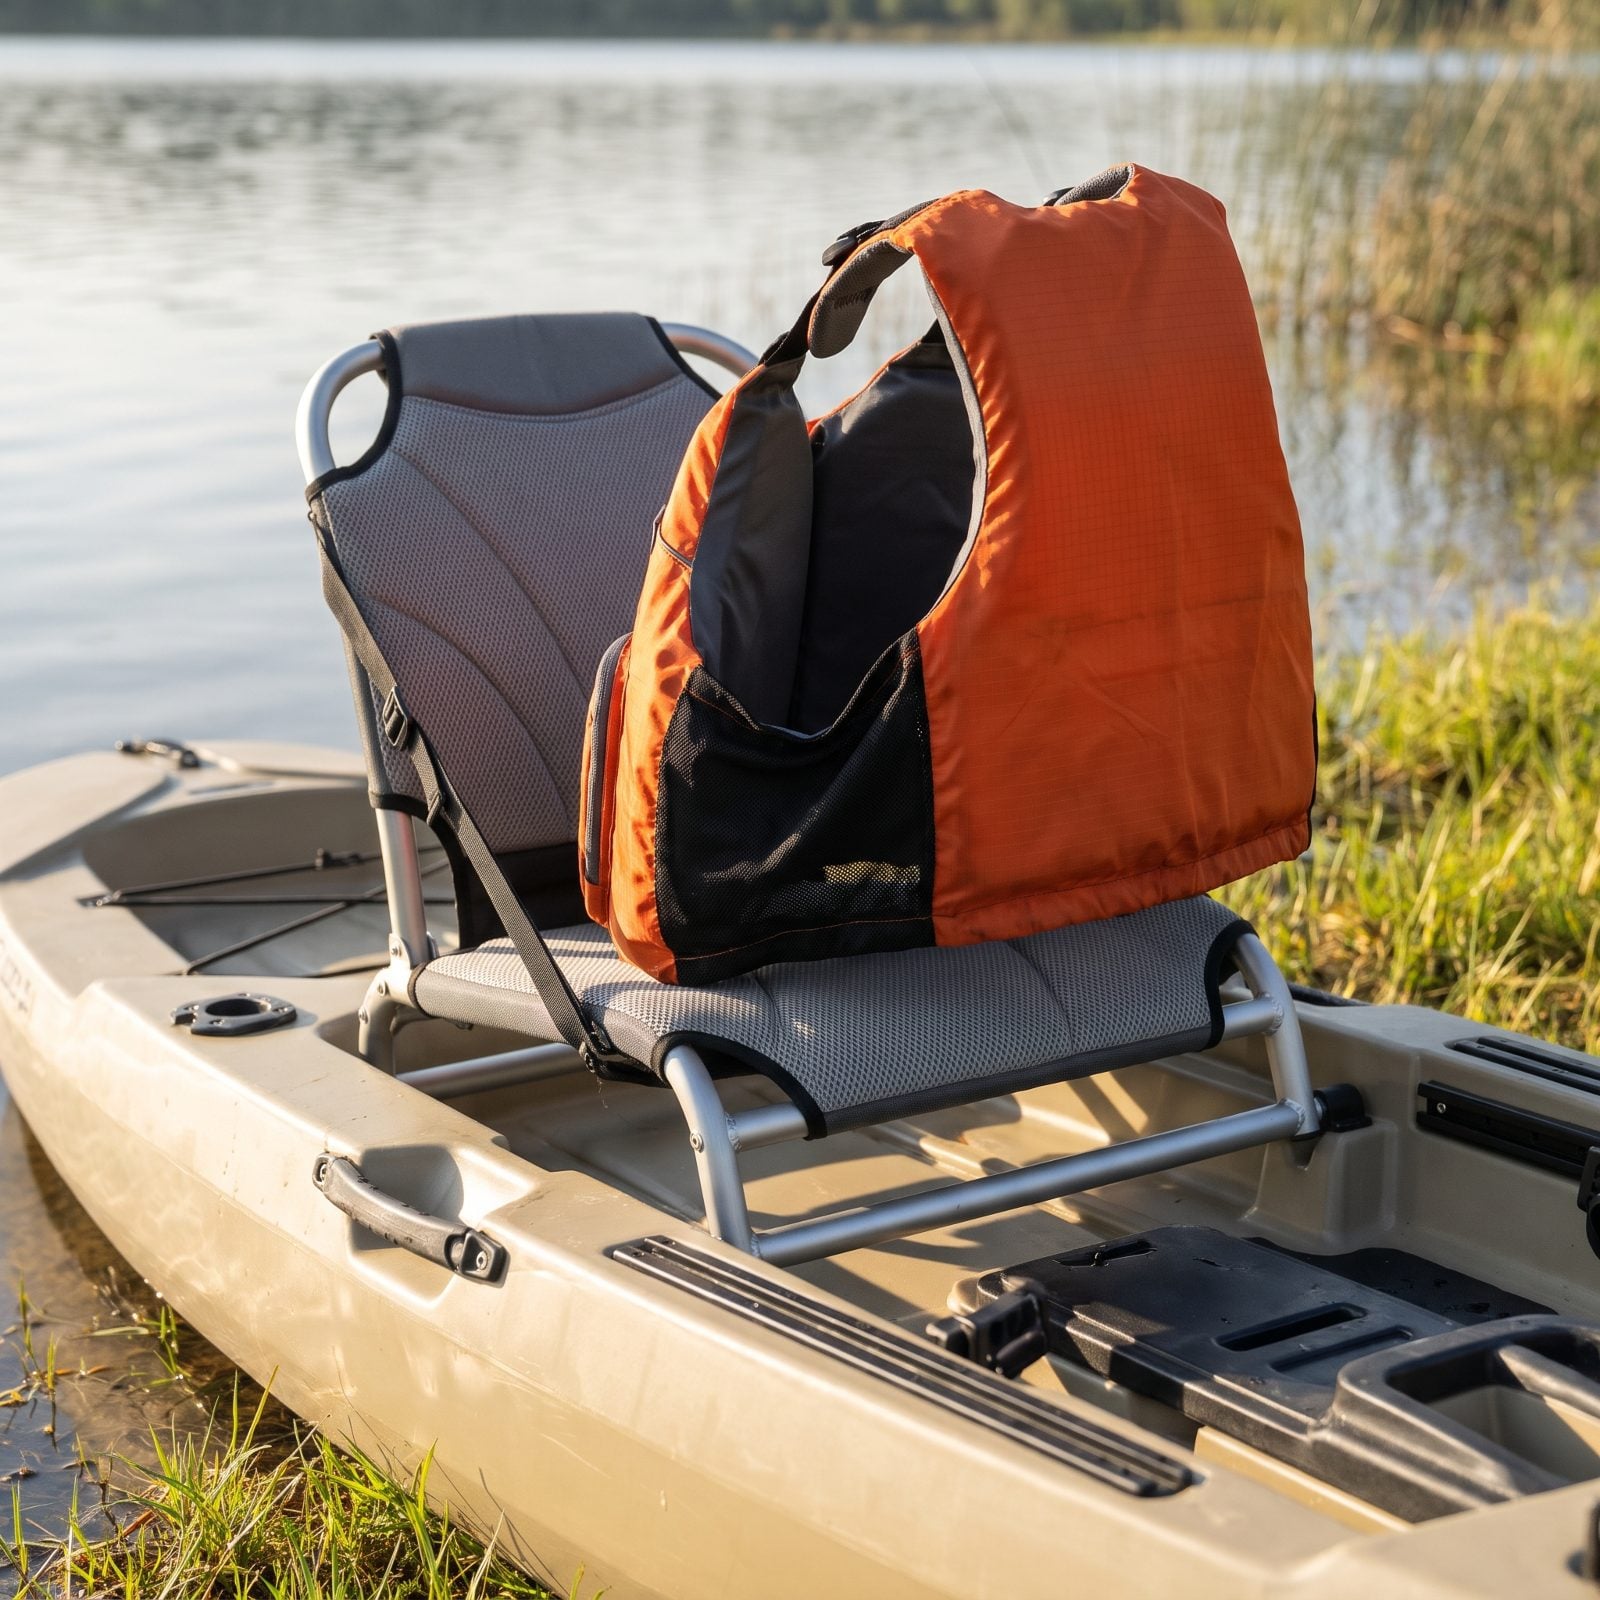
A life vest you take off because it’s uncomfortable in the seat is a life vest that isn’t saving anyone.
Sit in the boat wearing the PFD you’ll actually use, ideally a short-backed paddling model. A tall standard vest bunches against a high seatback and shoves you forward, and after an hour of that you’ll be tempted to loosen it or shed it entirely. Check that the seatback clears the vest’s lower panel, and that the armholes let you reach a rod high and low without the vest riding up into your chin.
7. Identify Safe Reentry Handholds
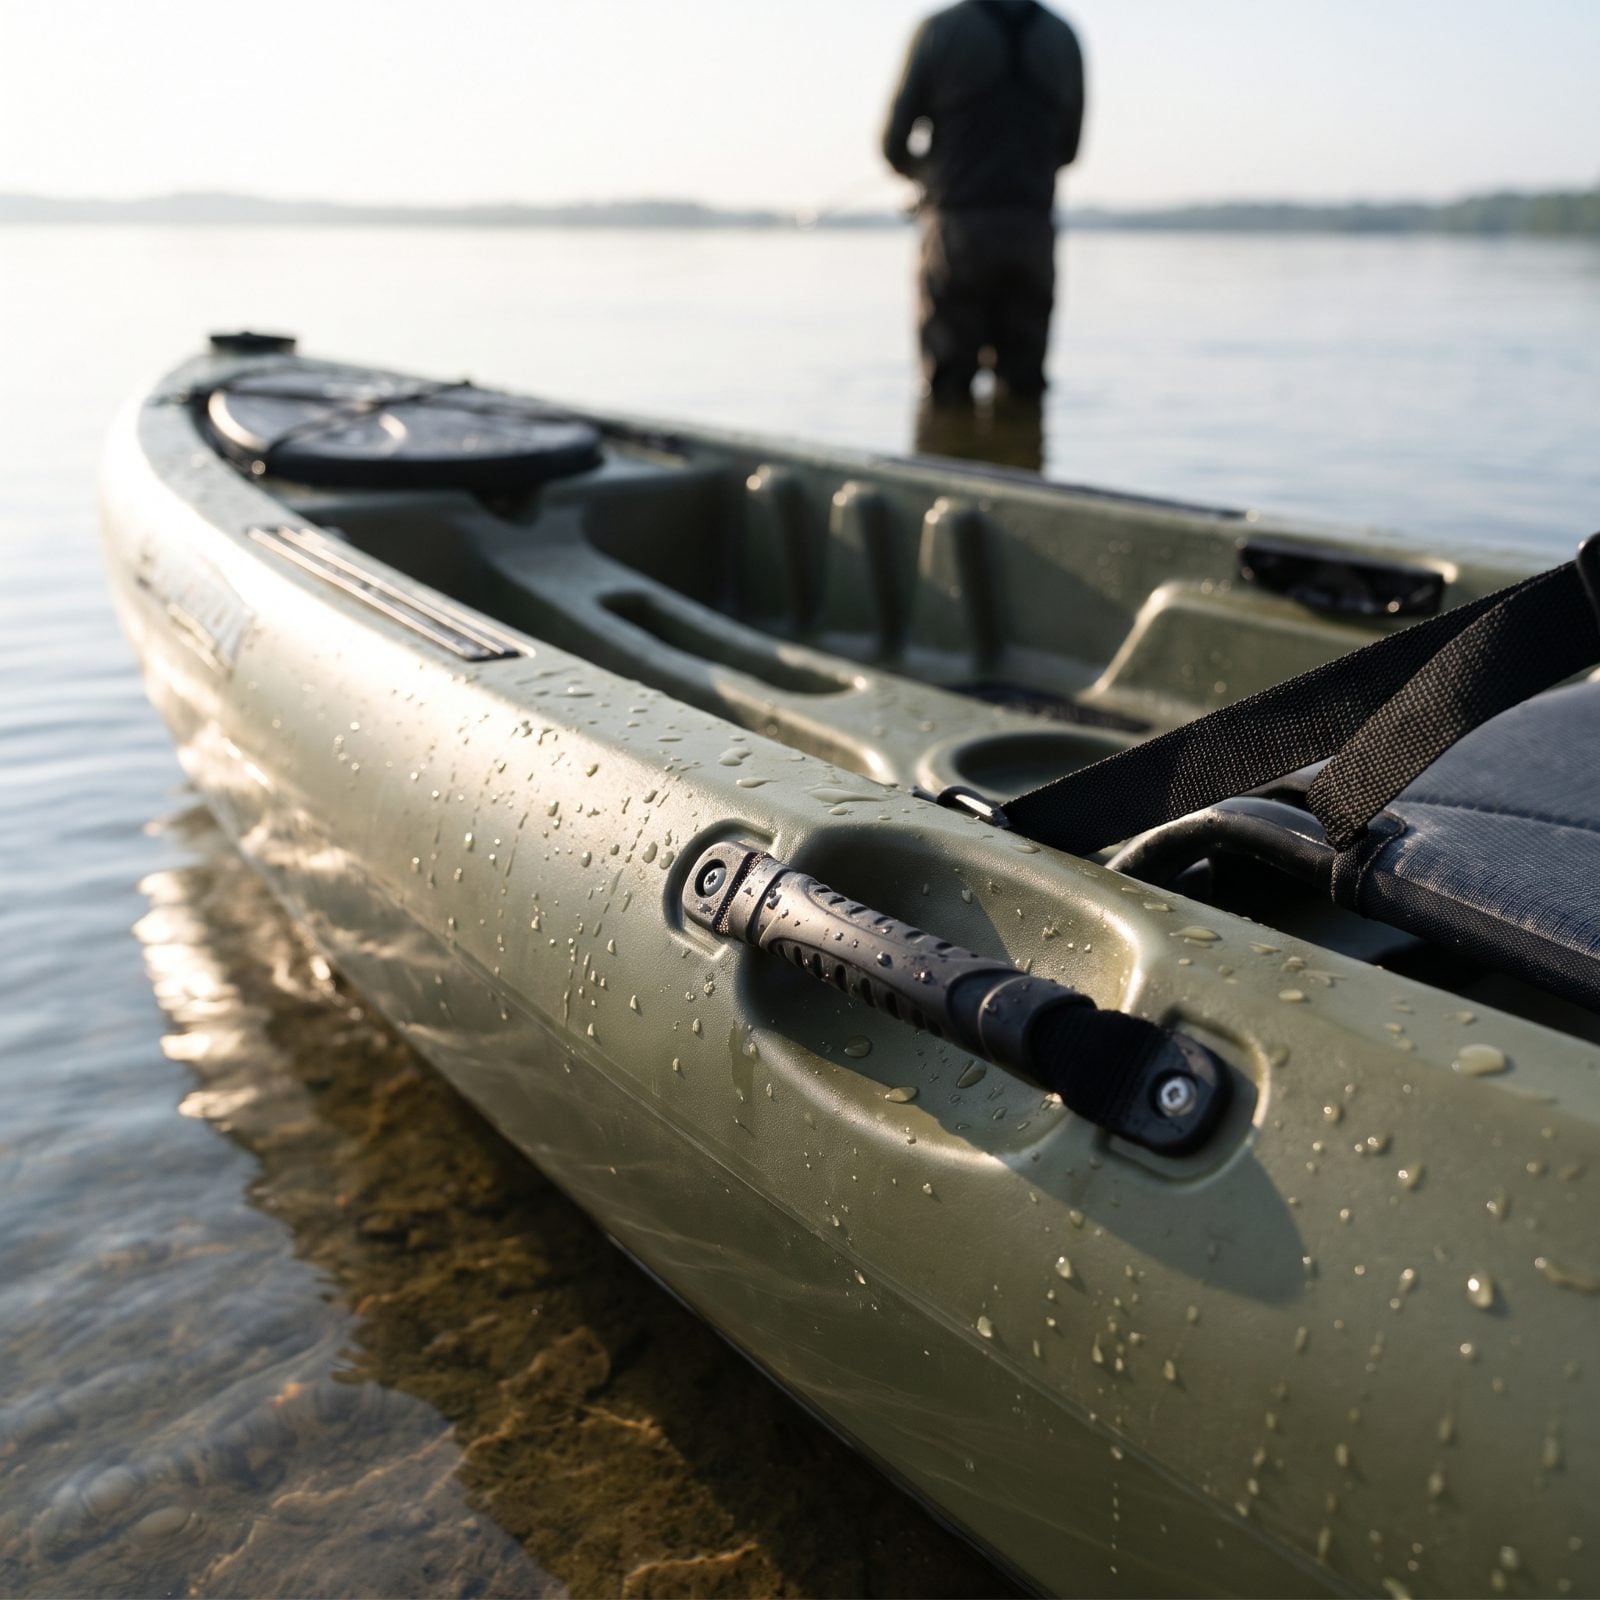
Most people buy a kayak looking at the deck. What actually matters when you capsize is whatever you can grab while treading water. A molded side handle sounds fine in the showroom, but if it sits flush with the hull you can’t get a hand under it with cold, wet fingers.
Run your hand along both sides at the cockpit. You want a handle or recess you can hook four fingers into while the boat floats high, then press down on one and feel whether it flexes or holds. Flimsy riveted handles tear out under load — usually the one moment you need them.
6. Practice Deep-Water Reentry Before Buying
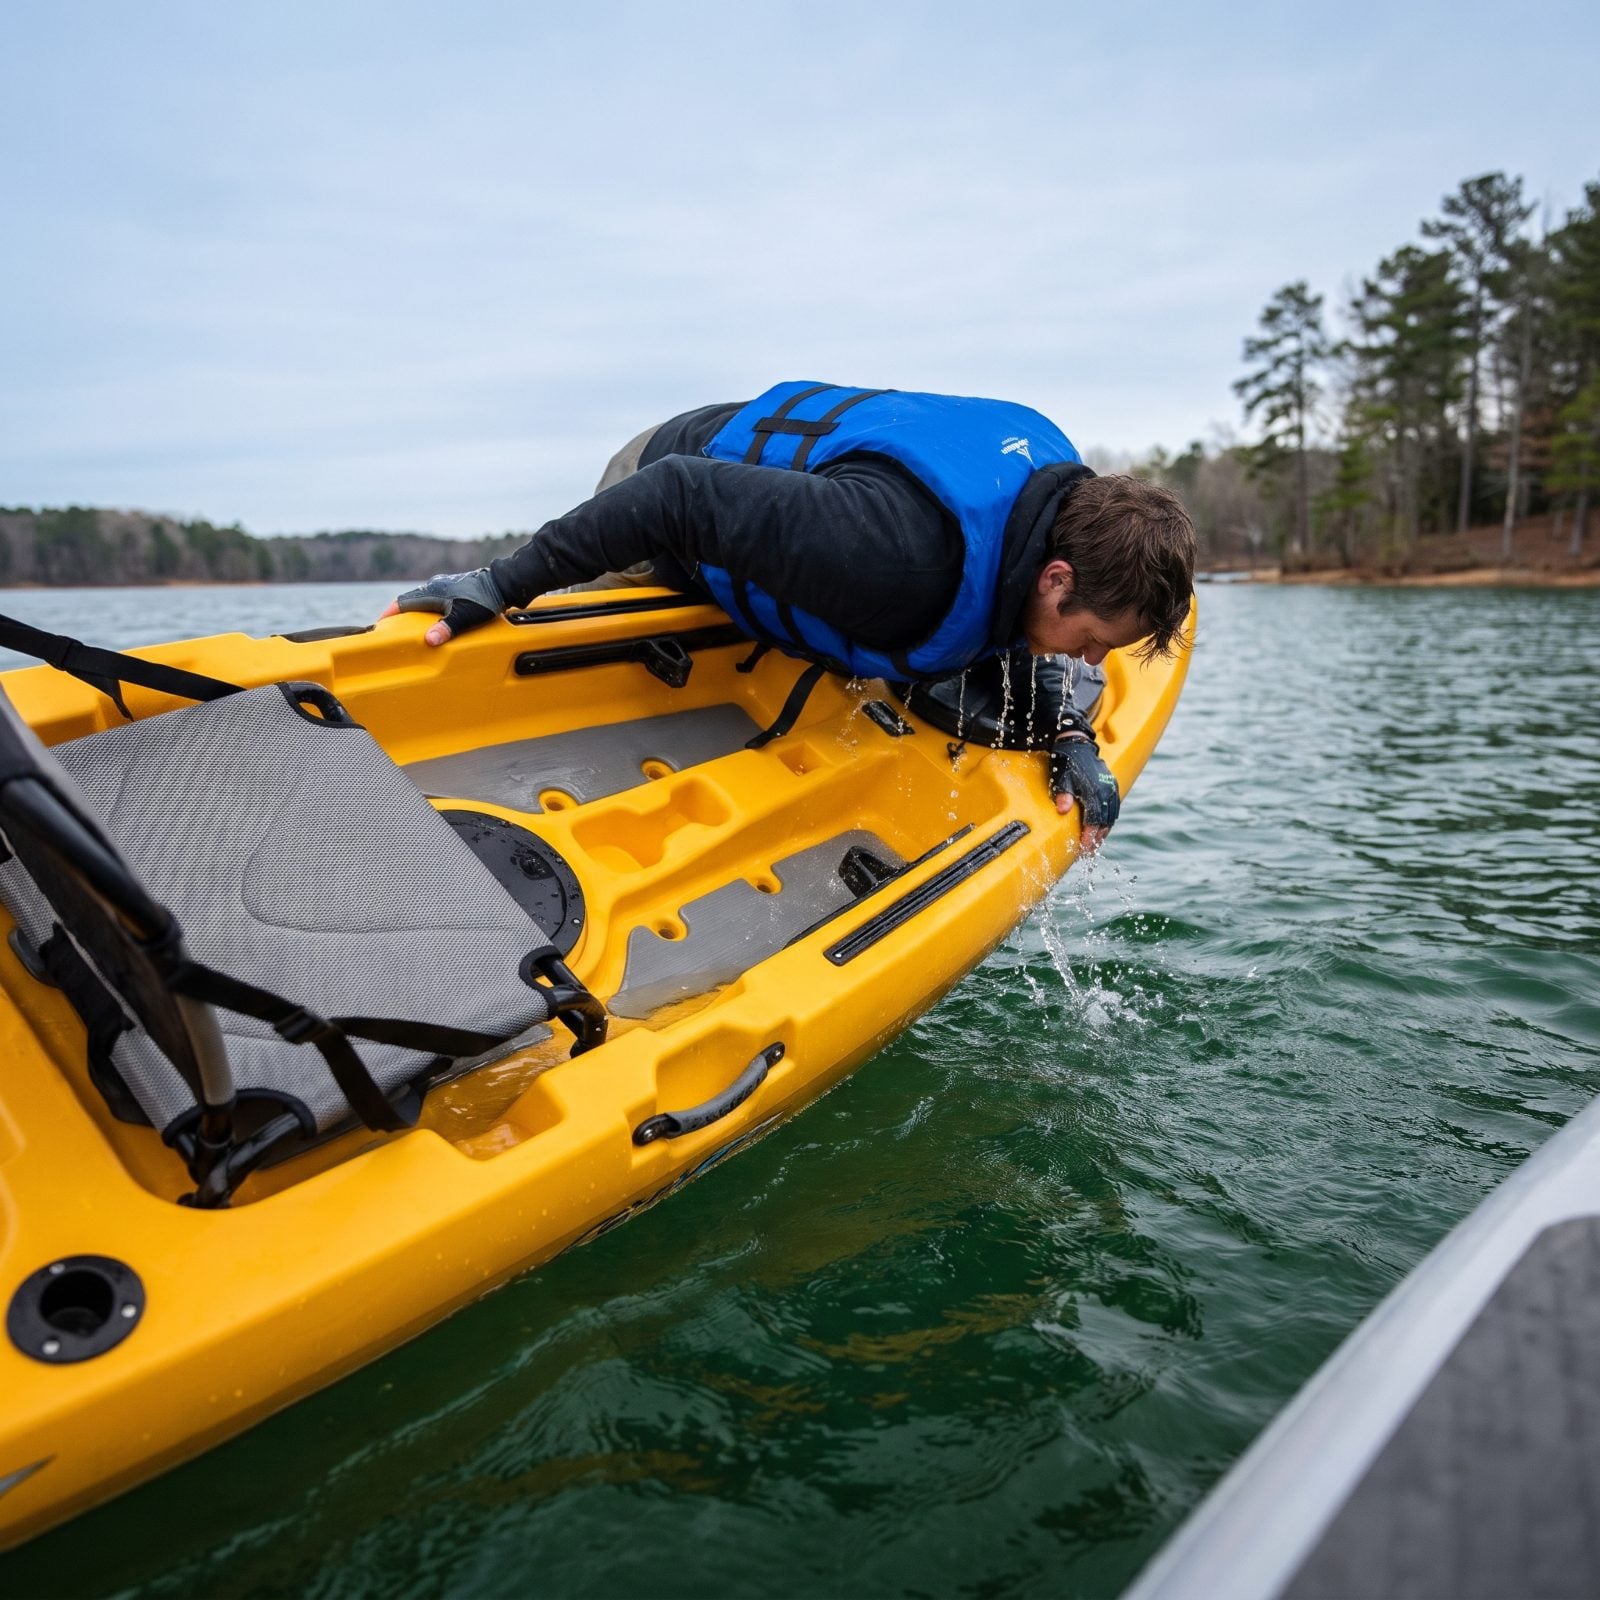
You won’t know if a kayak is right for you until you try climbing back onto it in water over your head. Dealers hate this. A good one will let you demo on a lake anyway, so paddle out past standing depth, roll yourself off on purpose, and get back on.
A stable hull lets you pull across the back deck and swing a leg over without flipping again. A tippy one dumps you three times before it works. I got this wrong early and bought a narrow boat because it was fast. Fast did me no good the day I went in off a windy point and couldn’t remount — I just floated there, hanging on, doing the math on how far the shore was.
Do it in the gear you’ll actually wear. Boots and a loaded PFD change everything.
5. Verify Attachment Points for Safety Gear
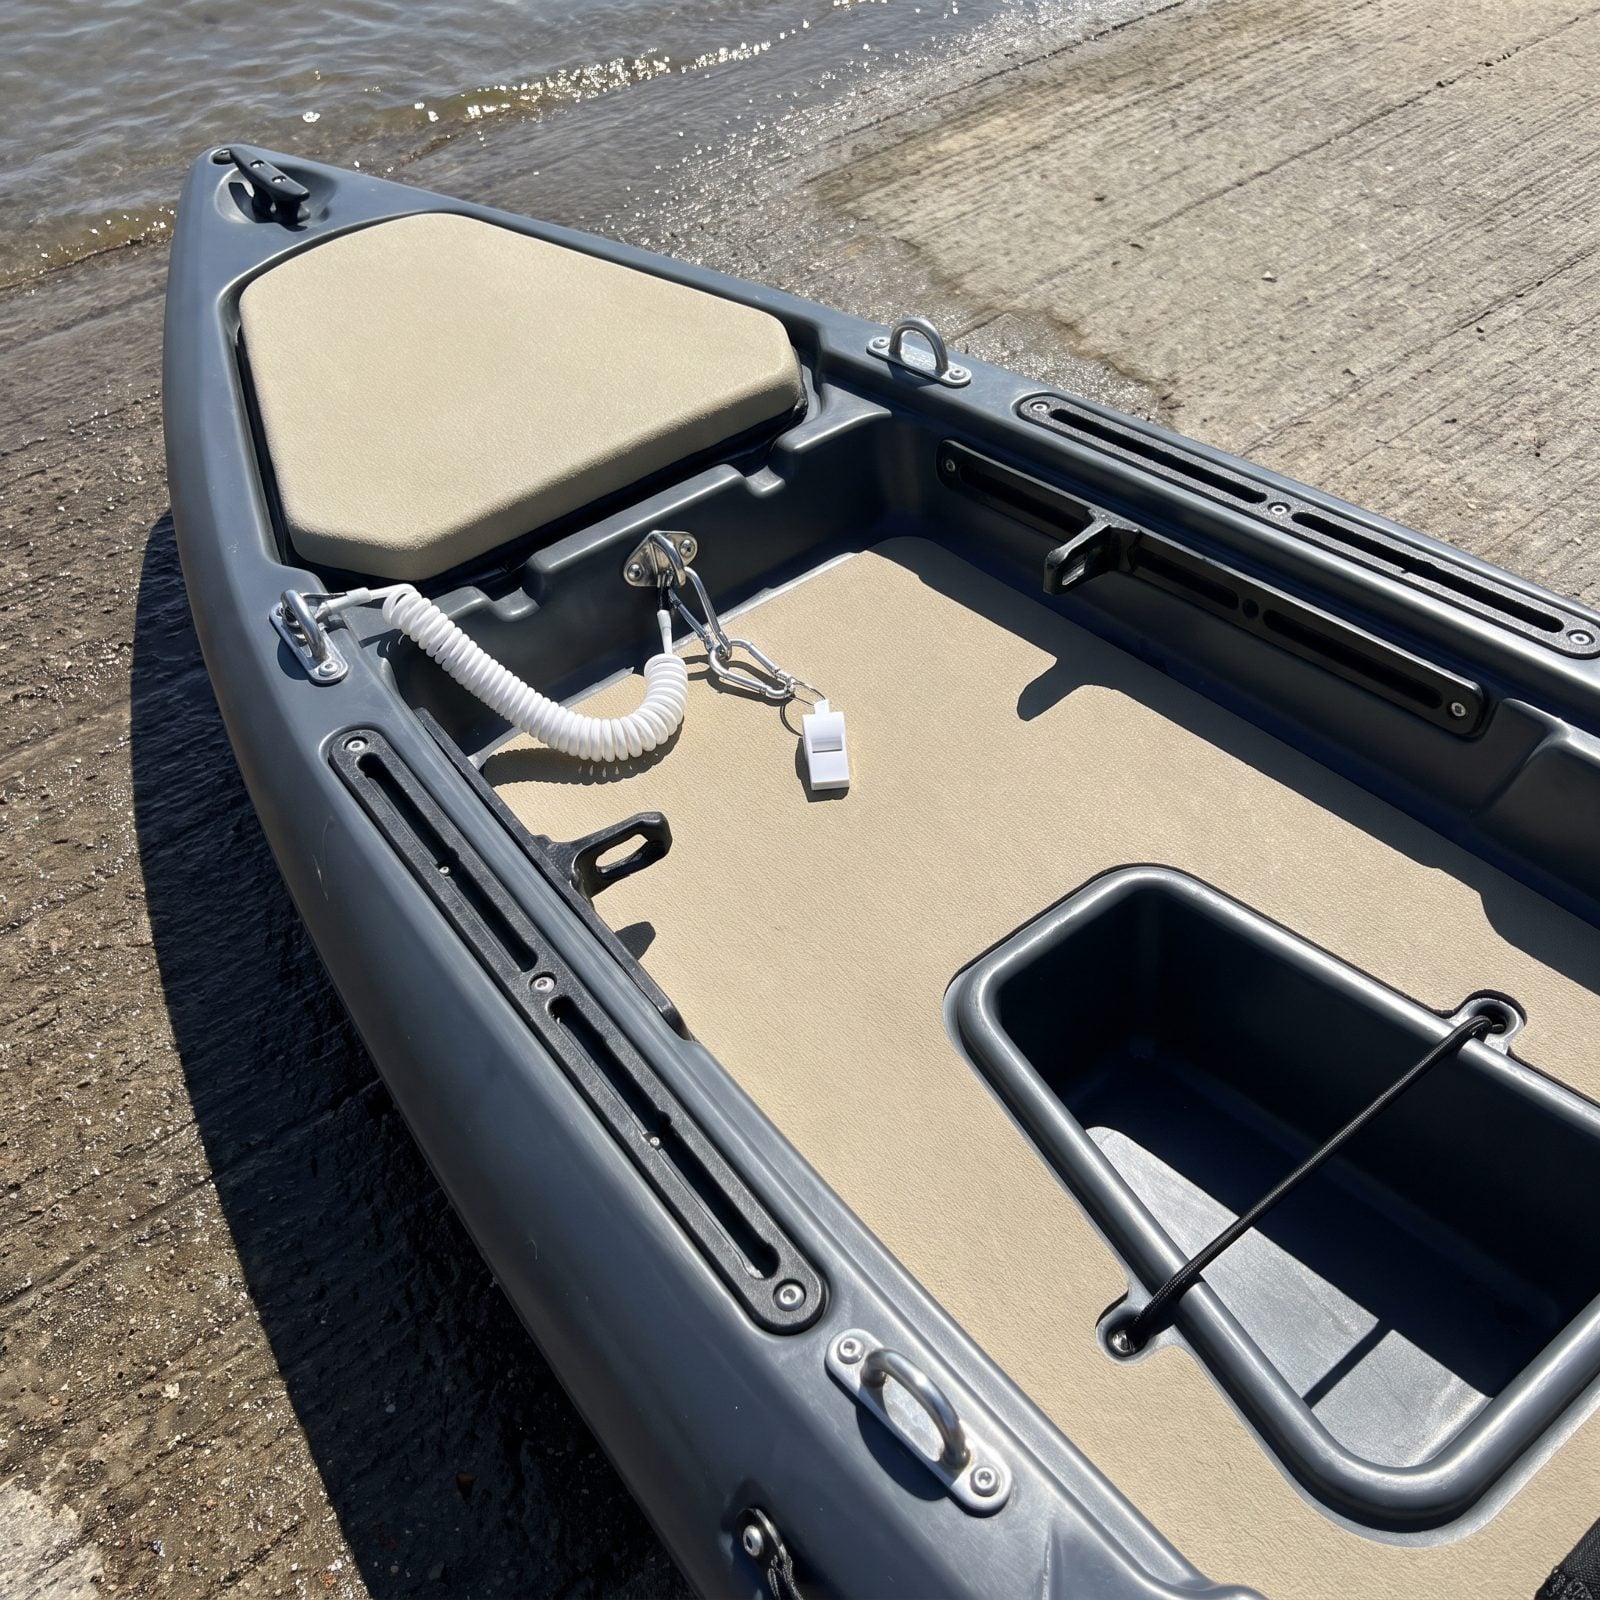
Safety gear is only safe if it stays attached. Look for solid stainless pad eyes or molded gear tracks rated to hold a load, not decorative bungee that pops off the first time you lean on it.
You need somewhere to clip a leash for your paddle, a tether for your rod, and a short line for a whistle or VHF. Tug each point hard with your whole arm. If it moves, flexes, or the mounting screws spin, it won’t survive a wave broadside.
4. Inspect Hull Thickness at Wear Areas
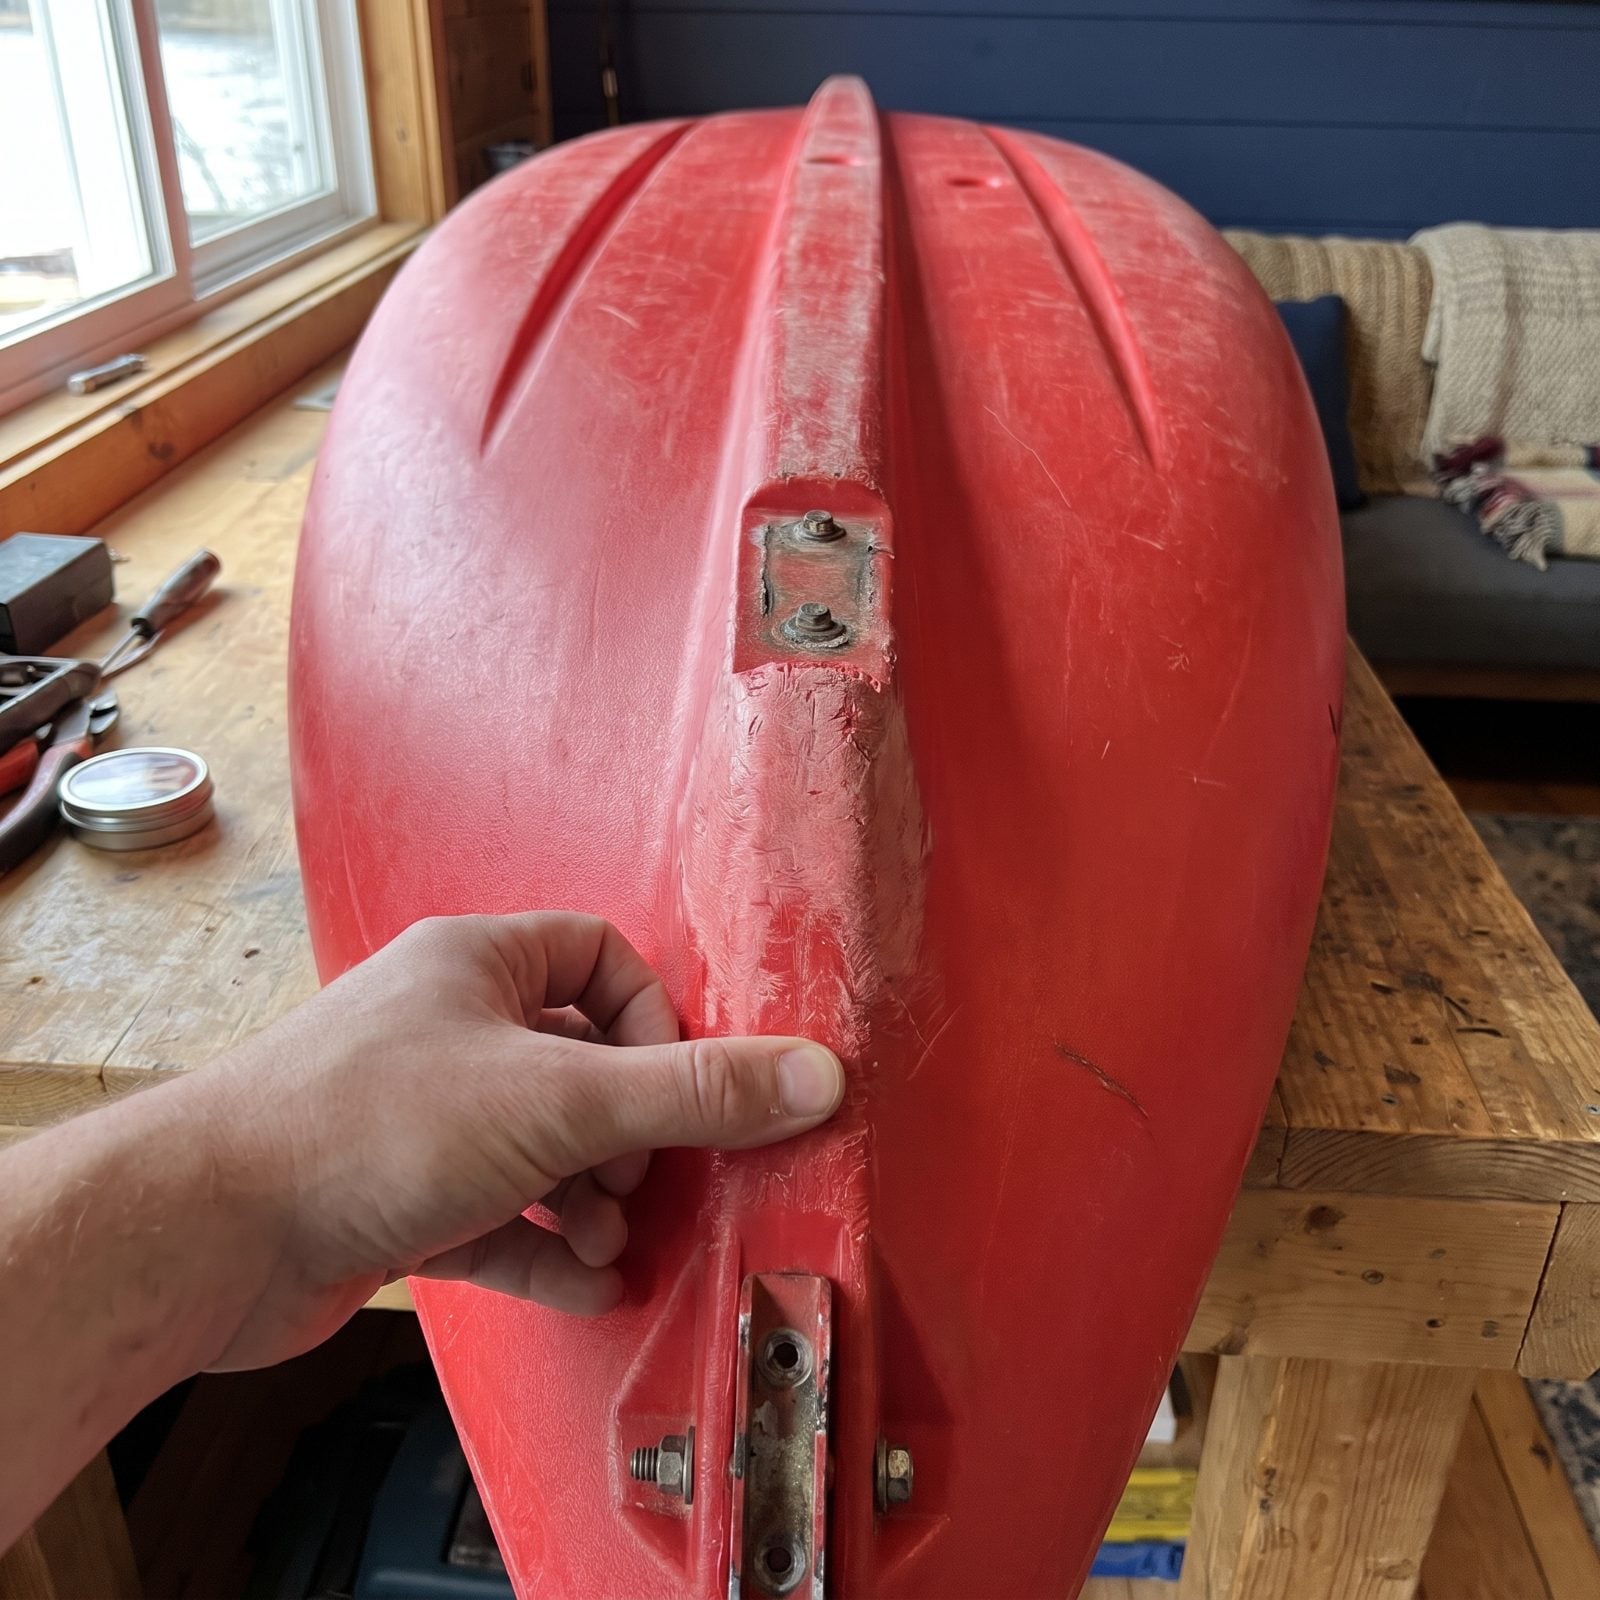
Rotomolded hulls aren’t all molded equal. The plastic pools differently as it spins, and the thin spots end up exactly where the boat takes the most punishment — the keel, the stern skid, and the chines you drag over gravel and ramps.
Flip a floor model and look along the keel in raking light. You’re hunting for even thickness, not a translucent patch where the plastic thinned out. Press the stern near the drag point. A hull that gives like a milk jug there will wear through fast; one that stays firm won’t.
Thin hulls also oilcan. That’s the flex and pop in the bottom that drives you quietly insane on flat water, and it’s worth catching before you pay.
3. Research Warranty Coverage and Exclusions
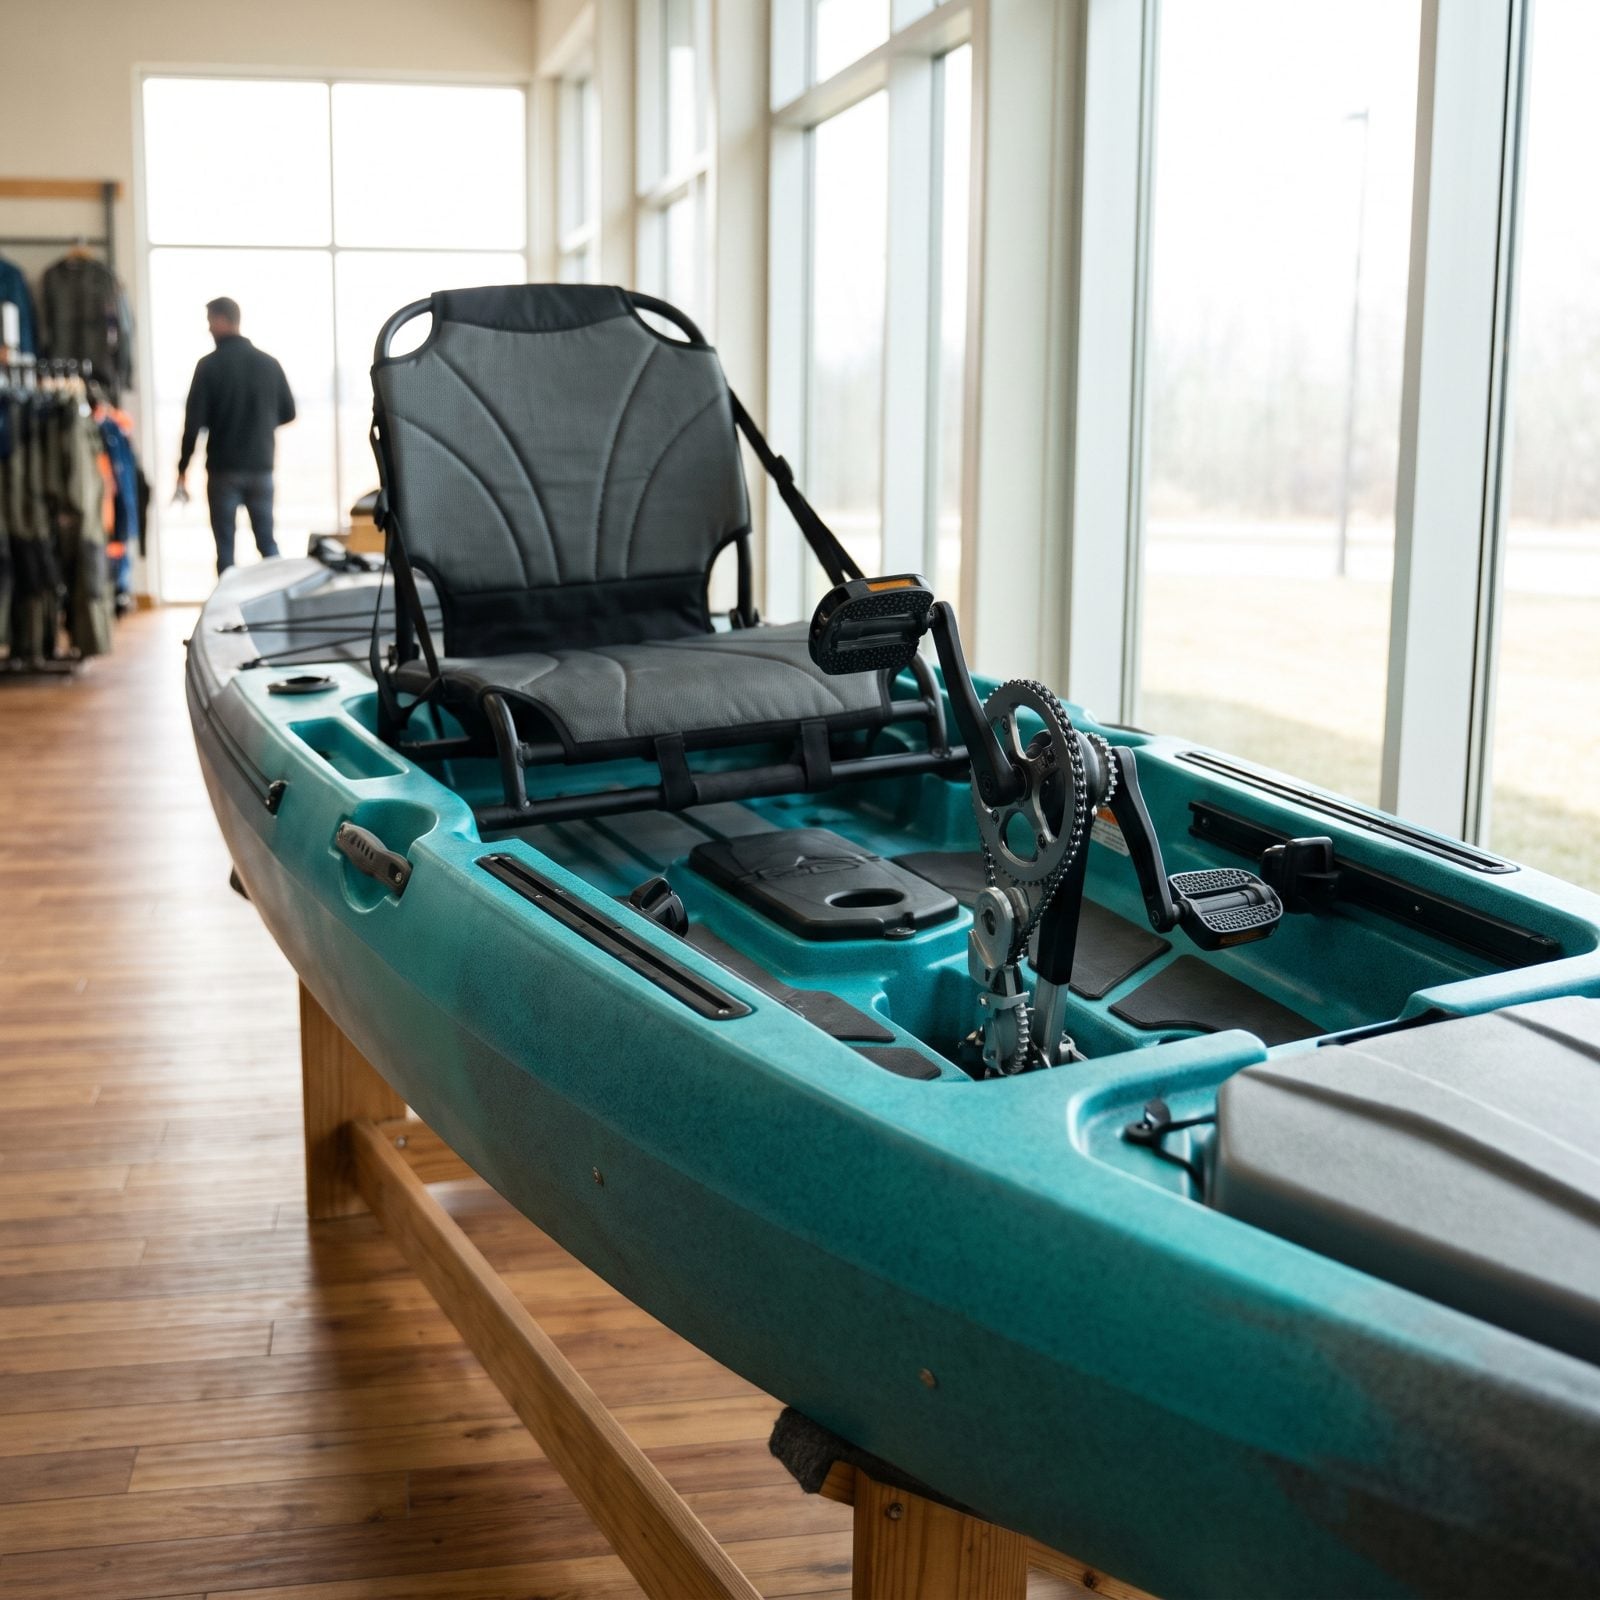
Here’s the part nobody reads until it’s too late. Kayak warranties love to split the boat into pieces, and the pieces carry wildly different coverage. The hull might get a long term — sometimes lifetime, sometimes five to ten years. The pedal drive, seat, rudder, and hatches usually get far less.
Ask flat out what’s covered and for how long, then ask what voids it. UV damage from storing it outside, saltwater corrosion, and transport damage are the three that quietly knock out most claims. And transferability matters if you ever sell it.
Get the answer in writing, not a friendly verbal shrug at the counter.
The hull outlives the warranty on everything you’ll actually break.
2. Check Dealer Repair Support Nearby
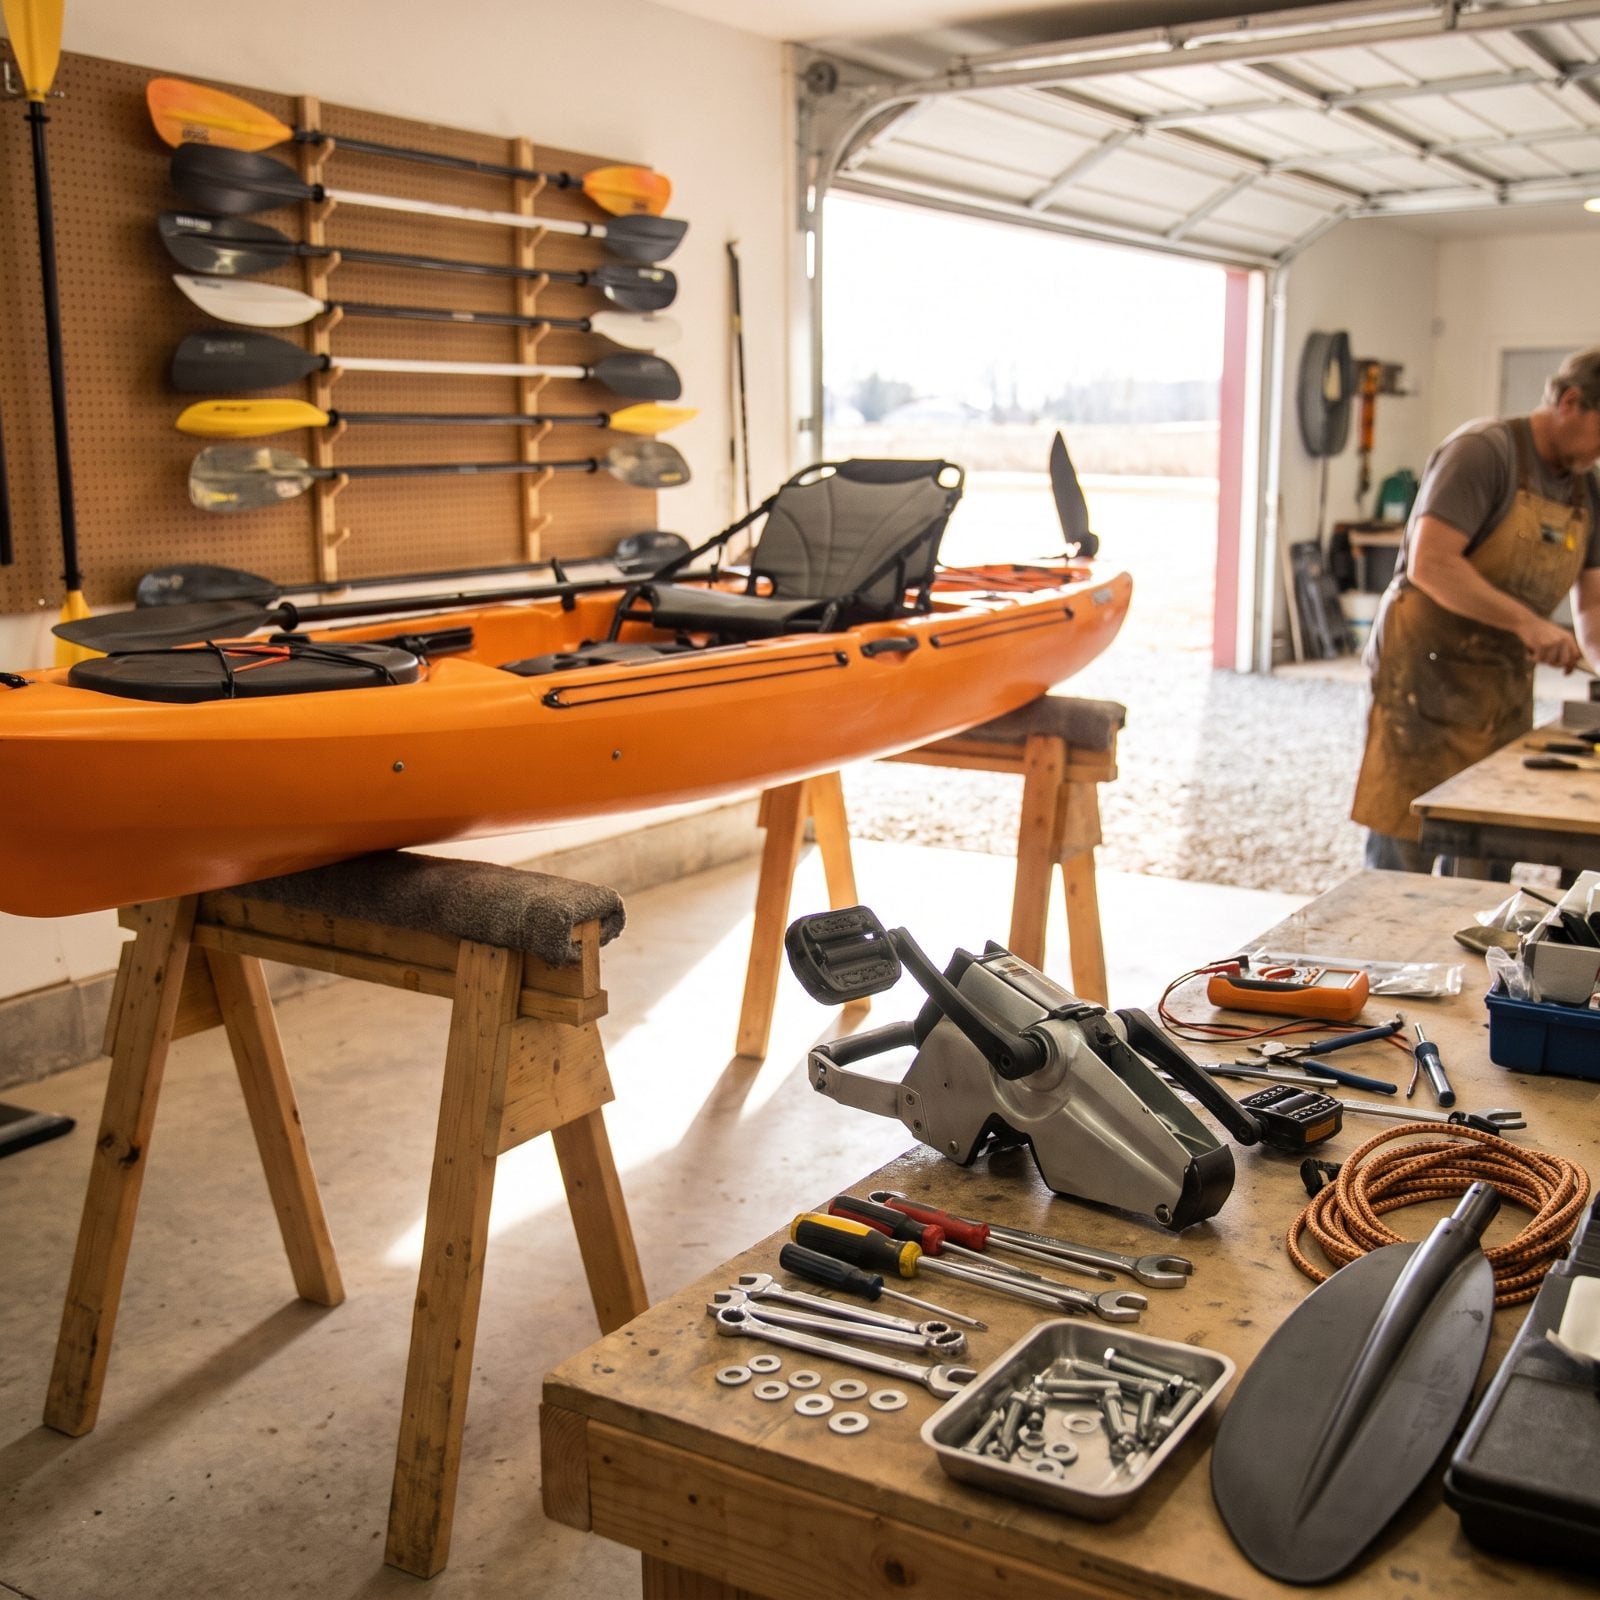
A pedal drive is a gearbox sitting in water. Eventually it needs a seal, a new cable, or a bent prop shaft straightened — and you don’t want to ship it across the country every time.
Before you buy, call the nearest dealer and ask whether they stock parts and service that model in-house. A shop that sells kayaks but mails everything back to the factory for repair isn’t support, it’s a middleman. Ask their turnaround in peak season too. Three weeks in July means your whole summer is gone.
1. Calculate the Fully Rigged Purchase Cost
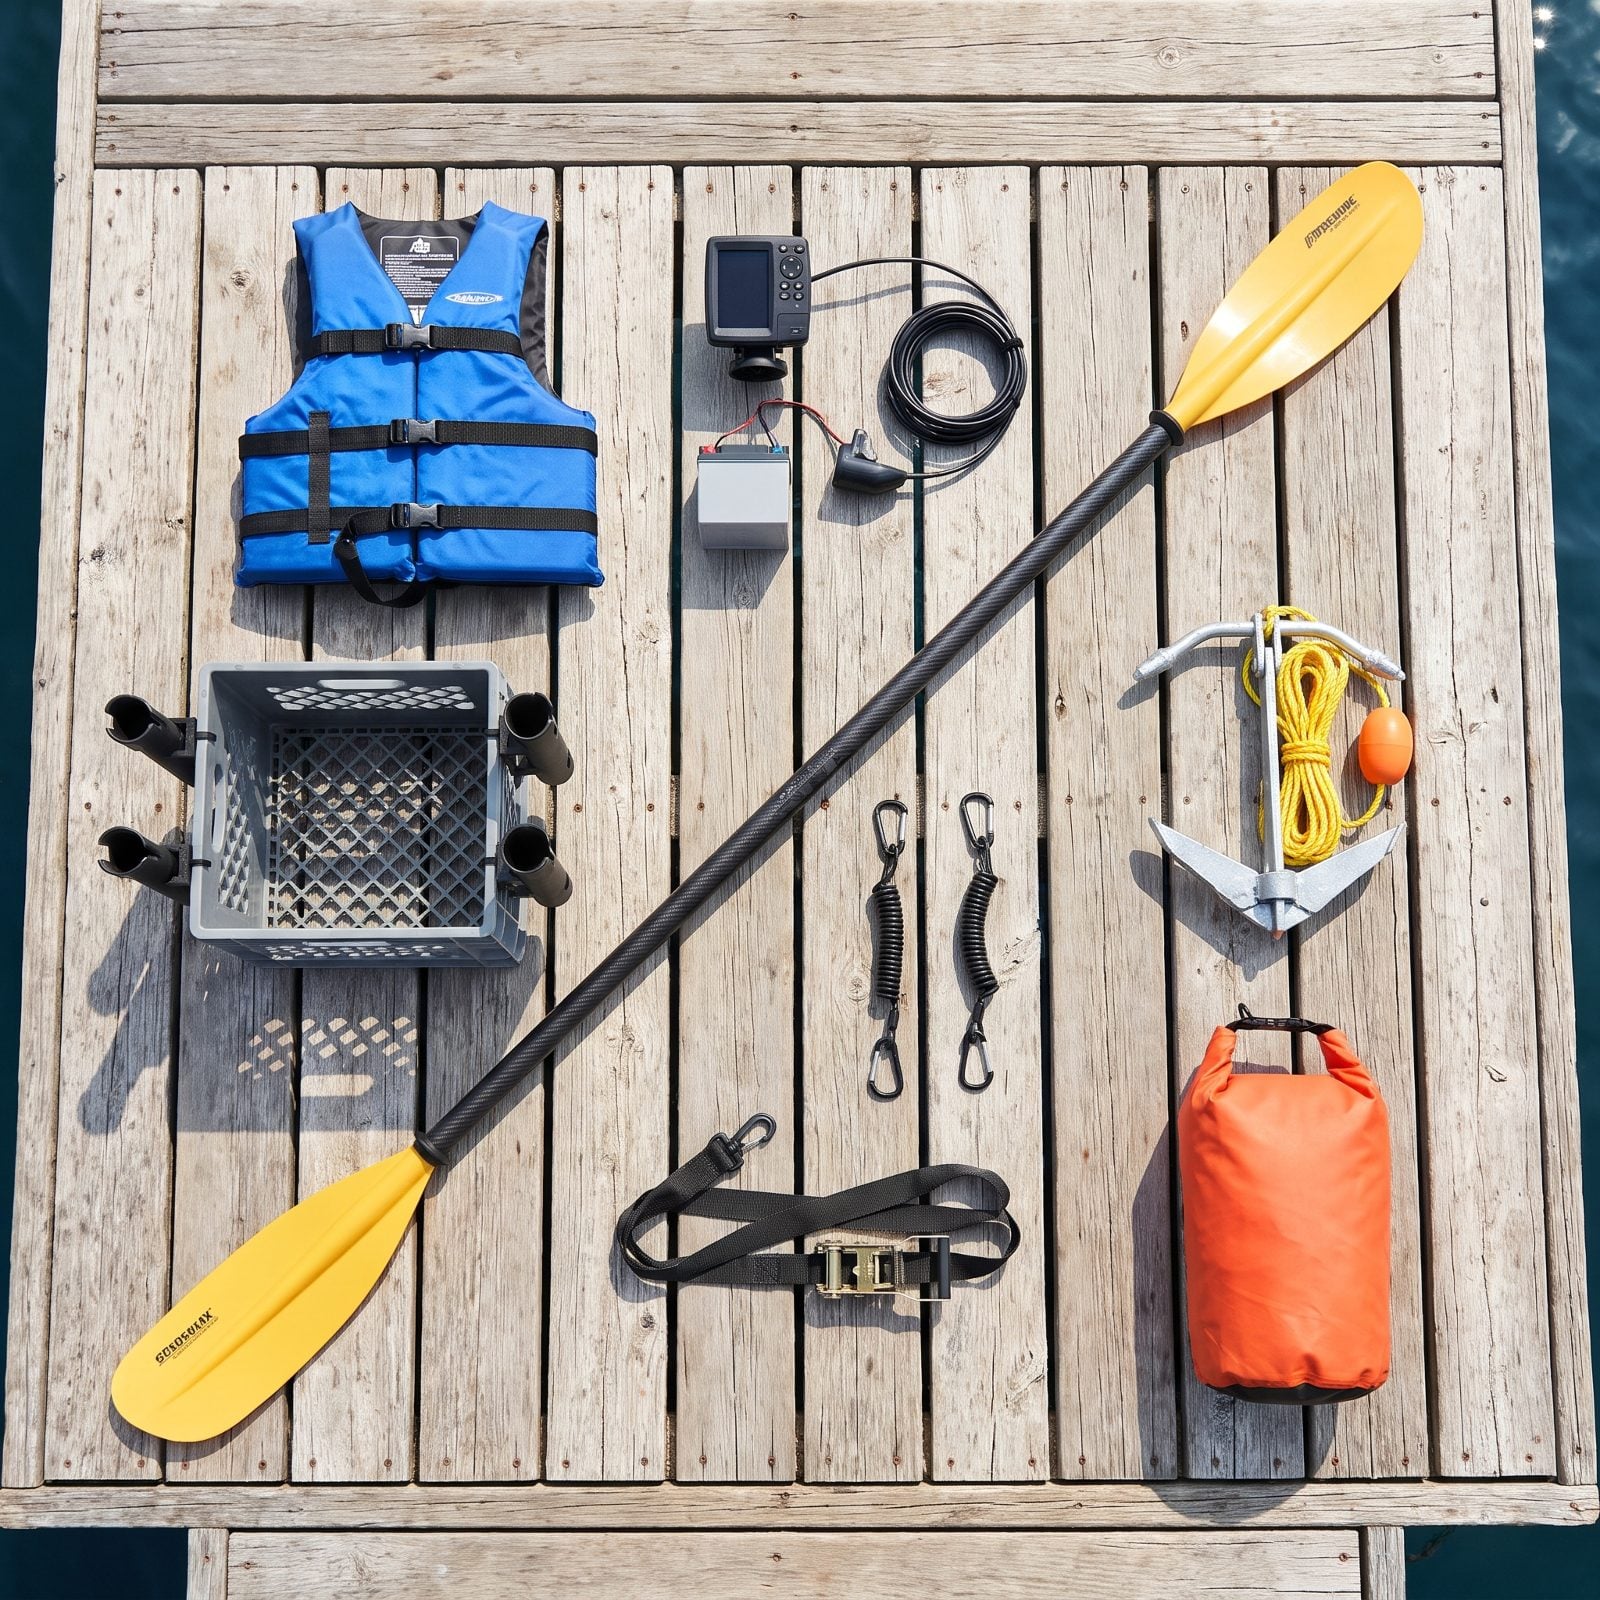
The sticker price is the start of the bill, not the end of it. Nobody fishes a bare hull. By the time you’re actually on the water you’ve bought a paddle, a PFD, a leash for everything, a way to anchor, and some kind of rod storage.
Add it up before you commit. A fish finder with a battery, a transducer mount, a roof rack and straps or a trailer, a crate or tackle system — all of that can quietly match a big chunk of the boat’s price. I underestimated this on my first rig and spent the next two months nickel-and-diming myself into the hole I should have budgeted for upfront.
Write the real number down. Then decide if the boat fits your money, not just your garage.
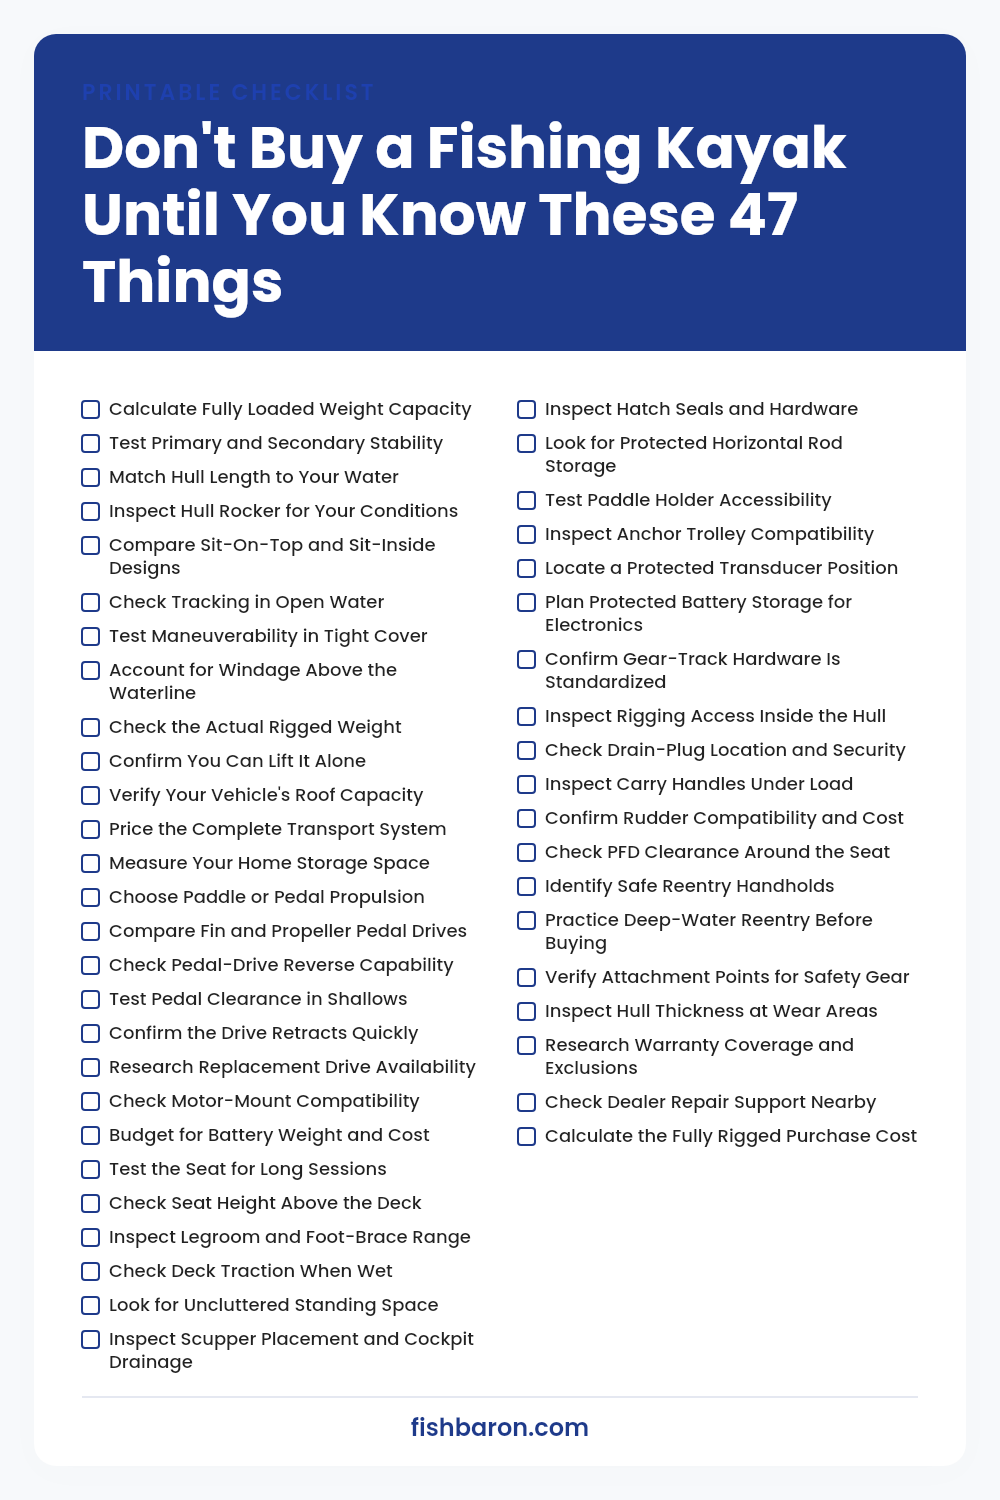
Your Printable Checklist
Save it to Pinterest or print it — every check from the list above on one page.